
How to Create a Policy
Policies are built from three things — the details that identify the policy, the scope that defines which transactions it monitors, and the rules that determine what happens when a transaction matches.
Steps
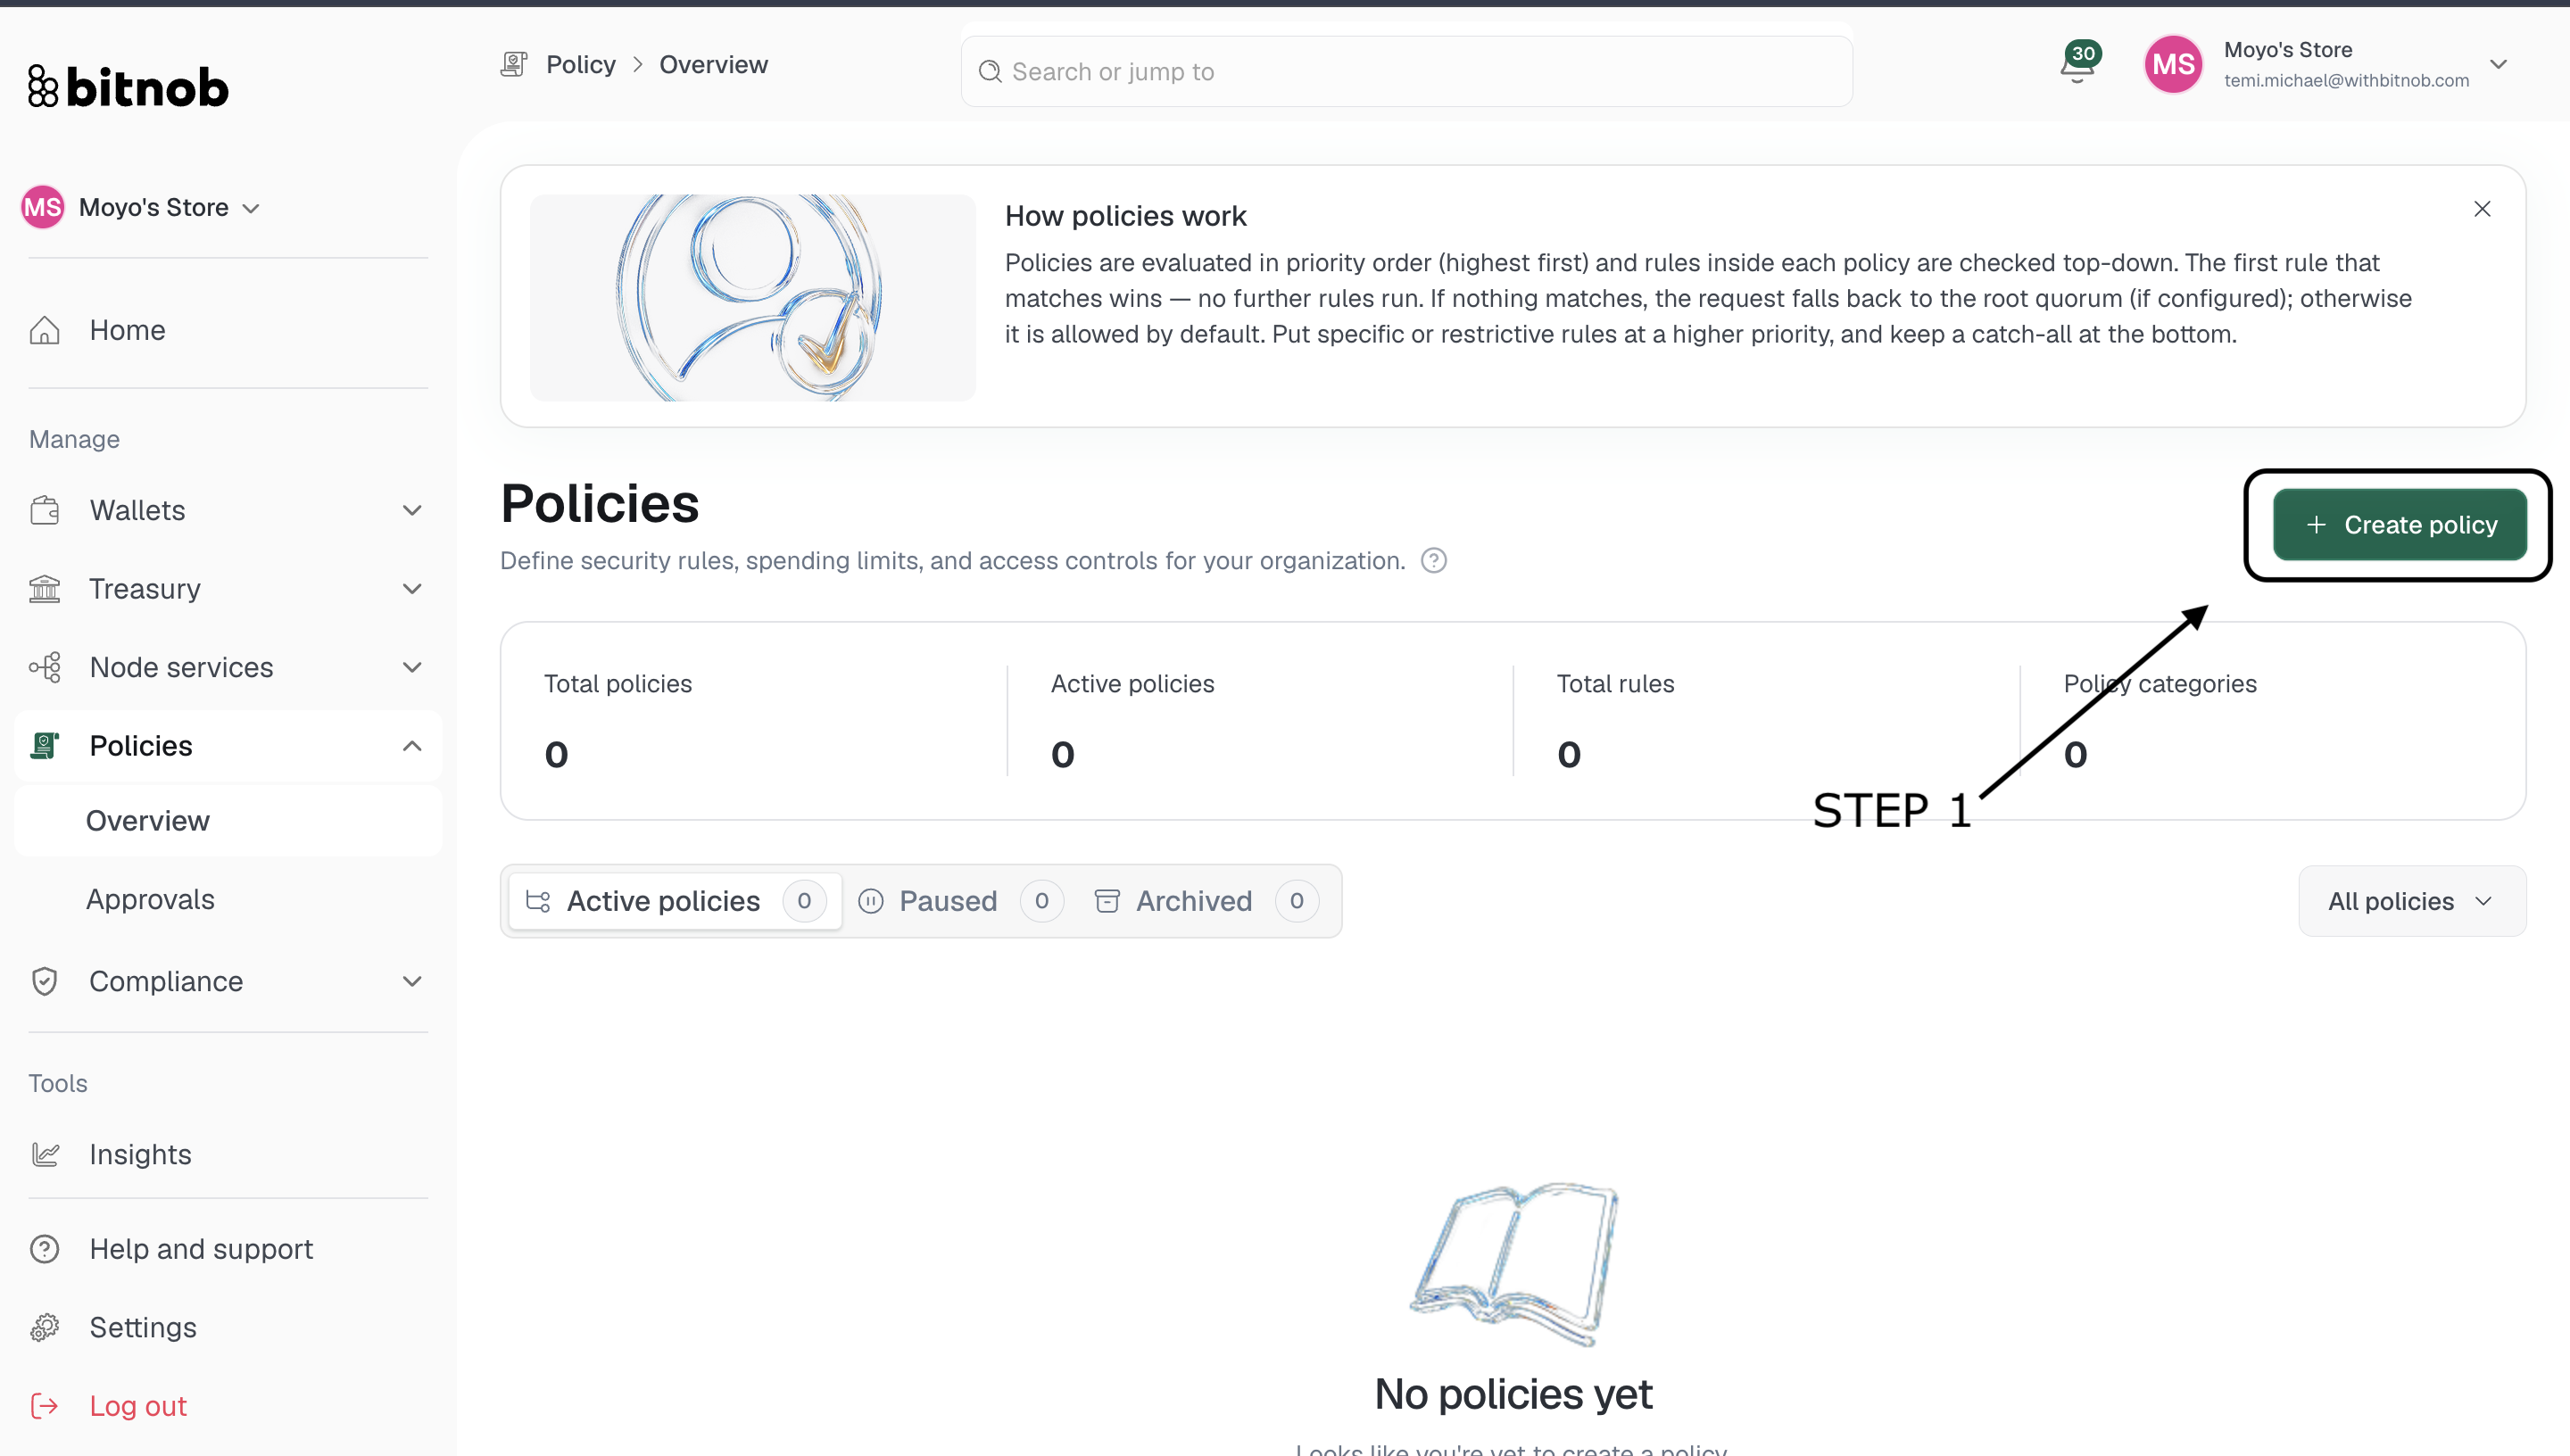
Navigate to Policies > Overview from the left sidebar
Click + Create policy in the top right corner
Enter a Policy name
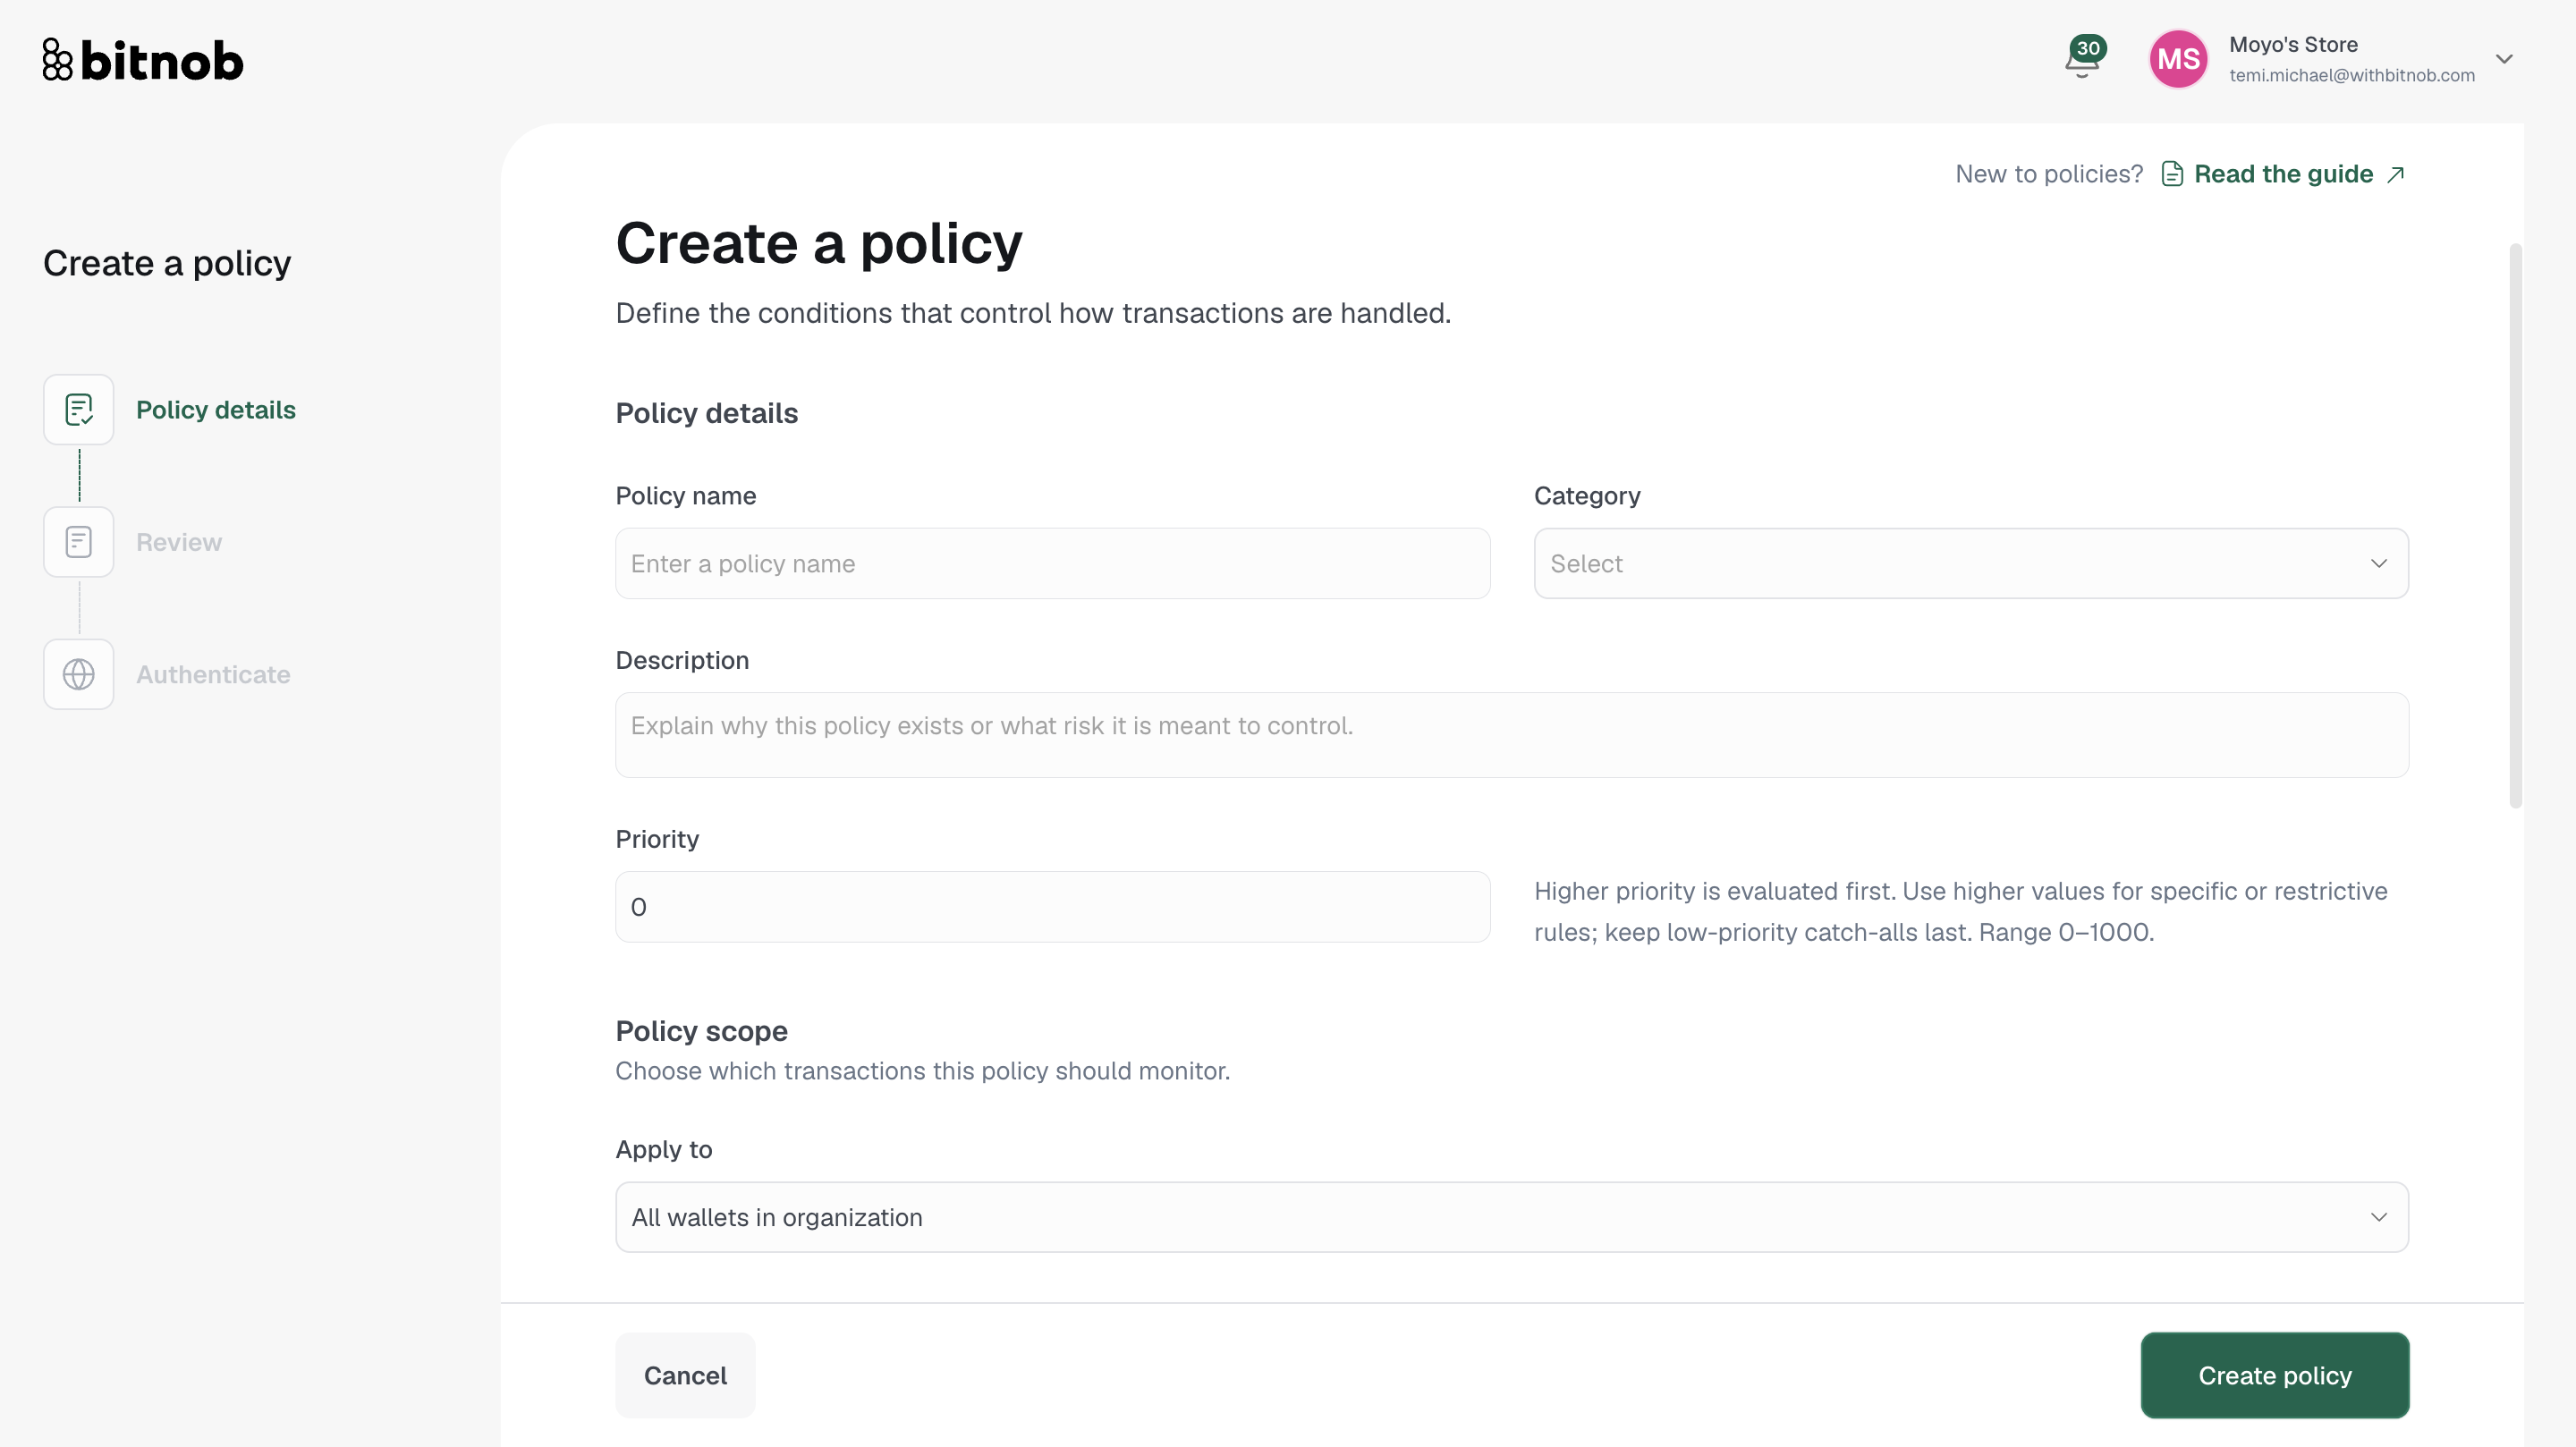
Select a Policy category — choose the type of control this policy represents:
Transaction limit — Cap the value of individual transactions
Velocity control — Limit the volume or frequency of transactions over time
Whitelist — Restrict transactions to approved addresses or accounts only
Approvals (Multisig) — Require multiple approvals before a transaction can proceed
Enter a Description — explain why this policy exists or what risk it is meant to control
Set the Priority — a number between 0 and 1000. Higher values are evaluated first. Use high priority for specific or restrictive rules and low priority for catch-all rules
Under Policy scope, select what this policy should monitor using the Apply to field:
All wallets in organization
Specific wallets
Specific vaults
Specific users
Specific chains
Specific treasury connections
All treasury transfers
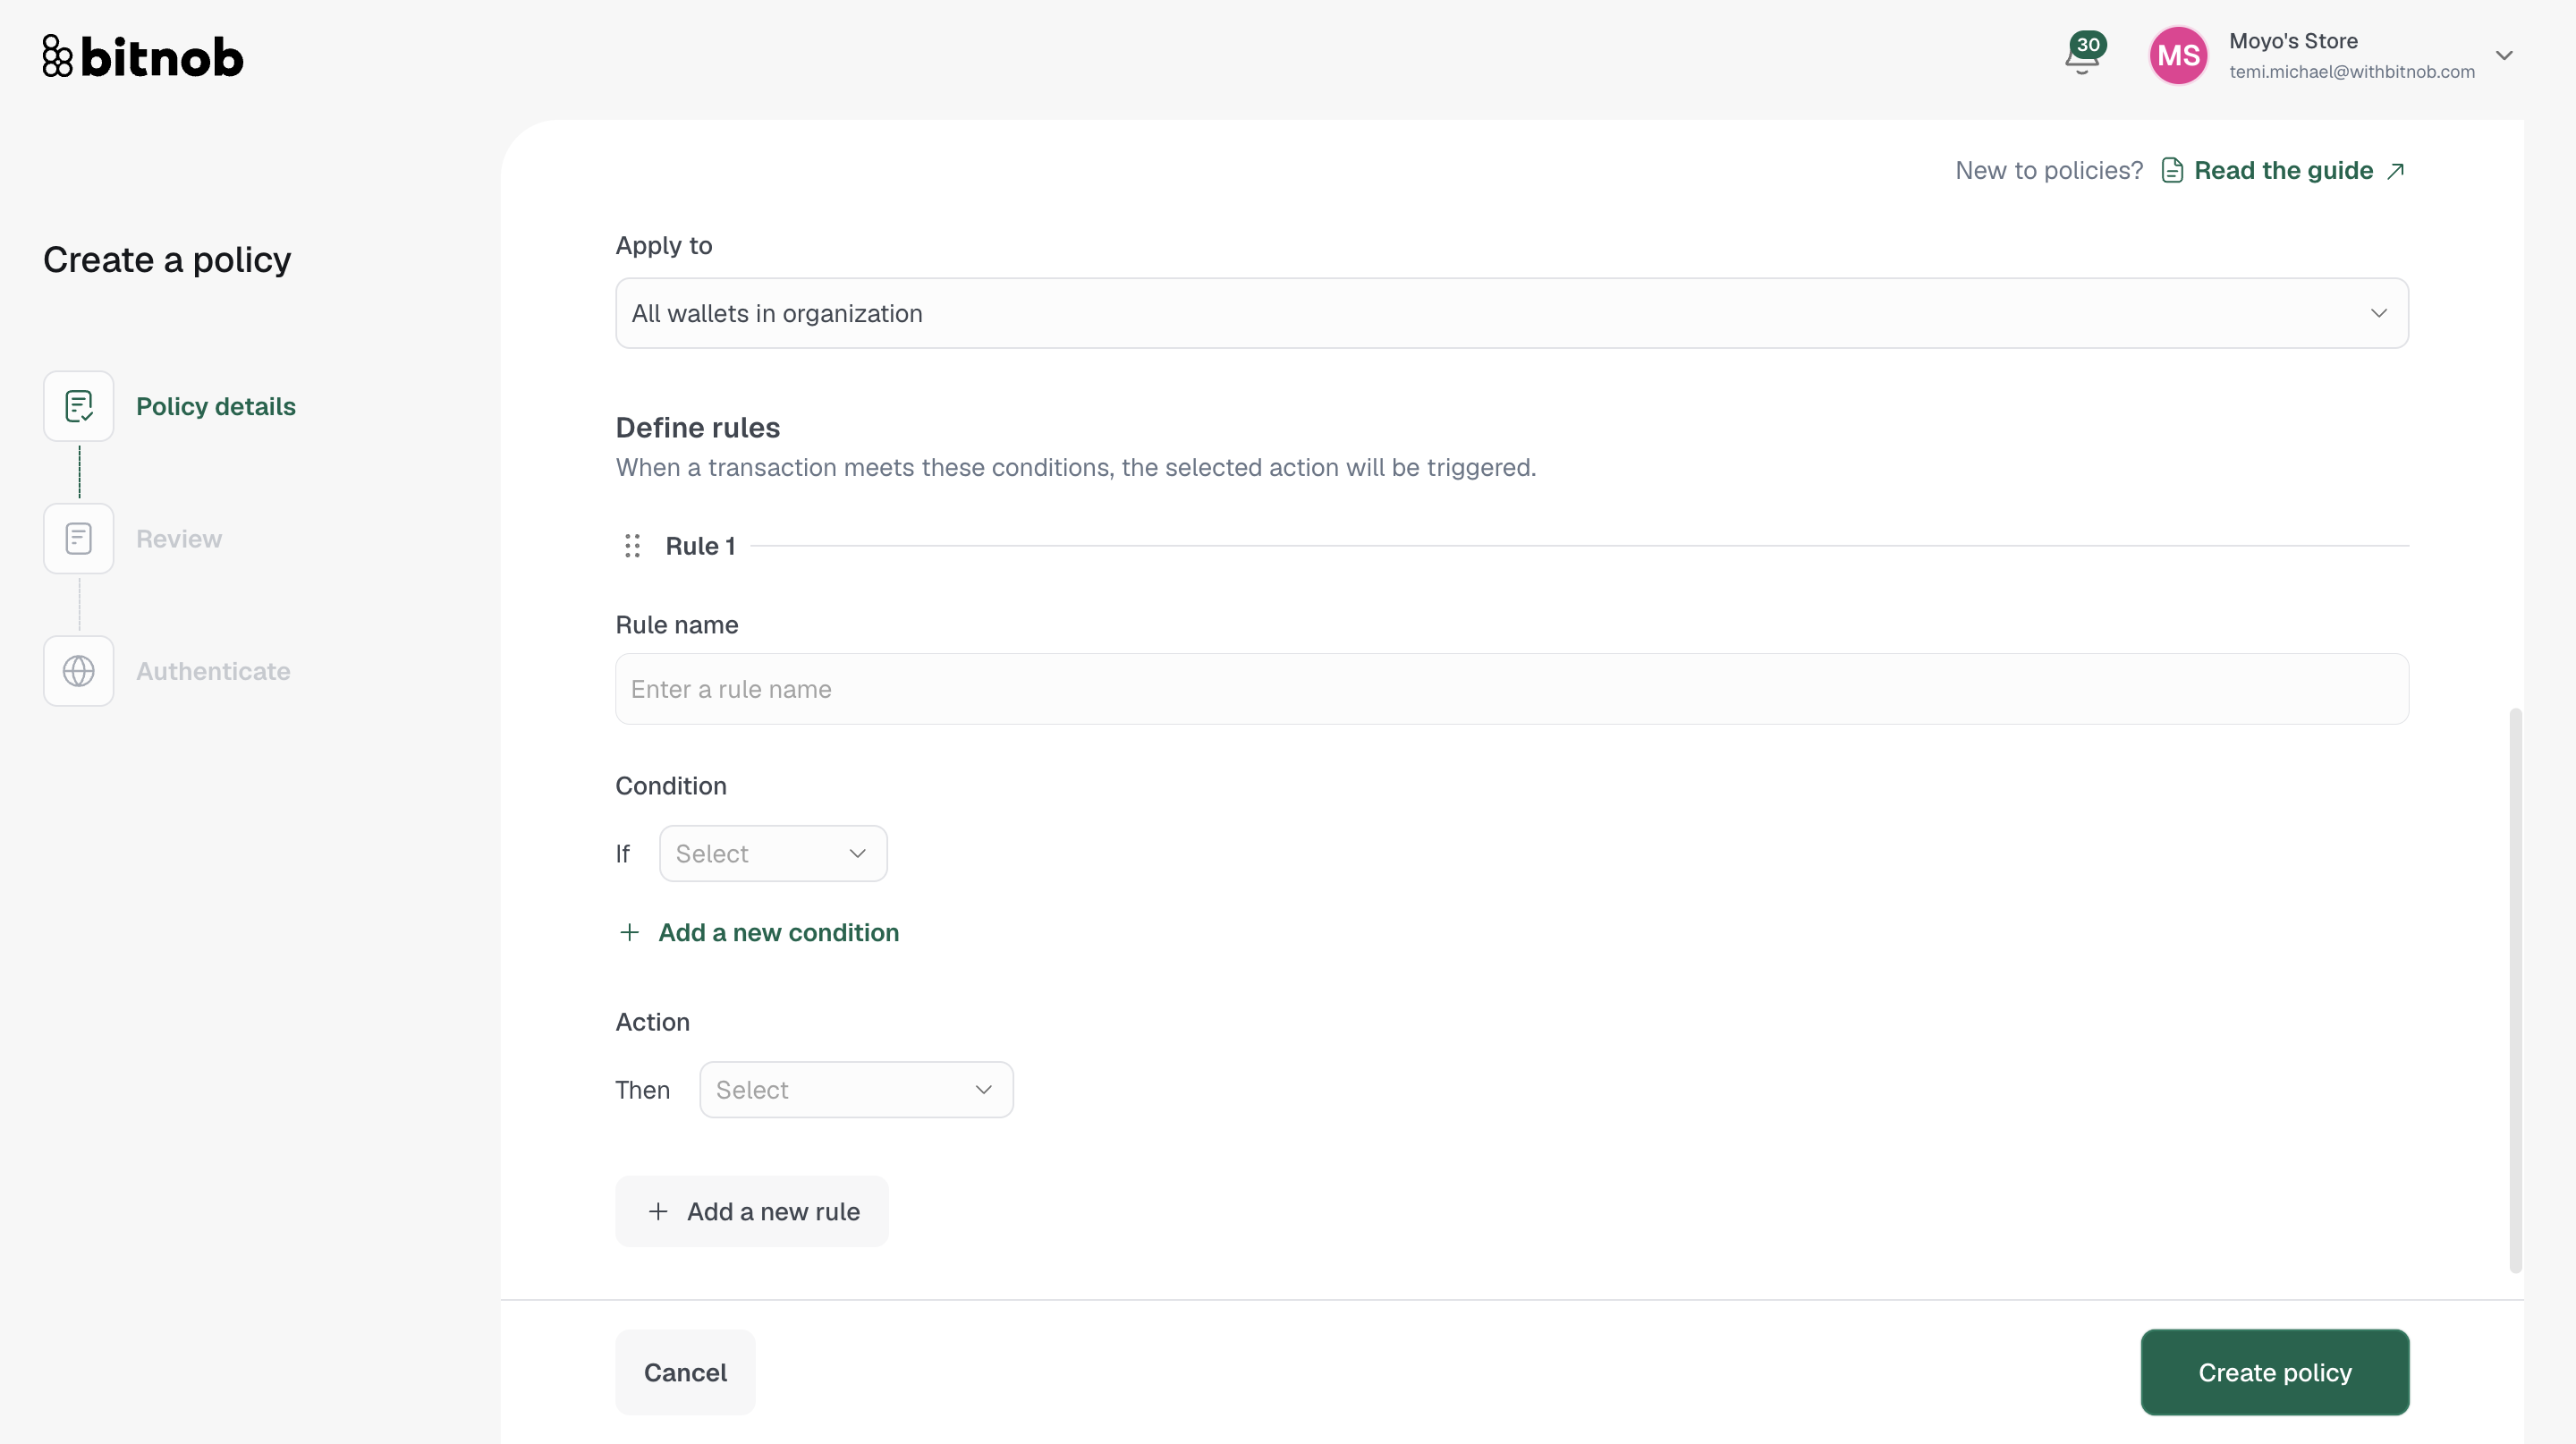
Under Define rules, configure one or more rules. For each rule:
Enter a Rule name
Set the Condition — select what the rule should check using the If dropdown. Available conditions include:
Amount, Amount (USD), Asset, Chain, Network, Transaction type, Wallet, Vault, Destination address, Source address, Token contract, Time of day, Day of week, In address book
Click + Add a new condition to stack multiple conditions on the same rule
Set the Action — select what happens when the condition is met using the Then dropdown:
Require approval — Sends the transaction to the Approvals queue before it can proceed
Delay transaction — Holds the transaction for a defined period before processing
Click + Add a new rule to add additional rules to the same policy
Click Create policy
Review your policy details and authenticate to complete
Tip: Keep your rules ordered intentionally. The first rule that matches a transaction wins, so place your most specific rules at the top and broader catch-all rules at the bottom.
Related articles