
How to pass KYC before issuing a card
Before you can issue a card, the customer has to pass KYC. Verification needs two things:
An image of the customer's ID card
Customer details that match that ID card exactly
Most rejections are not permanent failures. They are caused by avoidable issues with one of those two things, and they can be resolved by correcting the issue and retrying.
1. Select the right ID type
These are the ID types you can select when adding a customer:
National ID
Passport
Driver's license
BVN
NIN
Virtual NIN
Voter's card
Ghana Card
Select an ID type that is valid for the customer's country:
BVN, NIN and Virtual NIN are Nigerian documents. The country on the submission must be Nigeria.
Ghana Card is a Ghanaian document.
Passport, national ID, driver's license and voter's card must be issued in the customer's own country.
Country is sent as an ISO 3166-1 alpha-3 code, for example NGA, GHA, USA.
✓ DO
Select the ID type that matches the ID you are submitting
Use an ID that is still within its validity date
✗ DON'T
Select one ID type and submit the number or image from another
Submit an expired ID
Select an ID type that is not issued in the customer's country
2. Upload a clear, unedited image of the ID
The system has to read every character on the card. If it cannot, the check fails even when the ID itself is perfectly valid. This is the single most common cause of rejection.
Upload one image showing the full front of the ID.
File requirements:
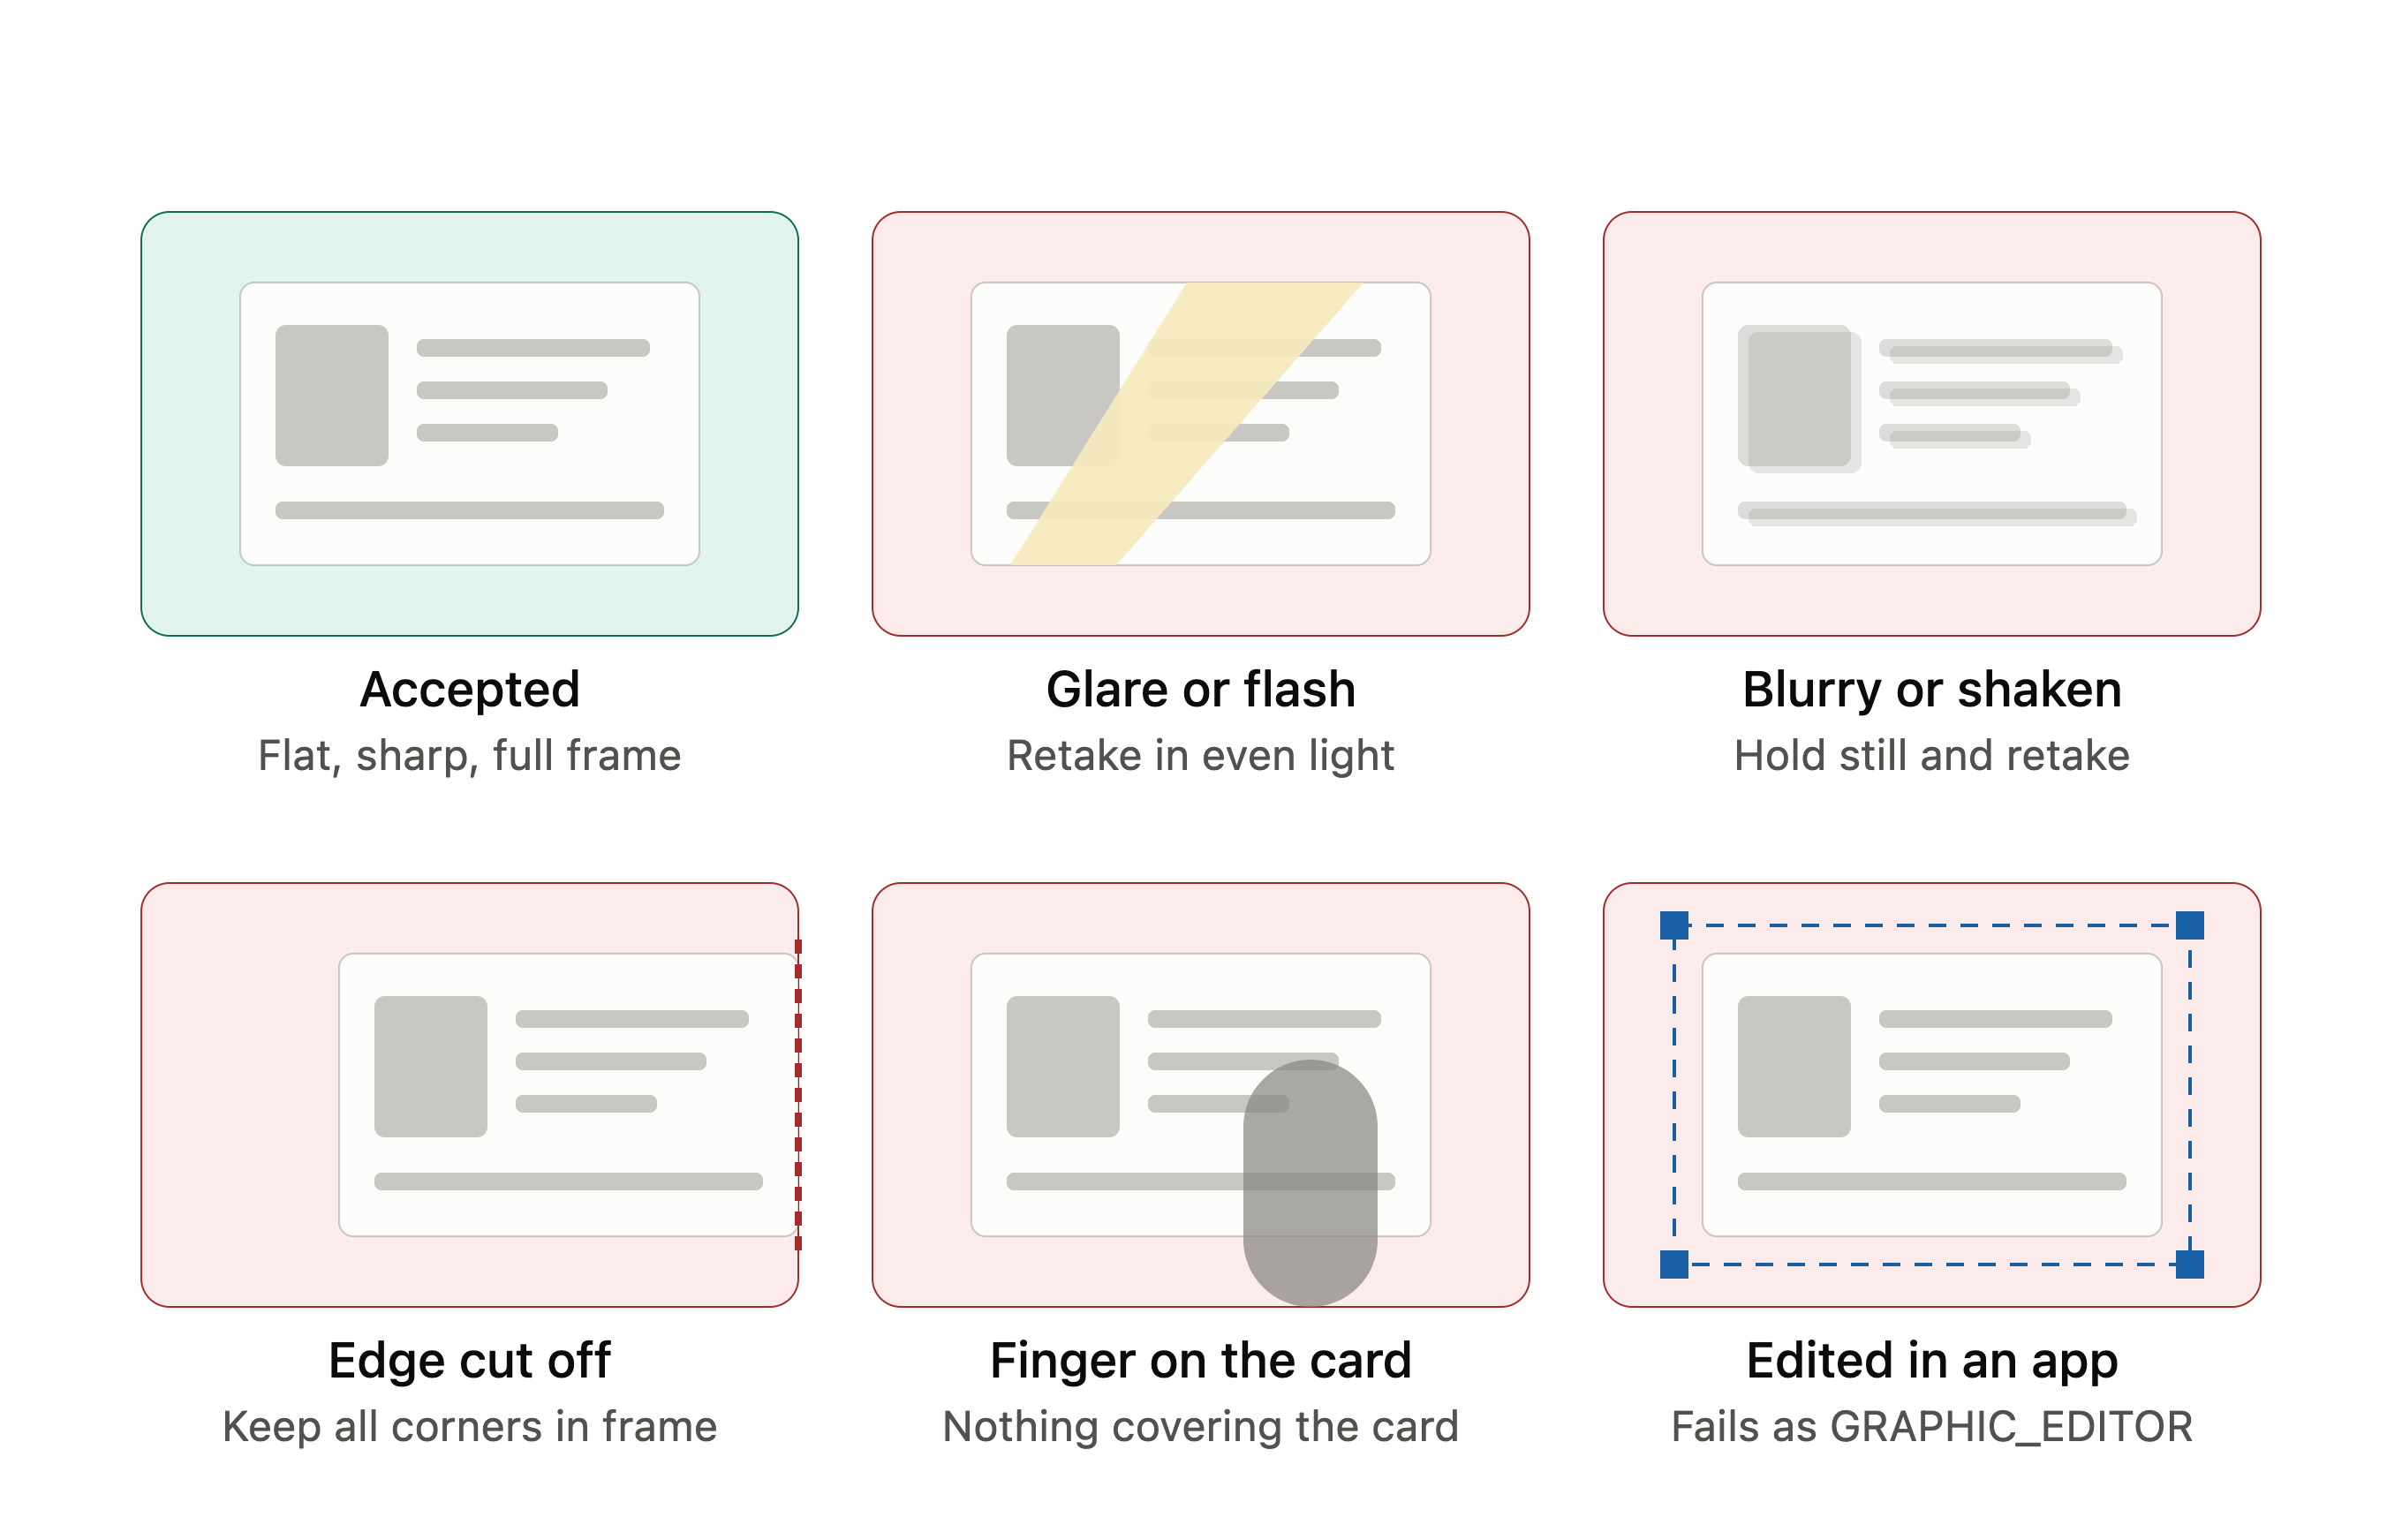
[Accepted / Rejected graphic]
✓ DO
Place the ID on a flat, plain surface and photograph it directly from above
Keep all four corners of the card inside the frame
Use even, natural light
Check that the text and photo are sharp before uploading
Upload the original file straight from the camera
✗ DON'T
Upload an image with glare or a flash reflection across the card
Upload a blurry or motion affected image
Crop or cut off any edge of the card
Cover part of the card with a finger
Photograph the ID on a screen, or upload a screenshot of it
Never pass the image through an editor
The check also looks for signs that the image file has been digitally altered, and it flags the submission when it finds them. This is not limited to forged IDs. An honest photo of a genuine card will still be rejected if it has been through an editing tool.
That includes adjusting brightness or contrast to make the text more readable, sharpening, retouching, removing a background, straightening or cropping in an editing app, removing a watermark, and simply opening the file in an editor and saving it again. Any of these can be enough.
Take a fresh photograph of the physical card and upload that file as it came off the camera. If the photo is too dark or too soft to read, do not fix it in an app. Take it again in better light.
There is no way to override this check, and there is no liveness check available as an alternative route to verification. A file that has been edited cannot pass.
3. Submit details that match the ID exactly
Every detail you send is checked against the card. Any difference in spelling, name order, spacing, or date format is a rejection.
The most common cause of a mismatch is not a typo. It is auto filling the KYC request from a stored user profile. A customer who signed up as "Tunde Bello" has an ID that reads "BELLO BABATUNDE ADESOLA", and the verification fails on a name they never typed.
✓ DO
Collect the name, date of birth, and ID number at KYC time, read directly off the card
Submit the name in the order printed on the card
Include middle names when they appear on the card
Preserve case sensitive values exactly as printed
Set the ID type to the card that was actually uploaded, and send the ID number that belongs to that type
✗ DON'T
Auto fill the KYC request from an existing user profile
Reformat, title case, or normalise names before submitting
Trim a middle name to fit a field
Use a nickname, display name, or preferred name
Default the ID type to a fixed value
Send a partial or truncated ID number
4. Complete every required field
An incomplete submission cannot be processed and will come back as a rejection rather than a validation error.
✓ DO
Send every required field on the first attempt
Send a real, complete address rather than a placeholder
Store the KYC status against the customer and wait for approval before attempting card creation
✗ DON'T
Send empty strings or placeholder values to satisfy a required field
Assume a successful create customer response means KYC has passed
If a verification is rejected
A rejection is recoverable in most cases. The first step is reading the rejection reason, which identifies the specific problem.
Where the reason is sent
Via the API. When integrating with the Virtual Card API, you can track a user's KYC verification status through the webhook events below.
Event
Status
Meaning
virtualcard.user.kyc.pendingPending
KYC verification is still under review. This is not a rejection, and there is nothing the user needs to fix or resubmit at this stage.
virtualcard.user.kyc.completeComplete
KYC verification was successfully completed. This is a final status.
virtualcard.user.kyc.failedFailed
KYC verification was unsuccessful. This is a final status and may require the user to take corrective action, depending on the reason for failure.
Important: A
virtualcard.user.kyc.pendingevent is not a rejection. It means verification is still under review, and there is nothing to fix. Onlyvirtualcard.user.kyc.completeandvirtualcard.user.kyc.failedare final statuses.For more details on integrating with the Bitnob API, see the Bitnob API documentation.
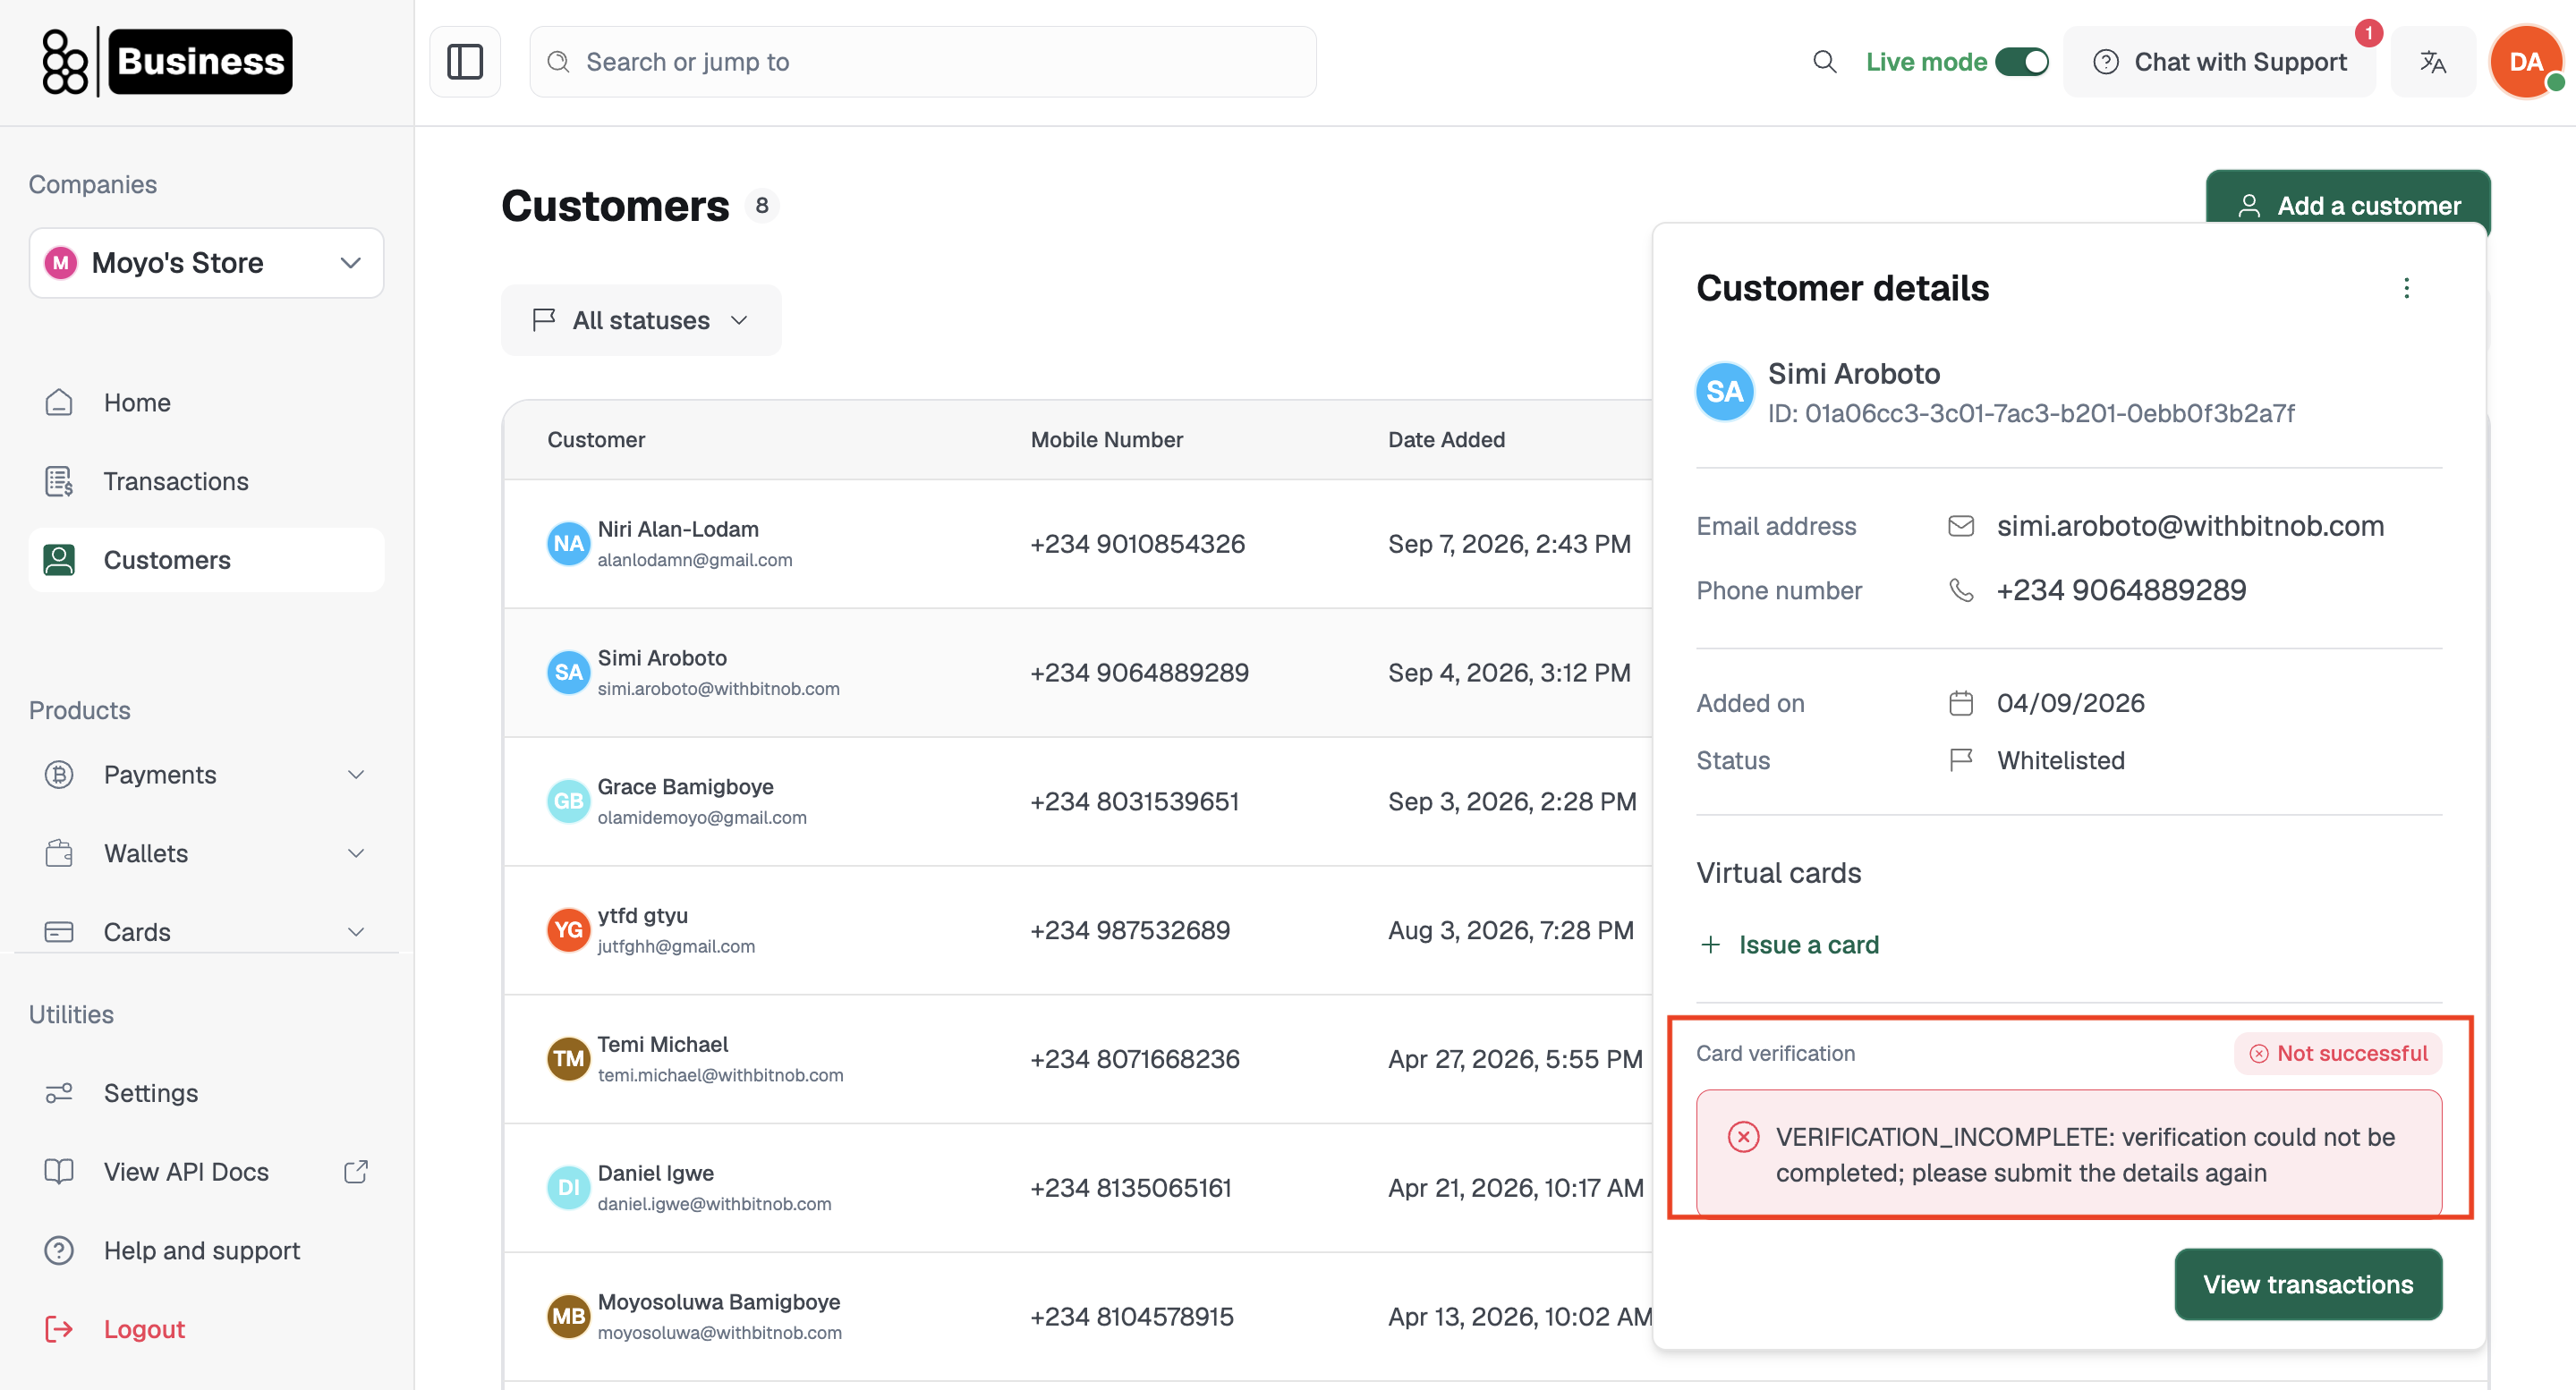
If you are not using webhooks. The reason can be found on the Customer tab
Then
Check the rejection reason returned. It tells you exactly what went wrong.
Take note of the specific issue, whether it is a blurry image or a mismatched detail.
Fix and restart the verification process
The two reasons you will see most often
Almost all current rejections come back as one of these two, and both are image problems rather than data problems.
GRAPHIC_EDITOR
The image shows signs of digital editing. Retake the photograph of the physical card and upload the original camera file without opening it in any editing app. This check cannot be waived, and a resubmission of the same edited file will fail again.
UNSATISFACTORY_PHOTOS
The image quality is too low for the card to be read. Retake it on a flat plain surface, in even light, with all four corners in frame and the text sharp. Do not brighten or sharpen the existing file to fix it, because that will convert this rejection into a GRAPHIC_EDITOR rejection.
Every submission is a chargeable verification, including one that is rejected on image quality. Checking the image before it is sent is cheaper than a retry loop.
If the issue has been corrected and the verification is still rejected, contact support at help@bitnob.com with a screenshot of the rejection and the time of the last attempt.
For the full event list, payload fields and handling rules, see Card KYC in the developer documentation.