
How to create a virtual card on Bitnob
Cards can only be issued to customers who already exist on your account and have passed verification. If you have not yet added the customer, start at Part 1. If the customer is already verified, skip to Part 2
Part 1: Add a customer and complete their KYC
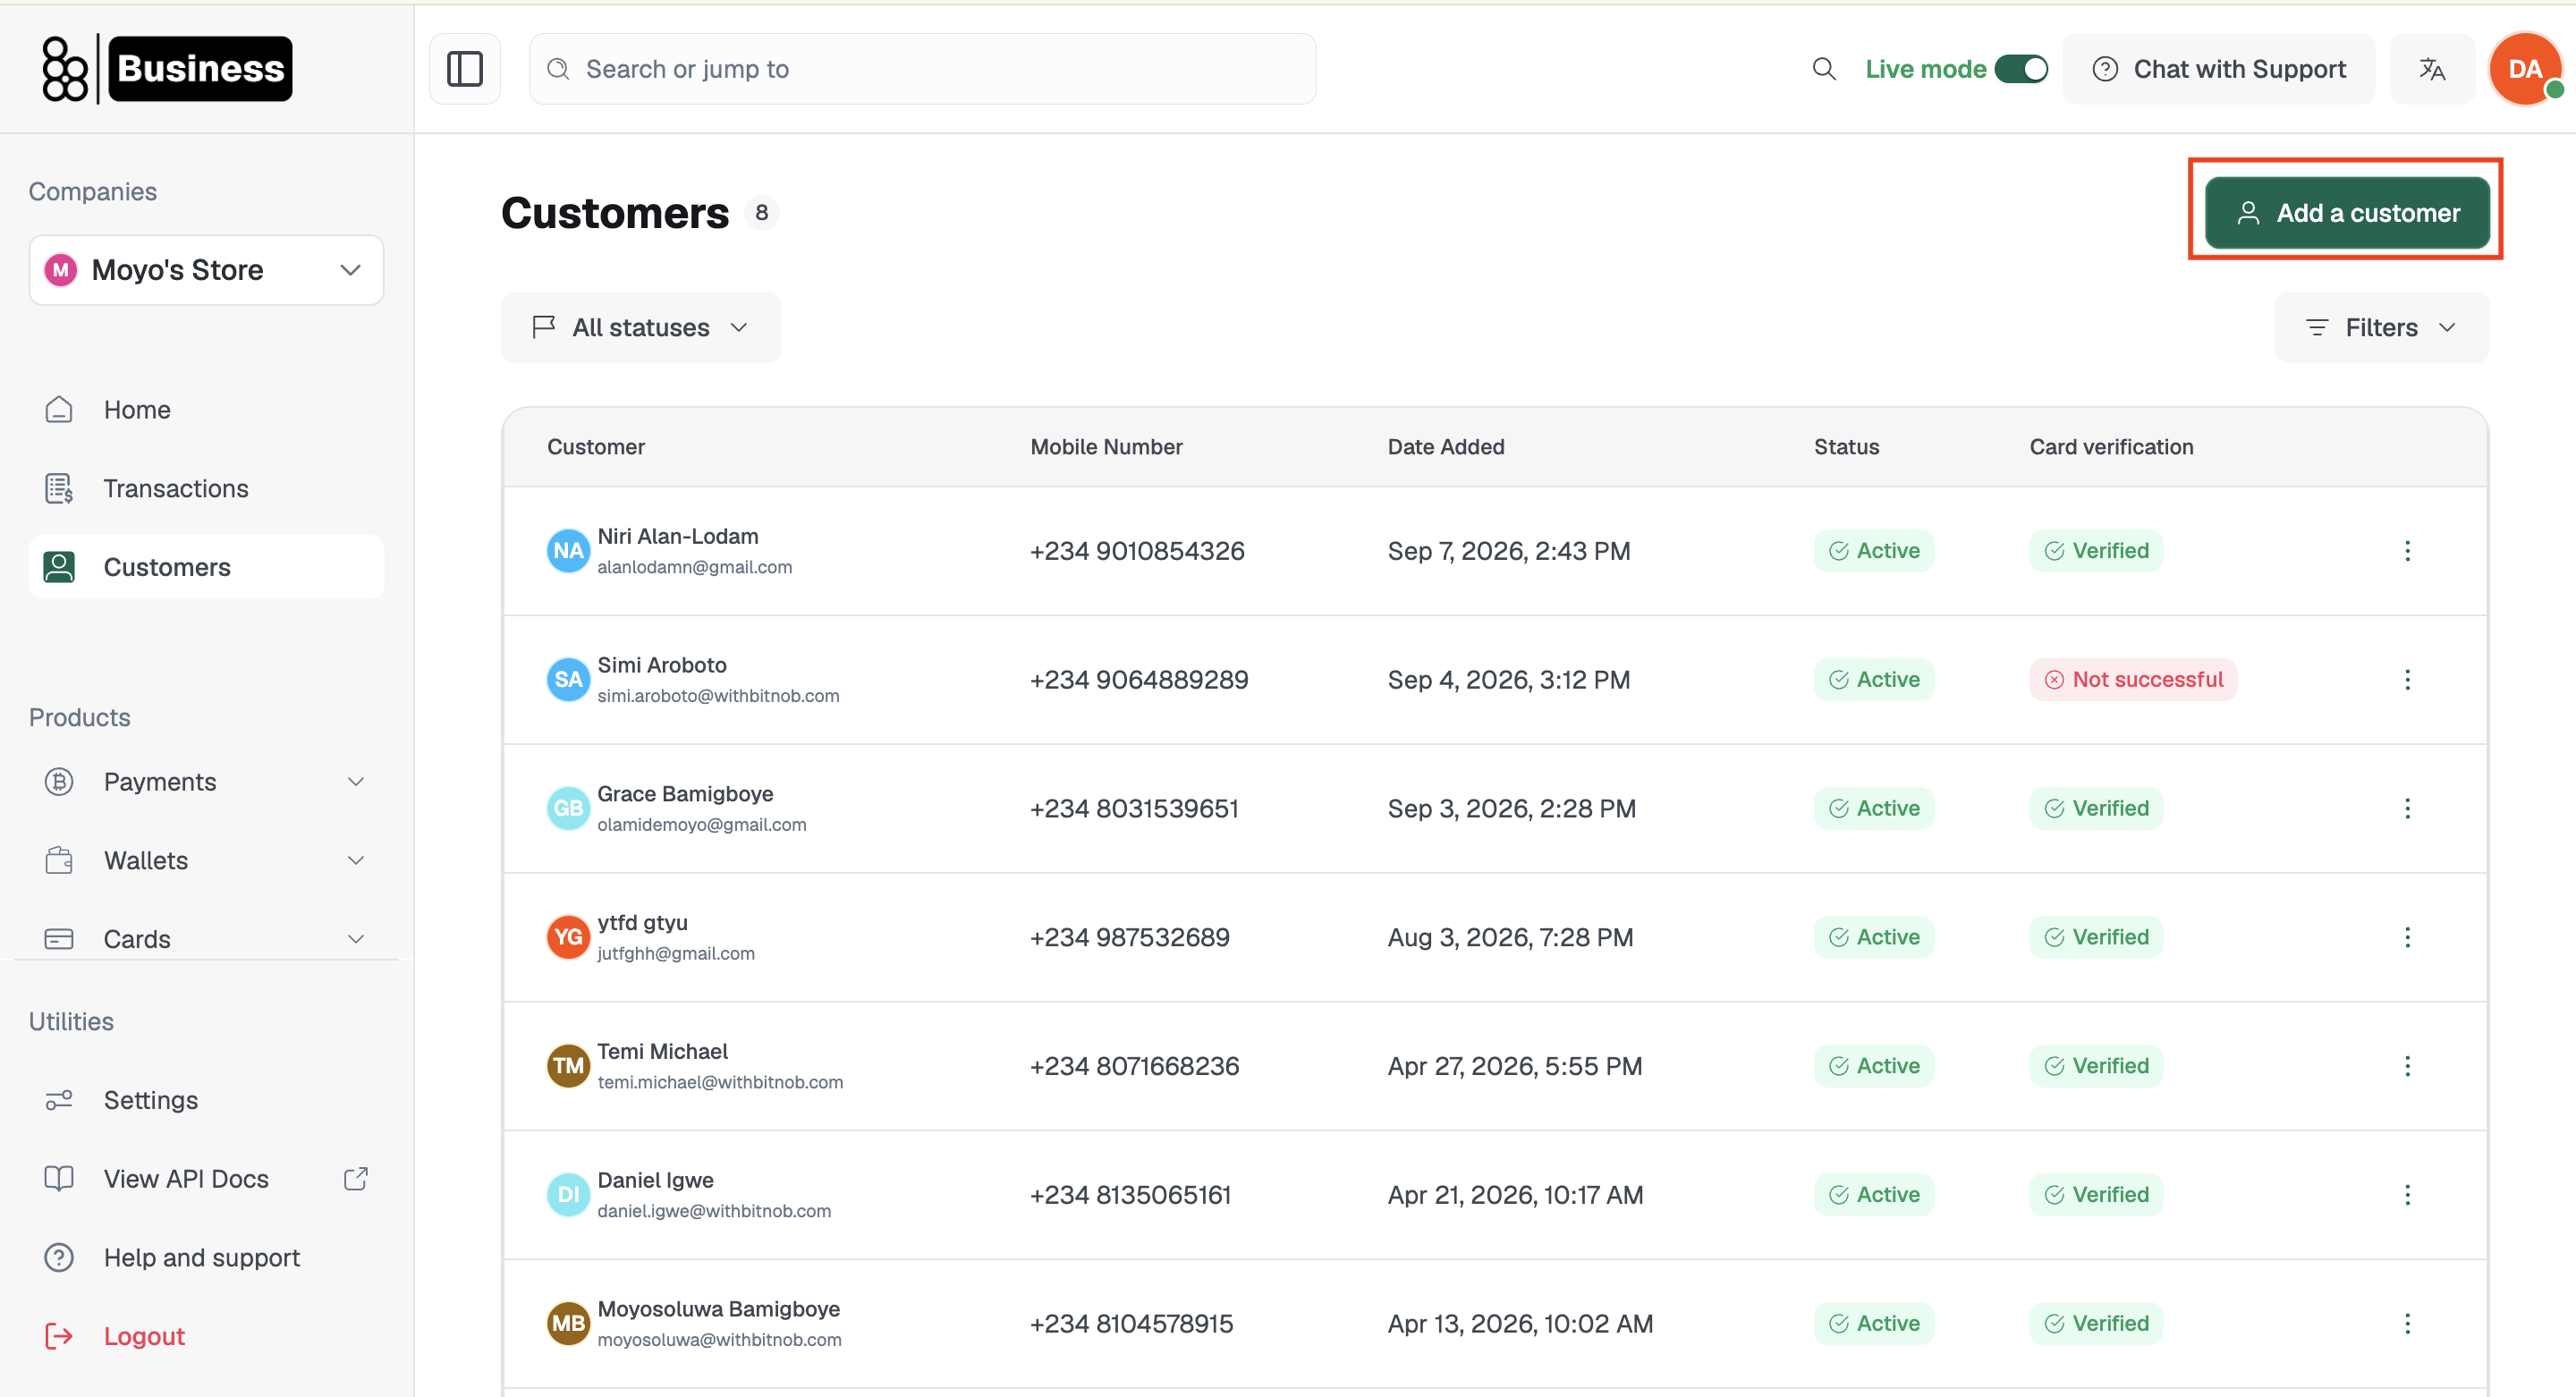
1. Open the Customers page
Click Customers in the sidebar, then click Add a customer.
2. Fill in the basic details
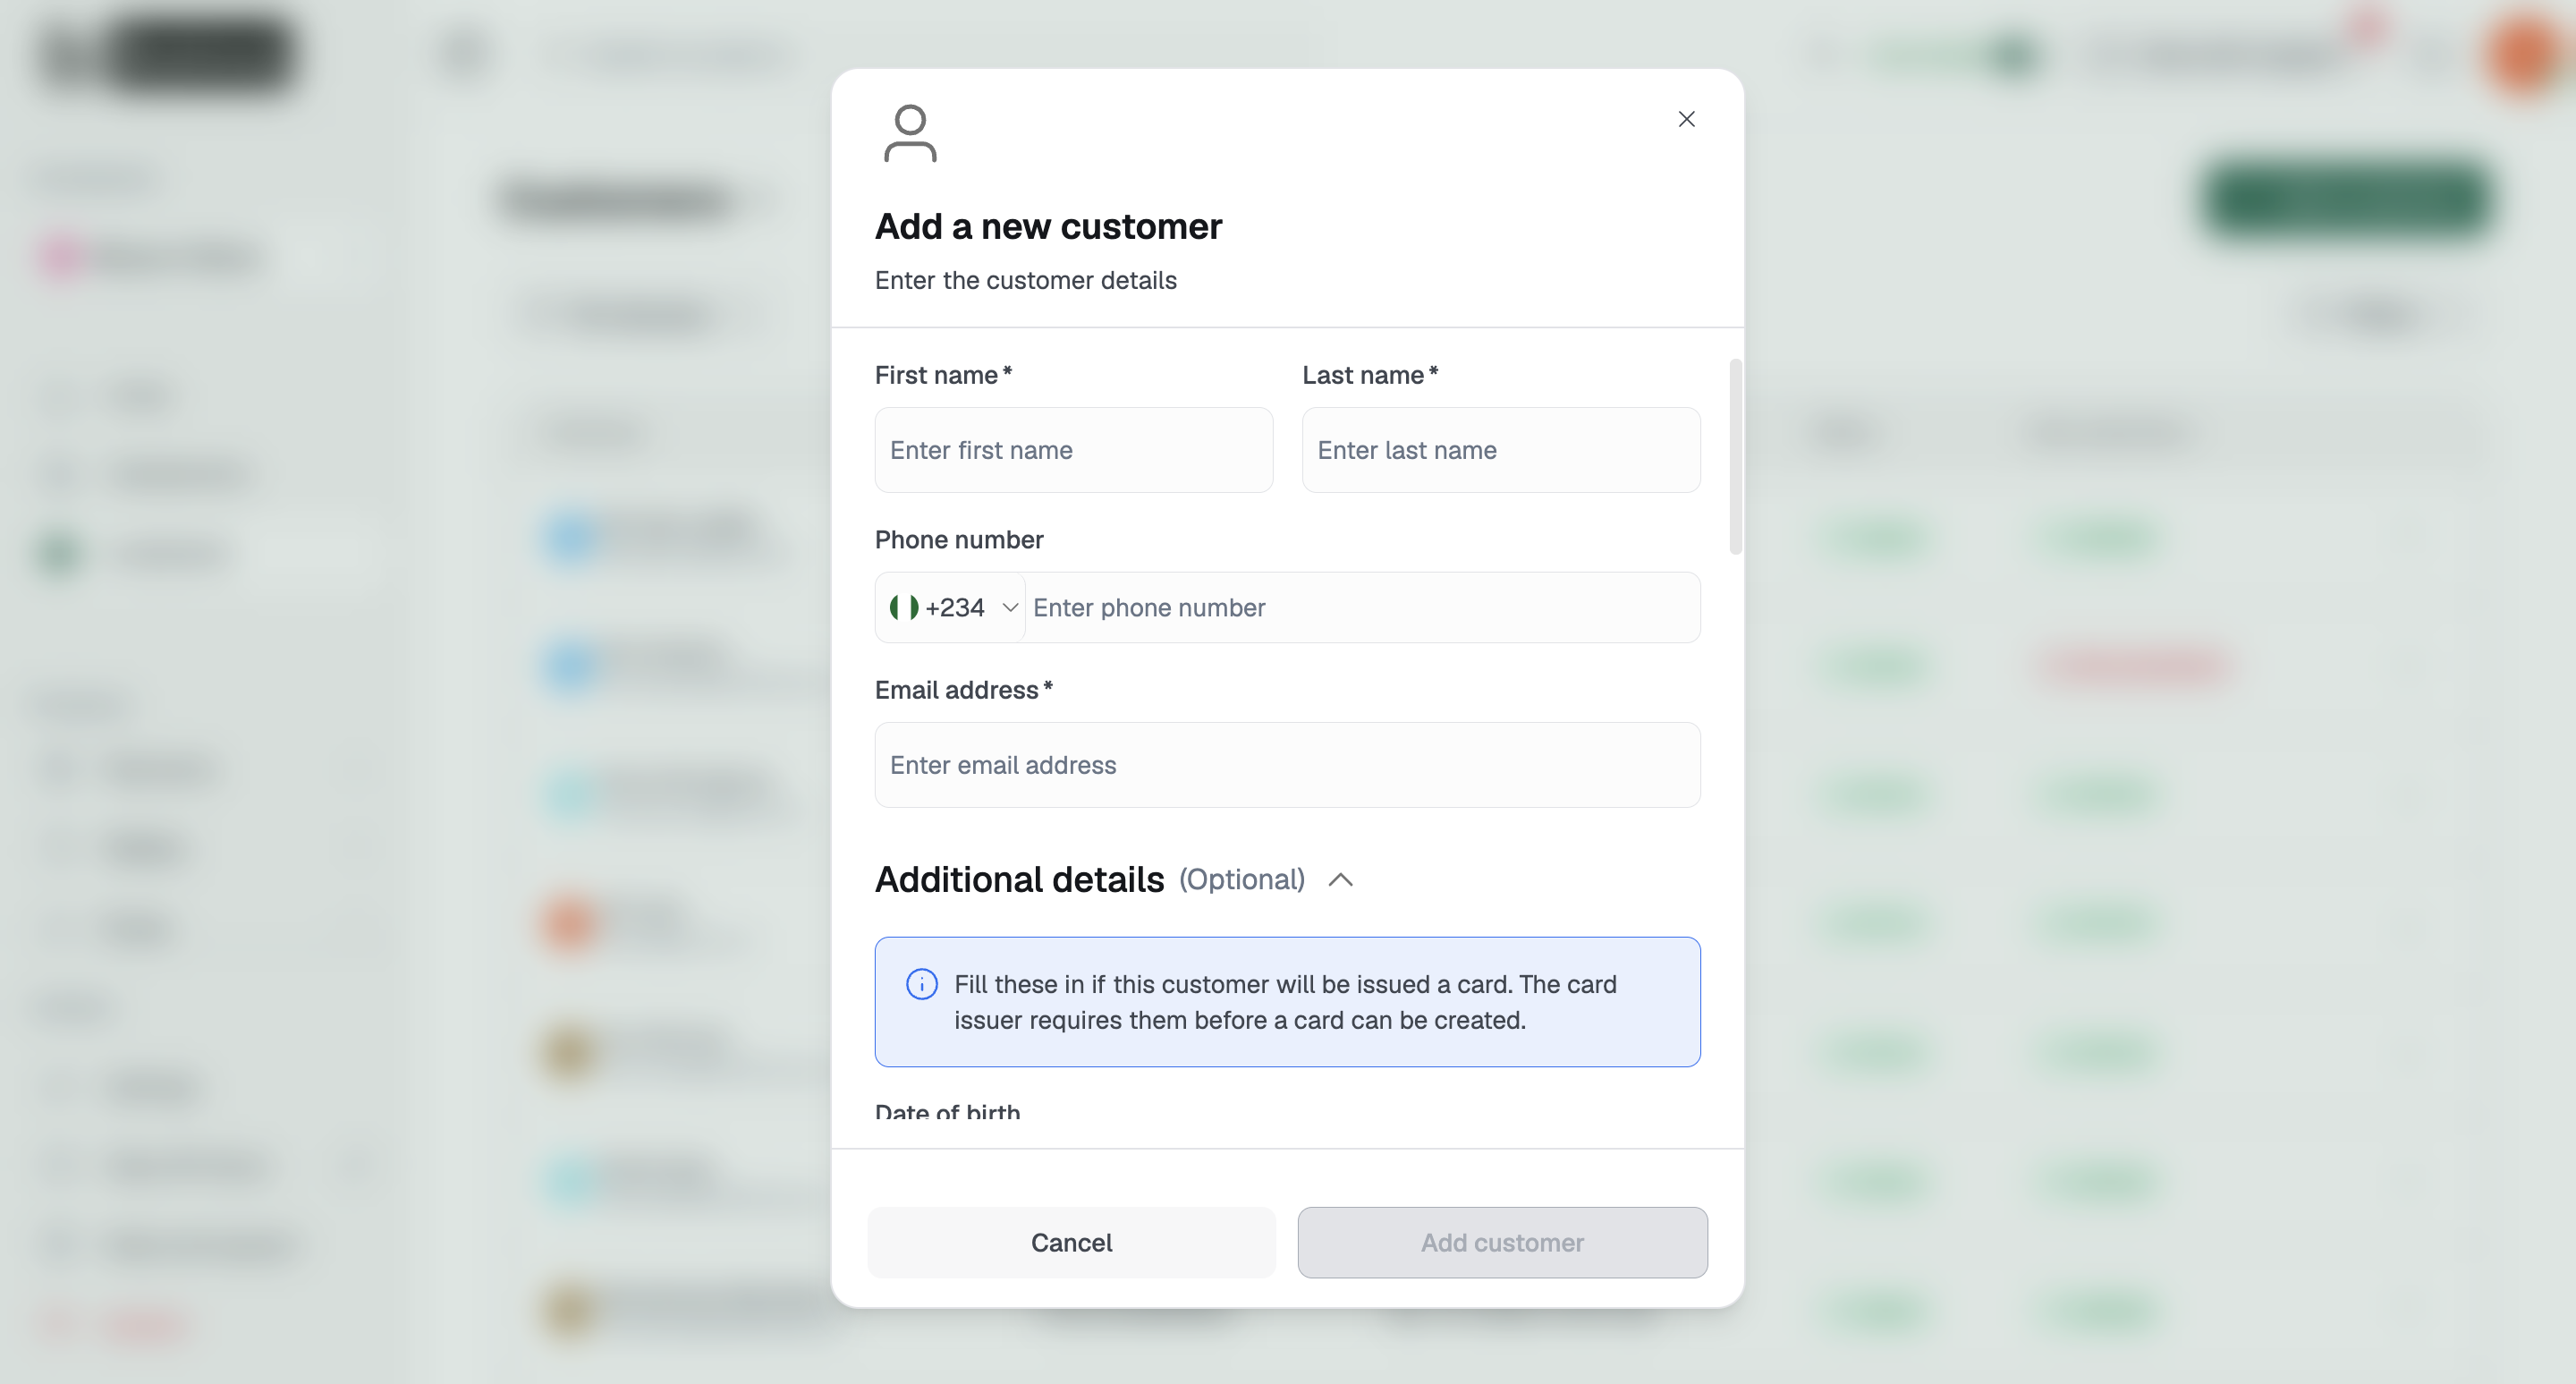
These are the only fields the form marks as required:
First name
Last name
Email address
Phone number (select the country code, then enter the number)
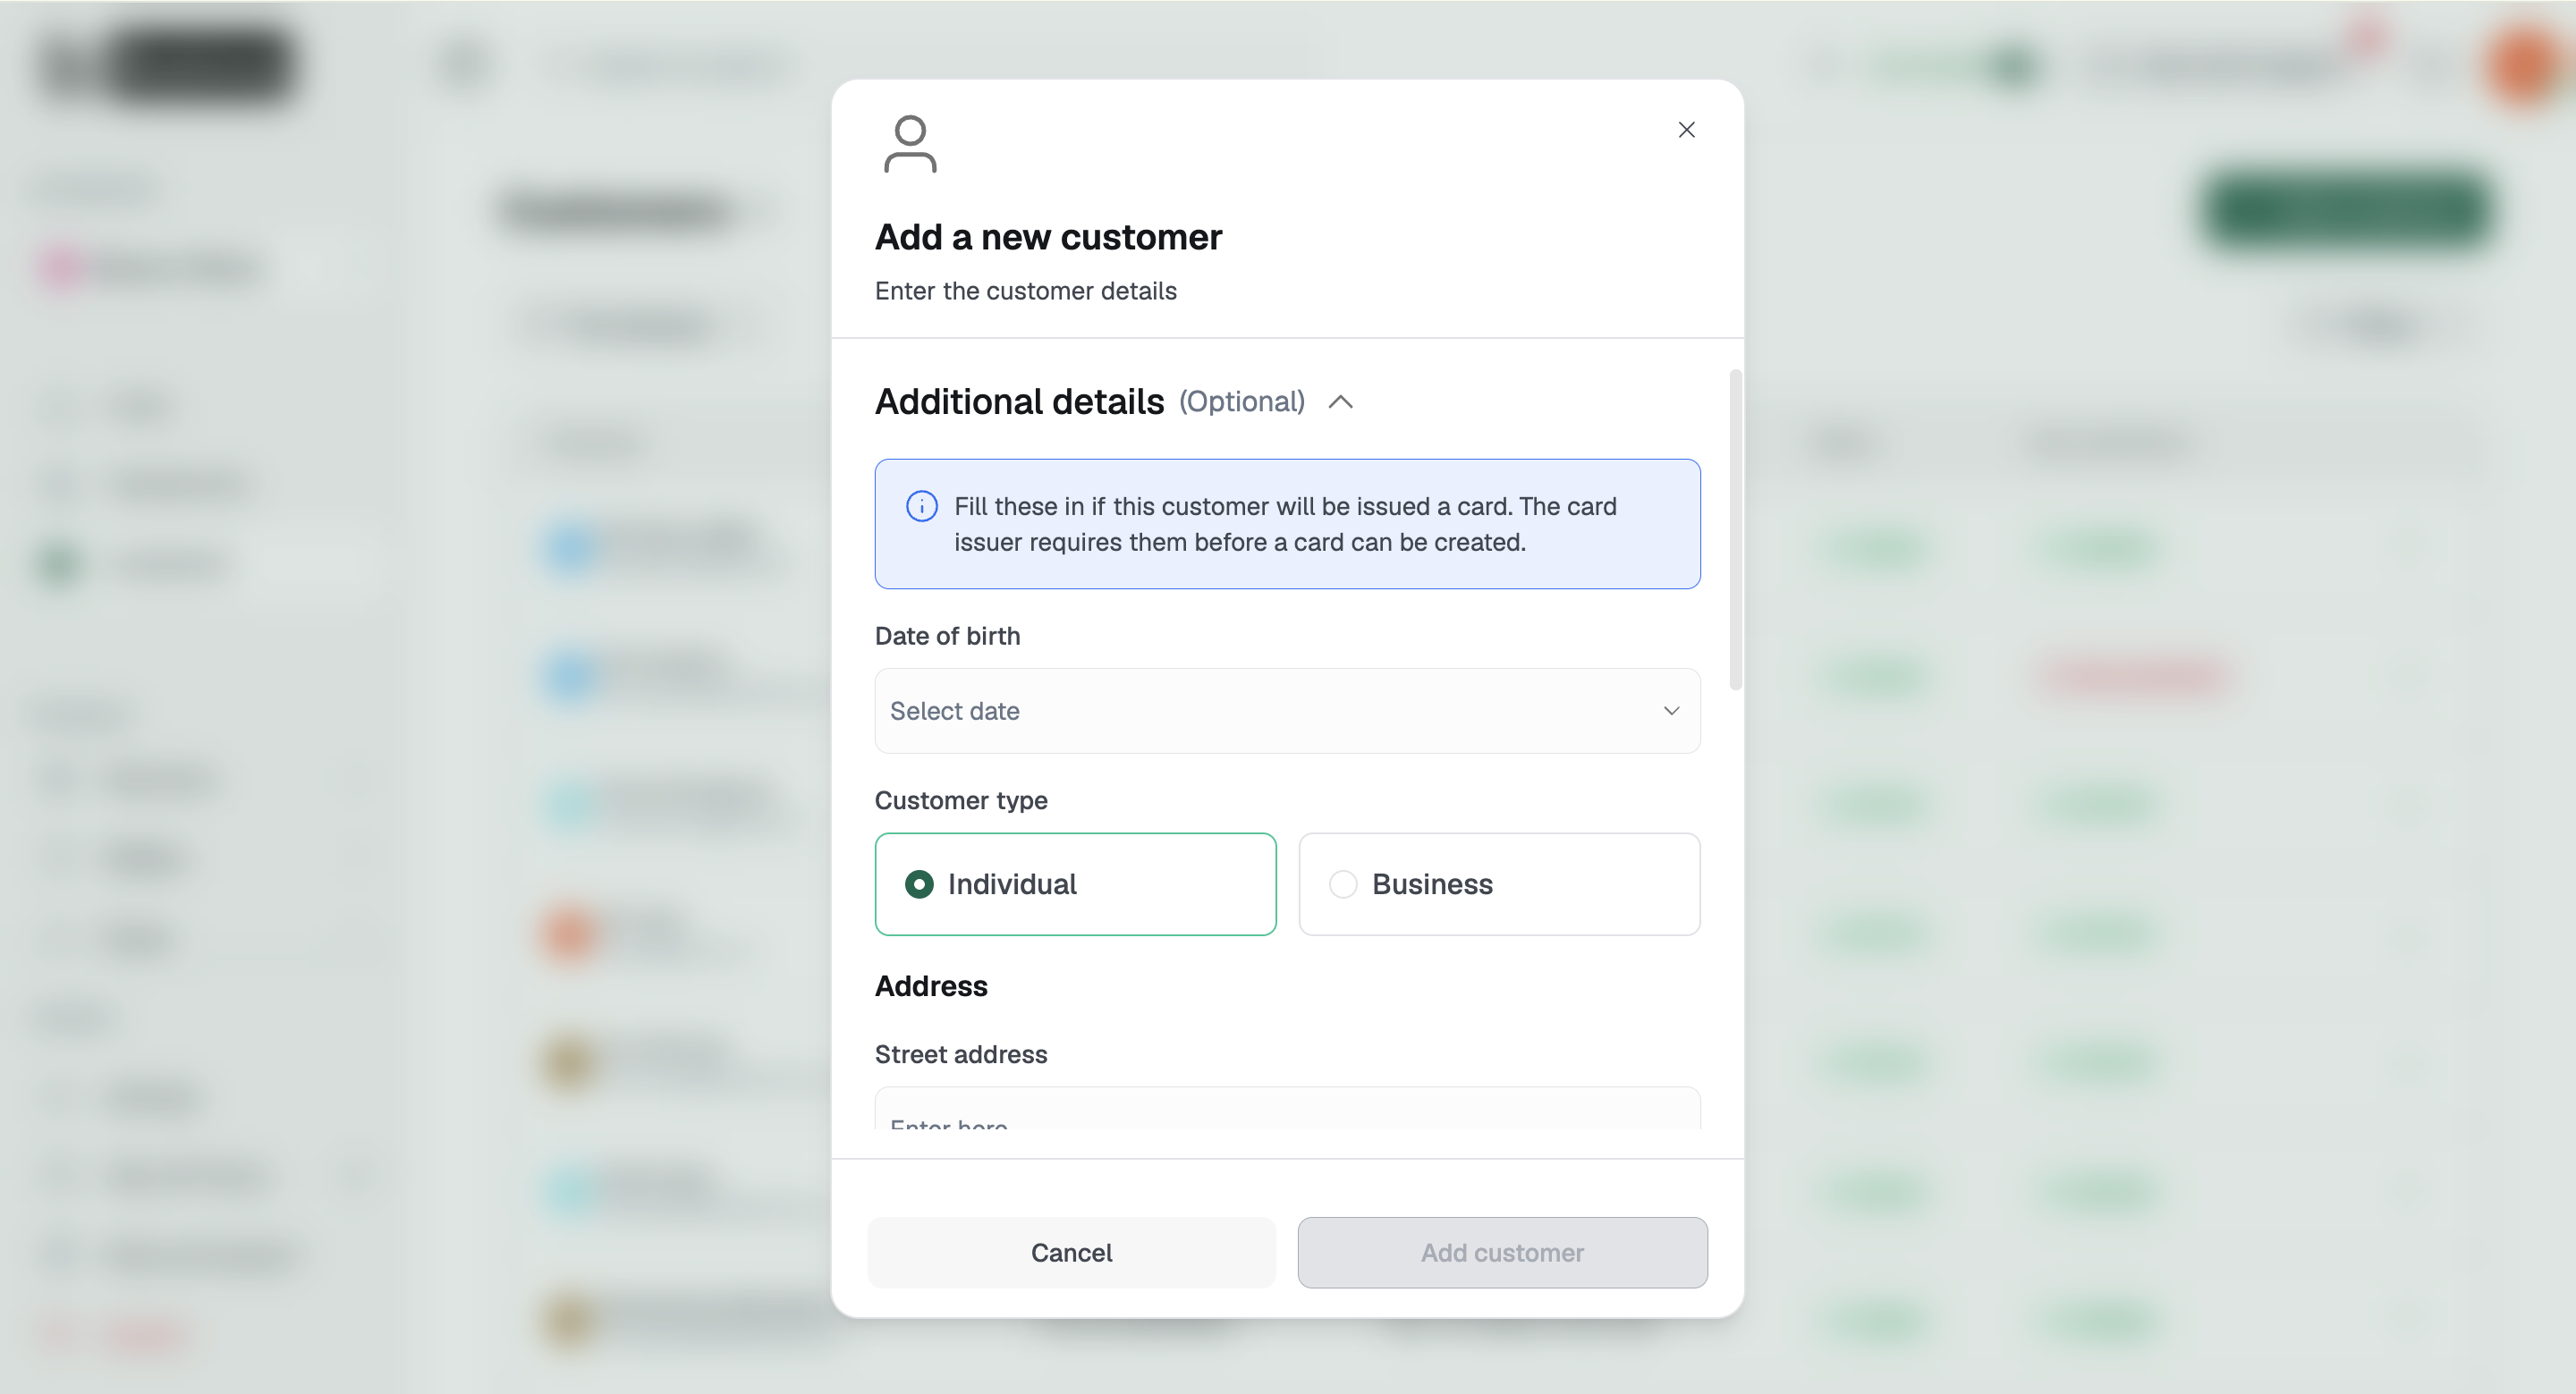
3. Expand Additional details and fill in everything
This section is marked Optional, but it is required if you intend to issue a card to this customer. Bitnob will not process card creation without this information.
Personal details
Date of birth
Customer type: Individual or Business
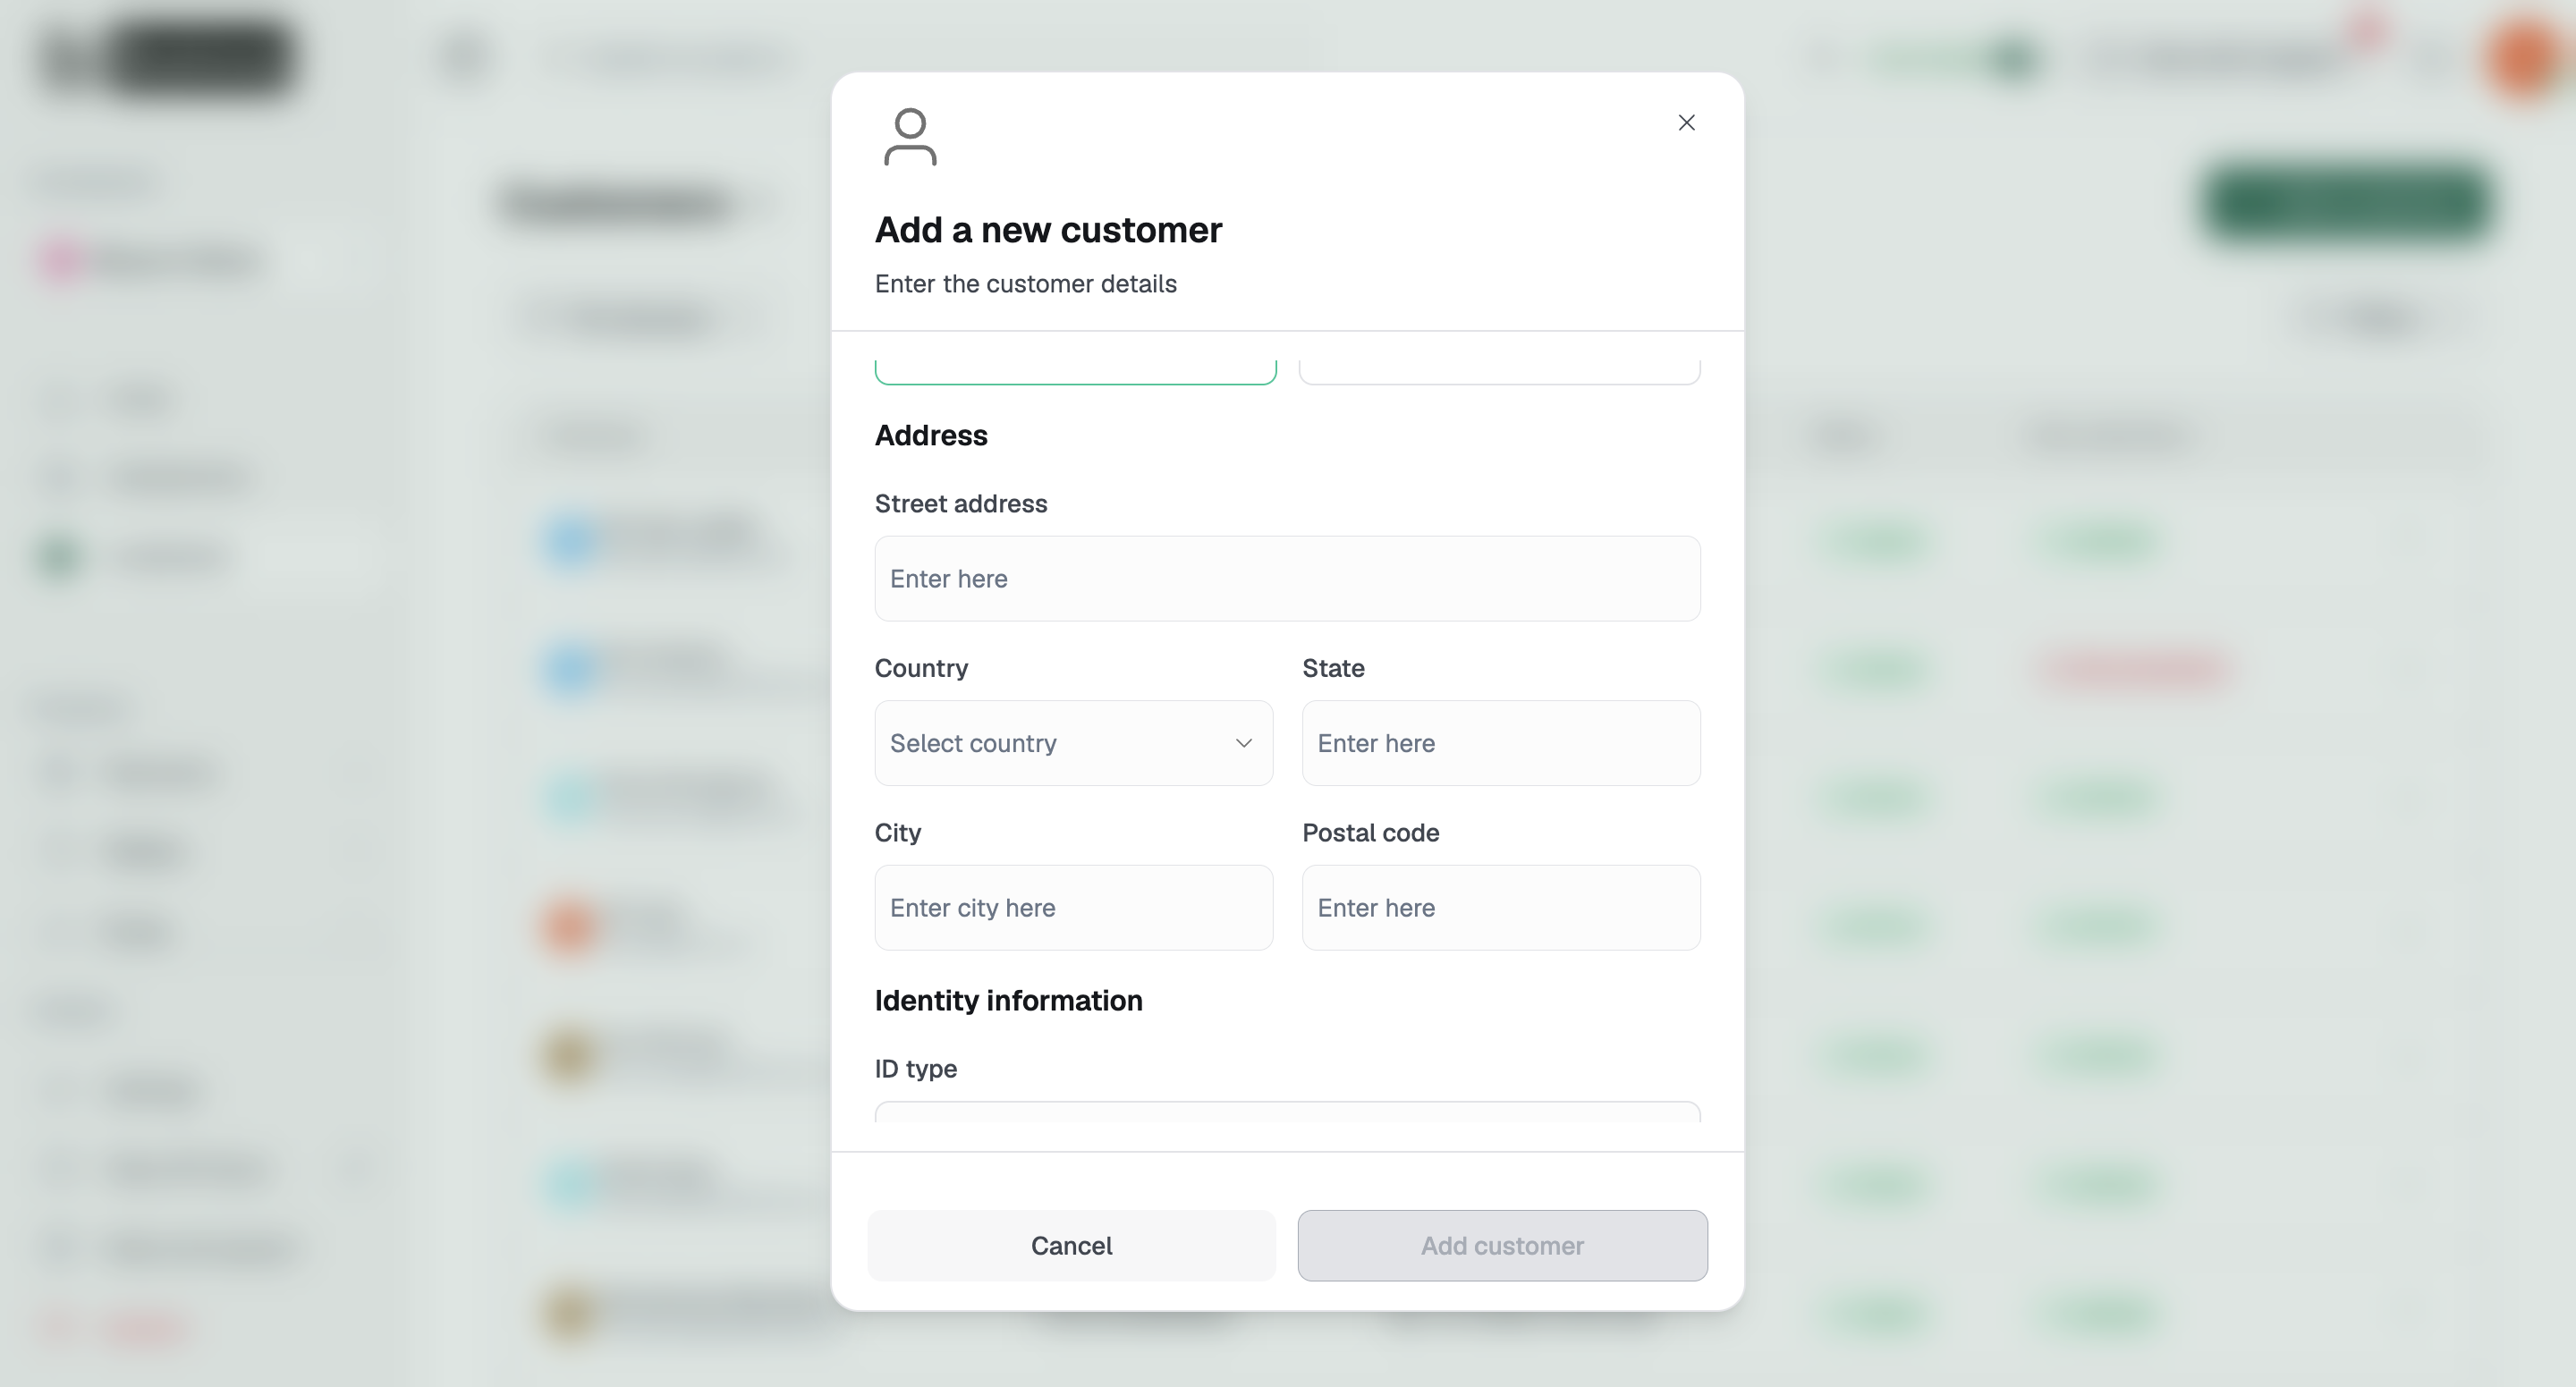
Address
Street address
Country
State
City
Postal code
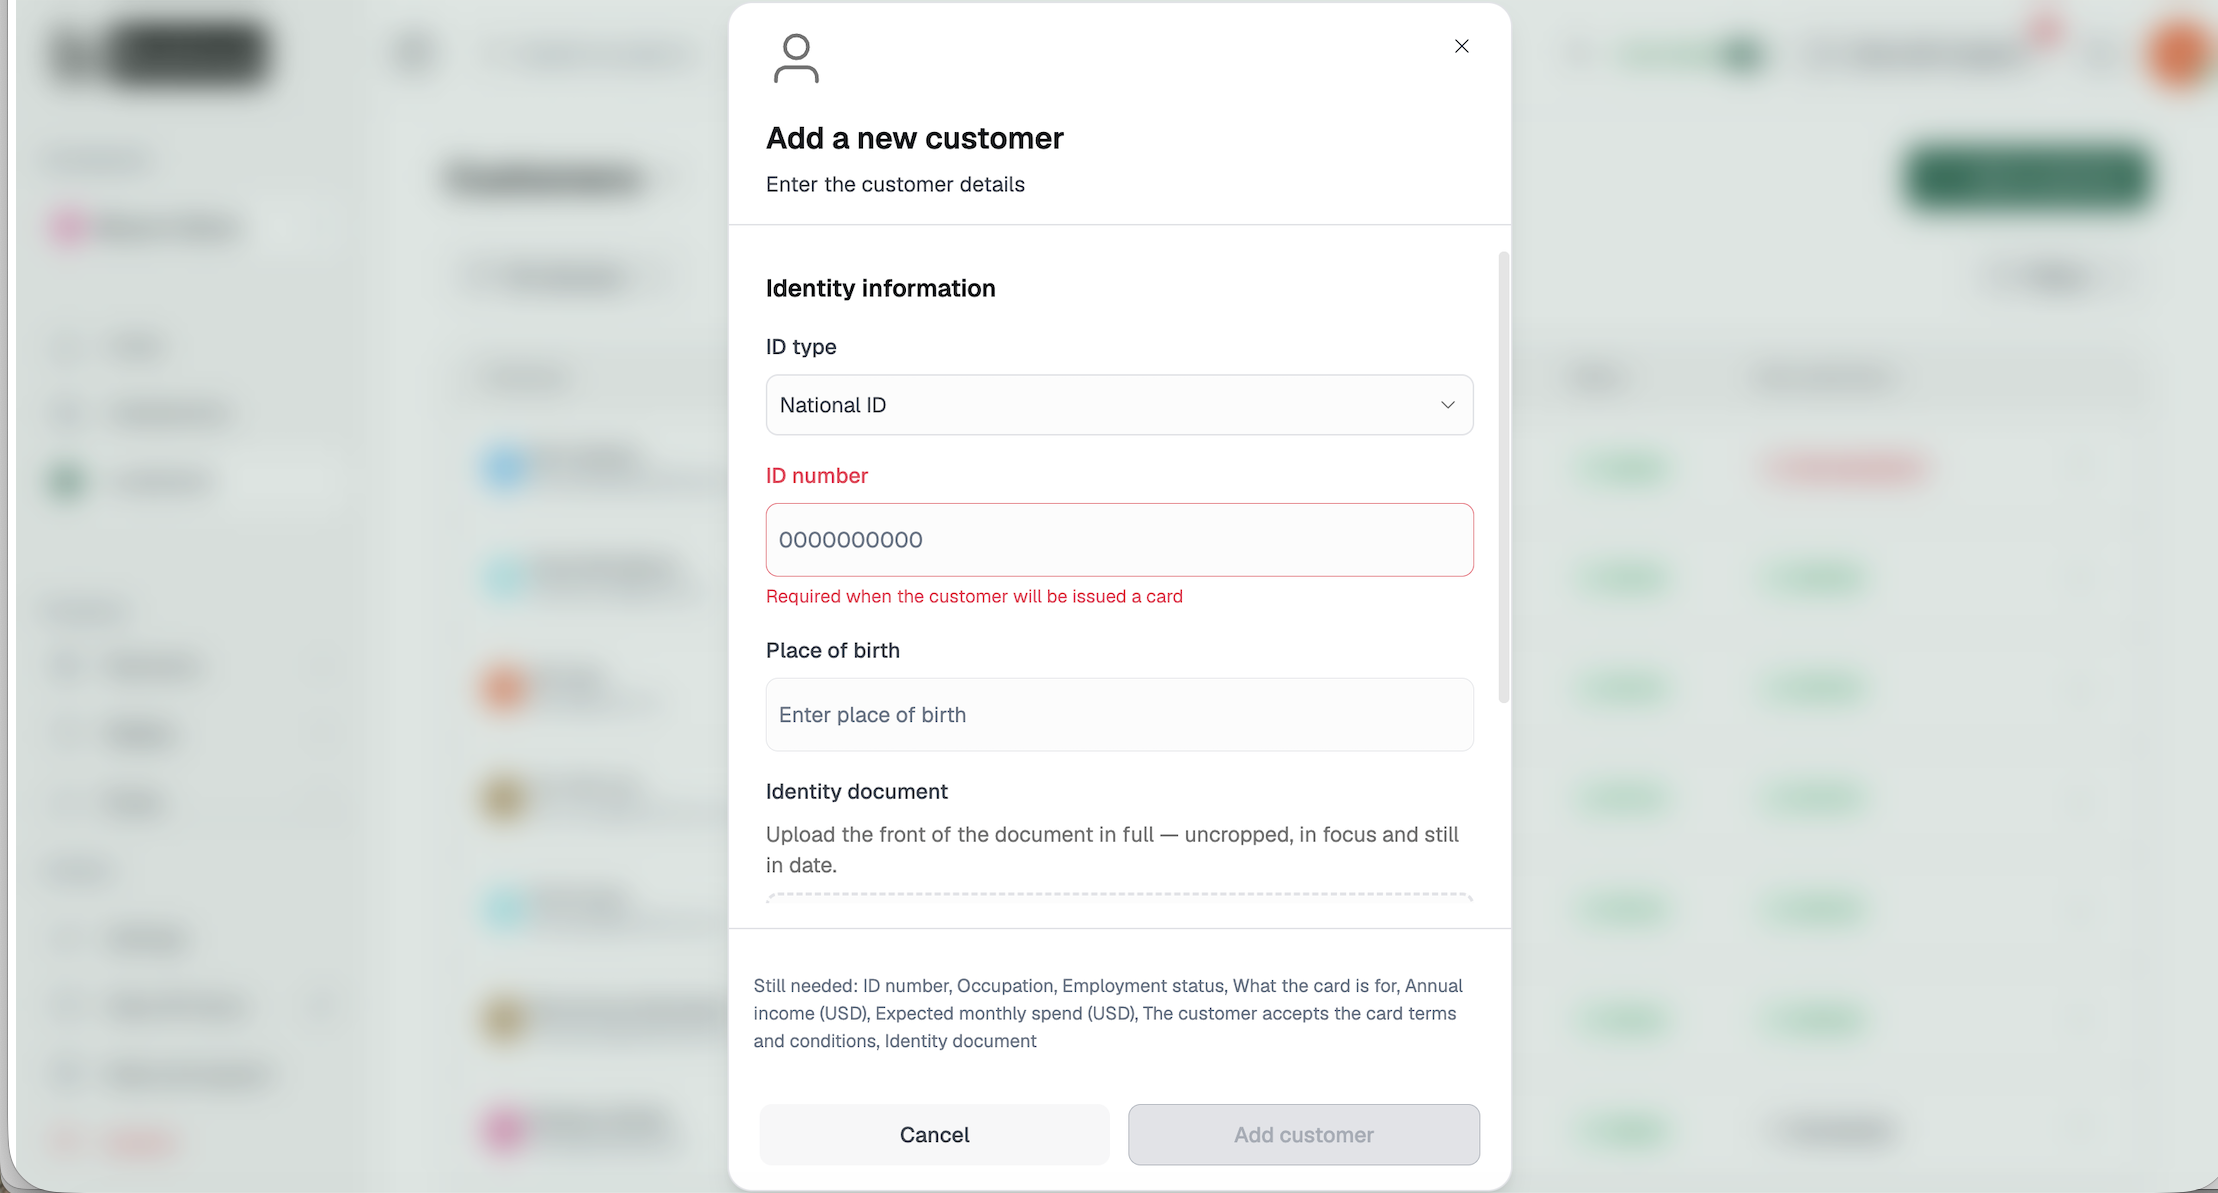
Identity Information
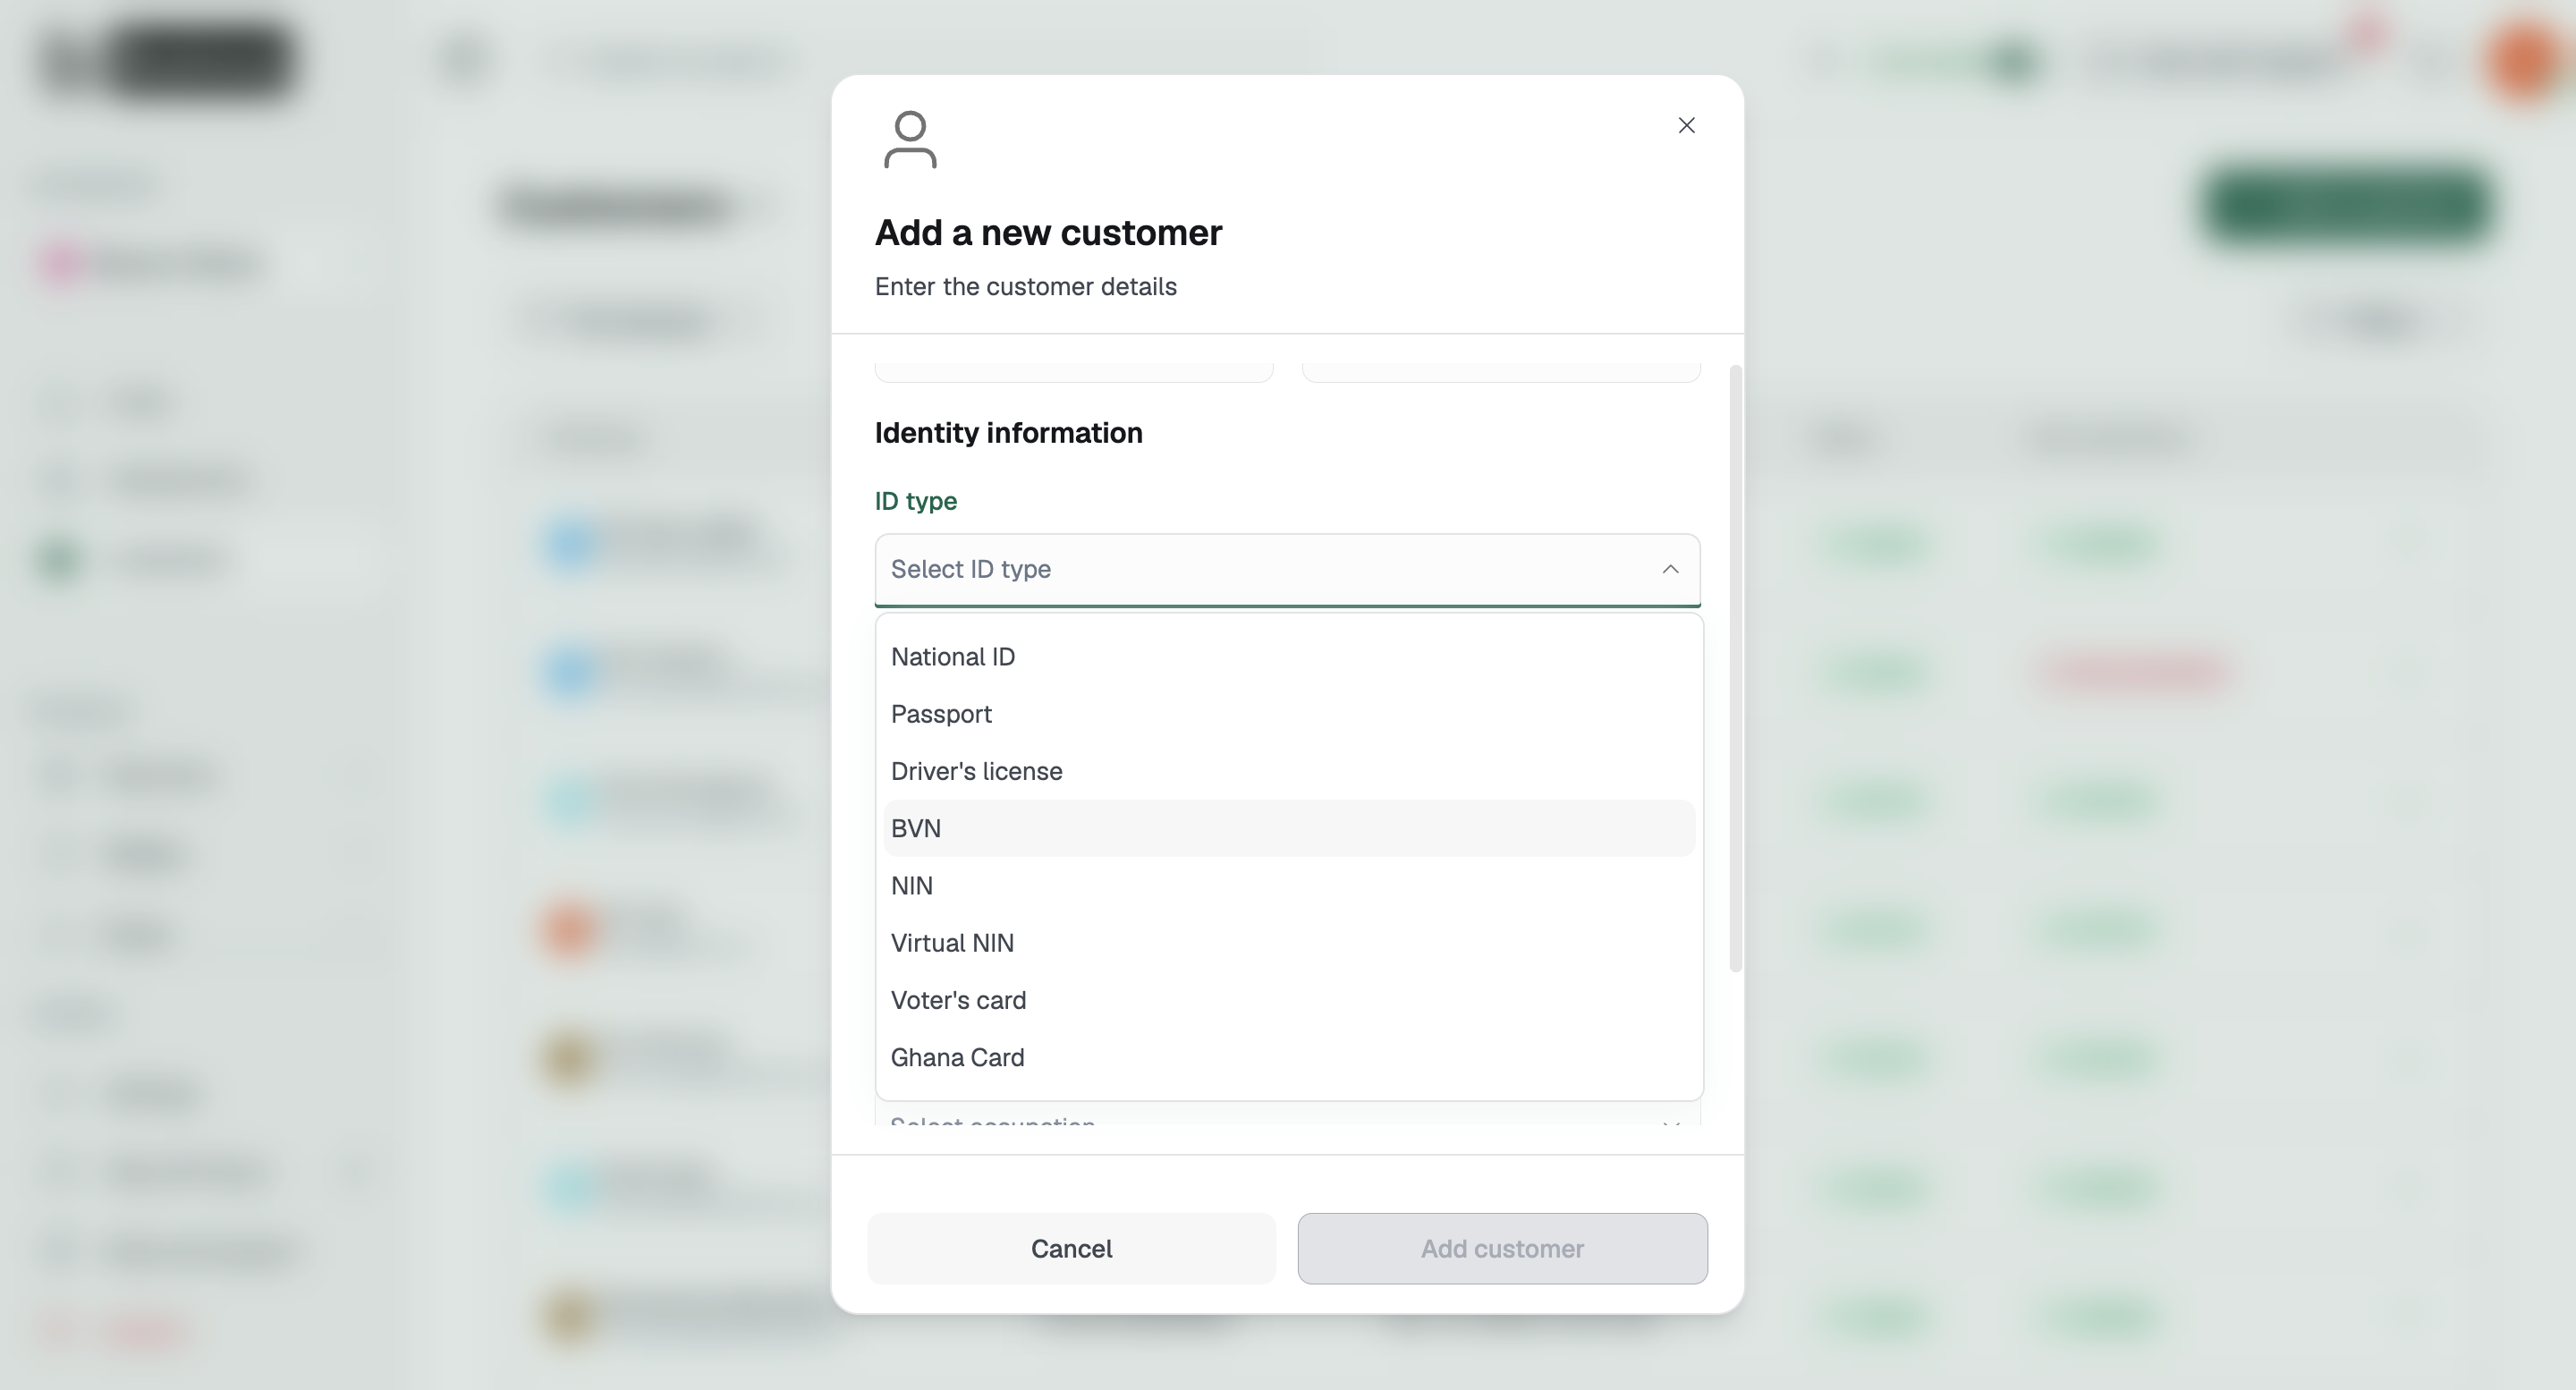
ID type: For example, National ID.
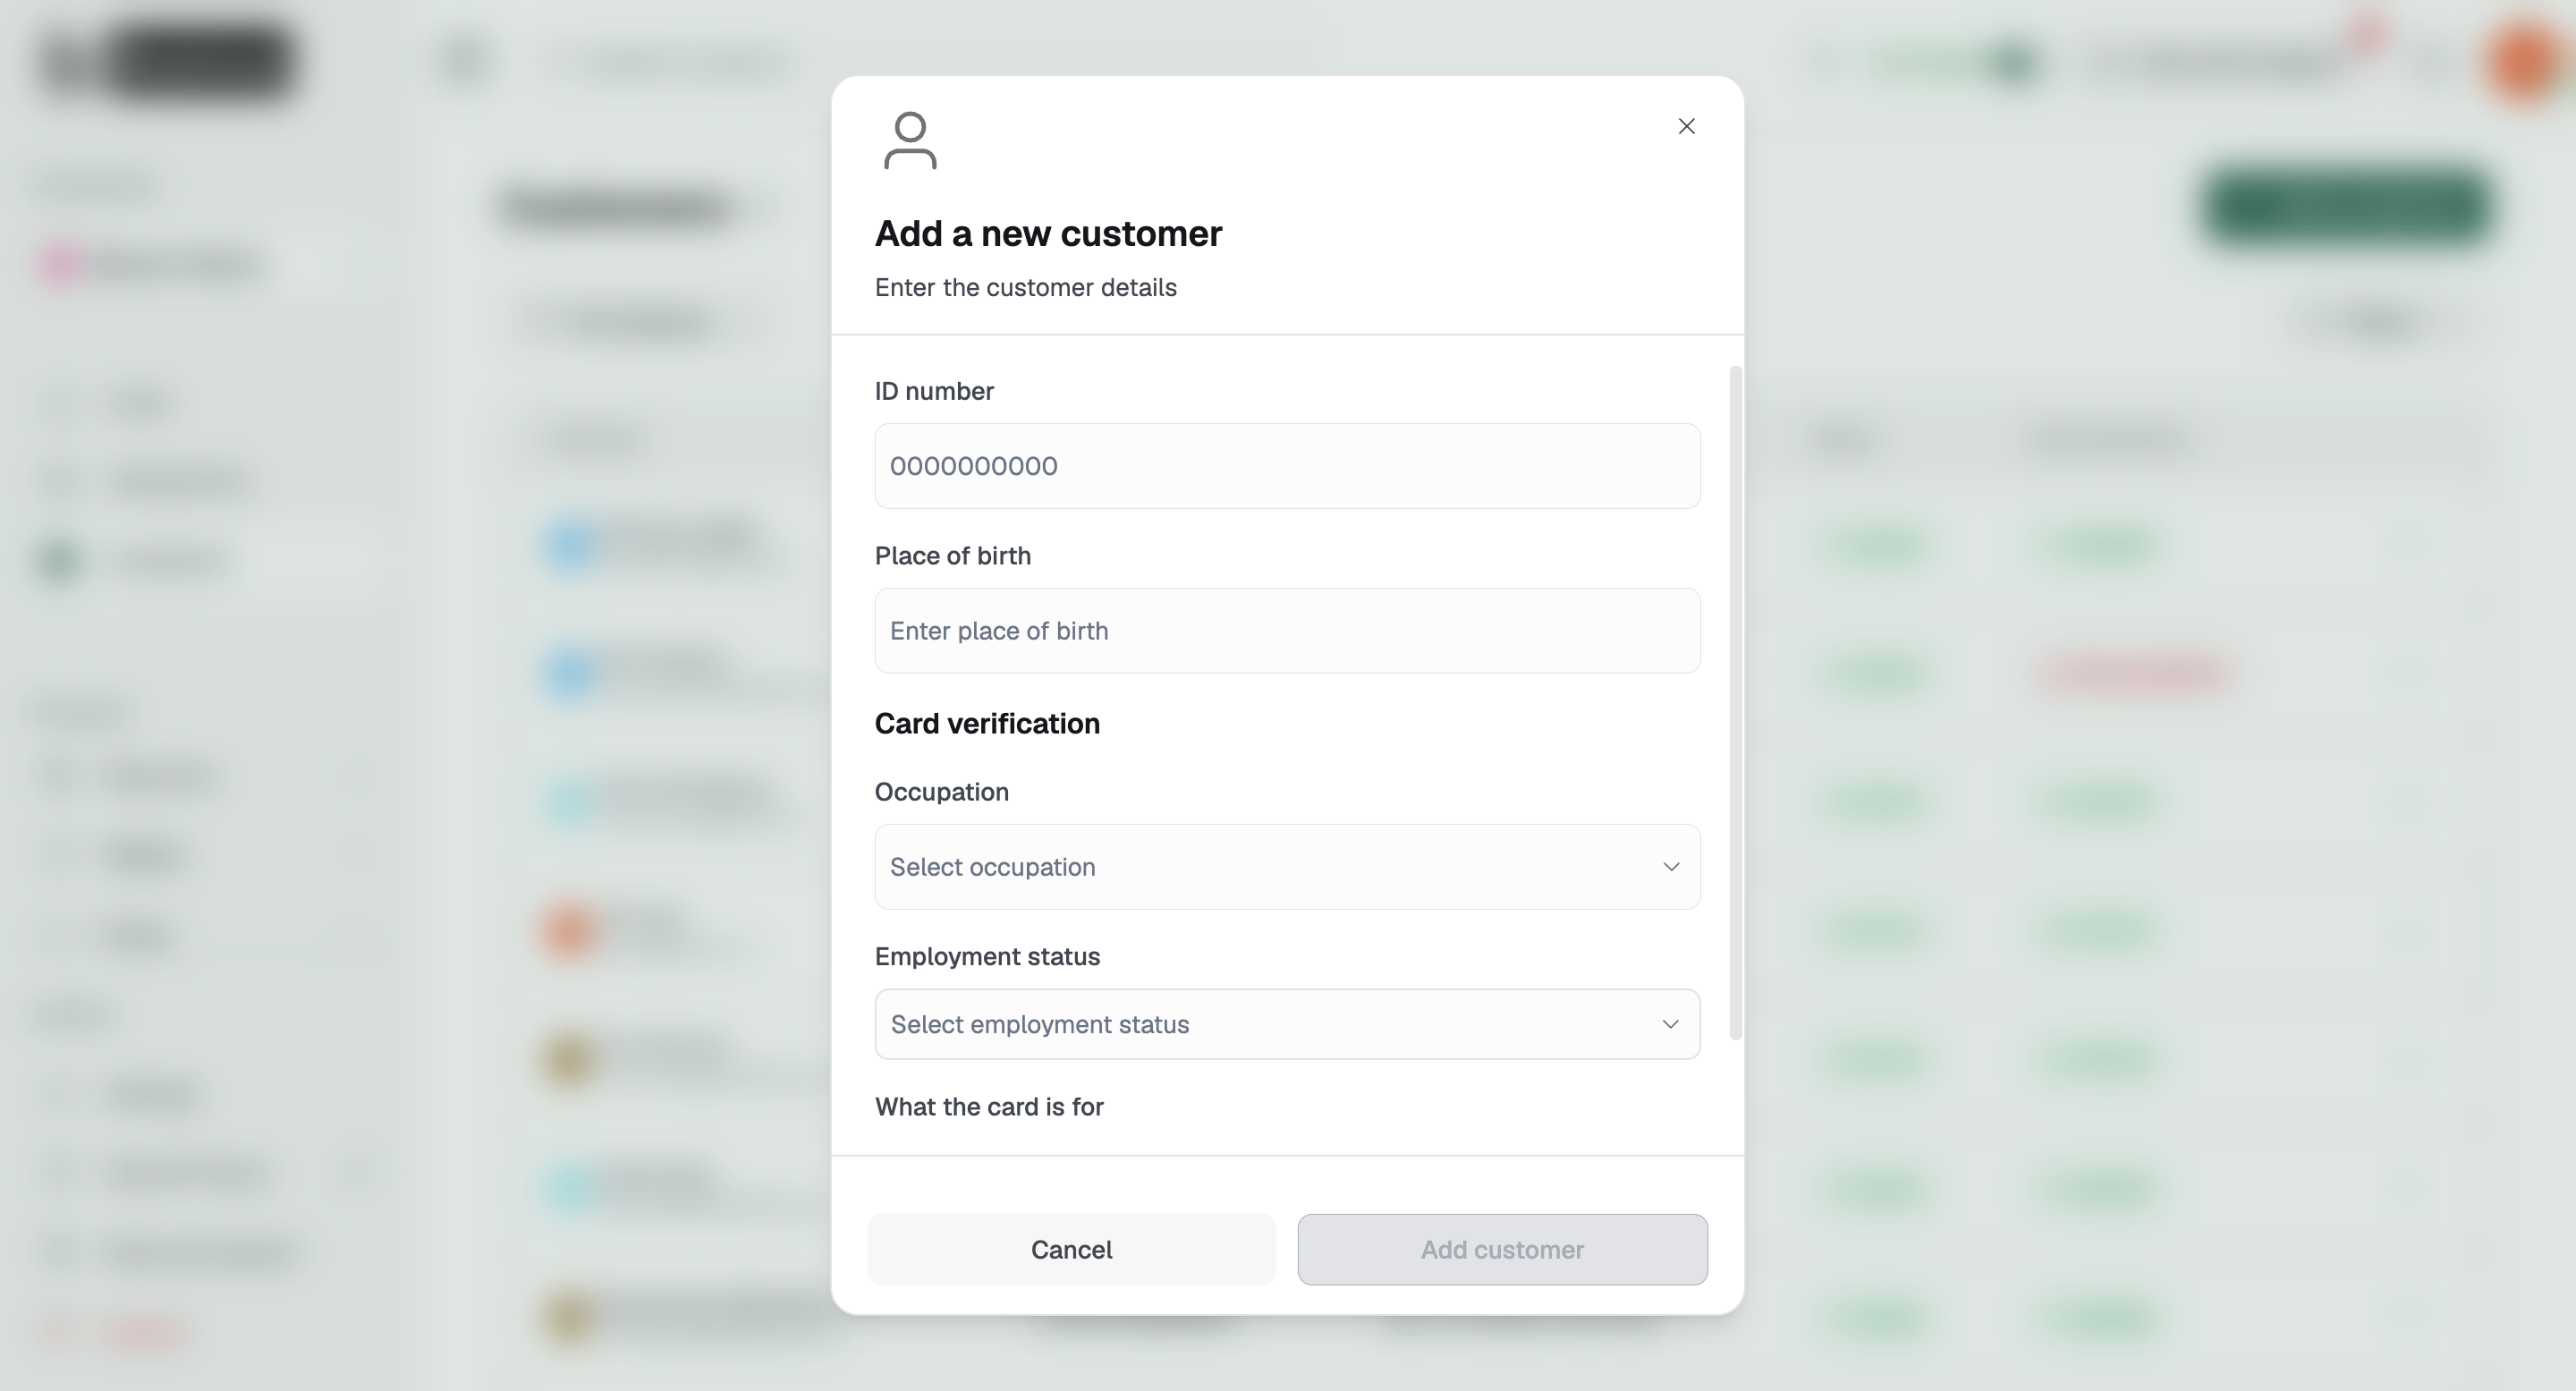
ID number: Enter the identification number shown on the document.
Place of birth: Provide the customer's place of birth.
Identity document: Upload a clear, full image of the front of the document. Ensure it is in focus, not cropped, and has not expired.
Note: For national ID cards issued in certain countries, both the front and back of the ID are required for KYC verification during virtual card creation. Please ensure both sides are uploaded together in a single submission. For the list of affected countries and further instructions, see our KYC Verification for Virtual Card Creation: National ID Requirements guide.
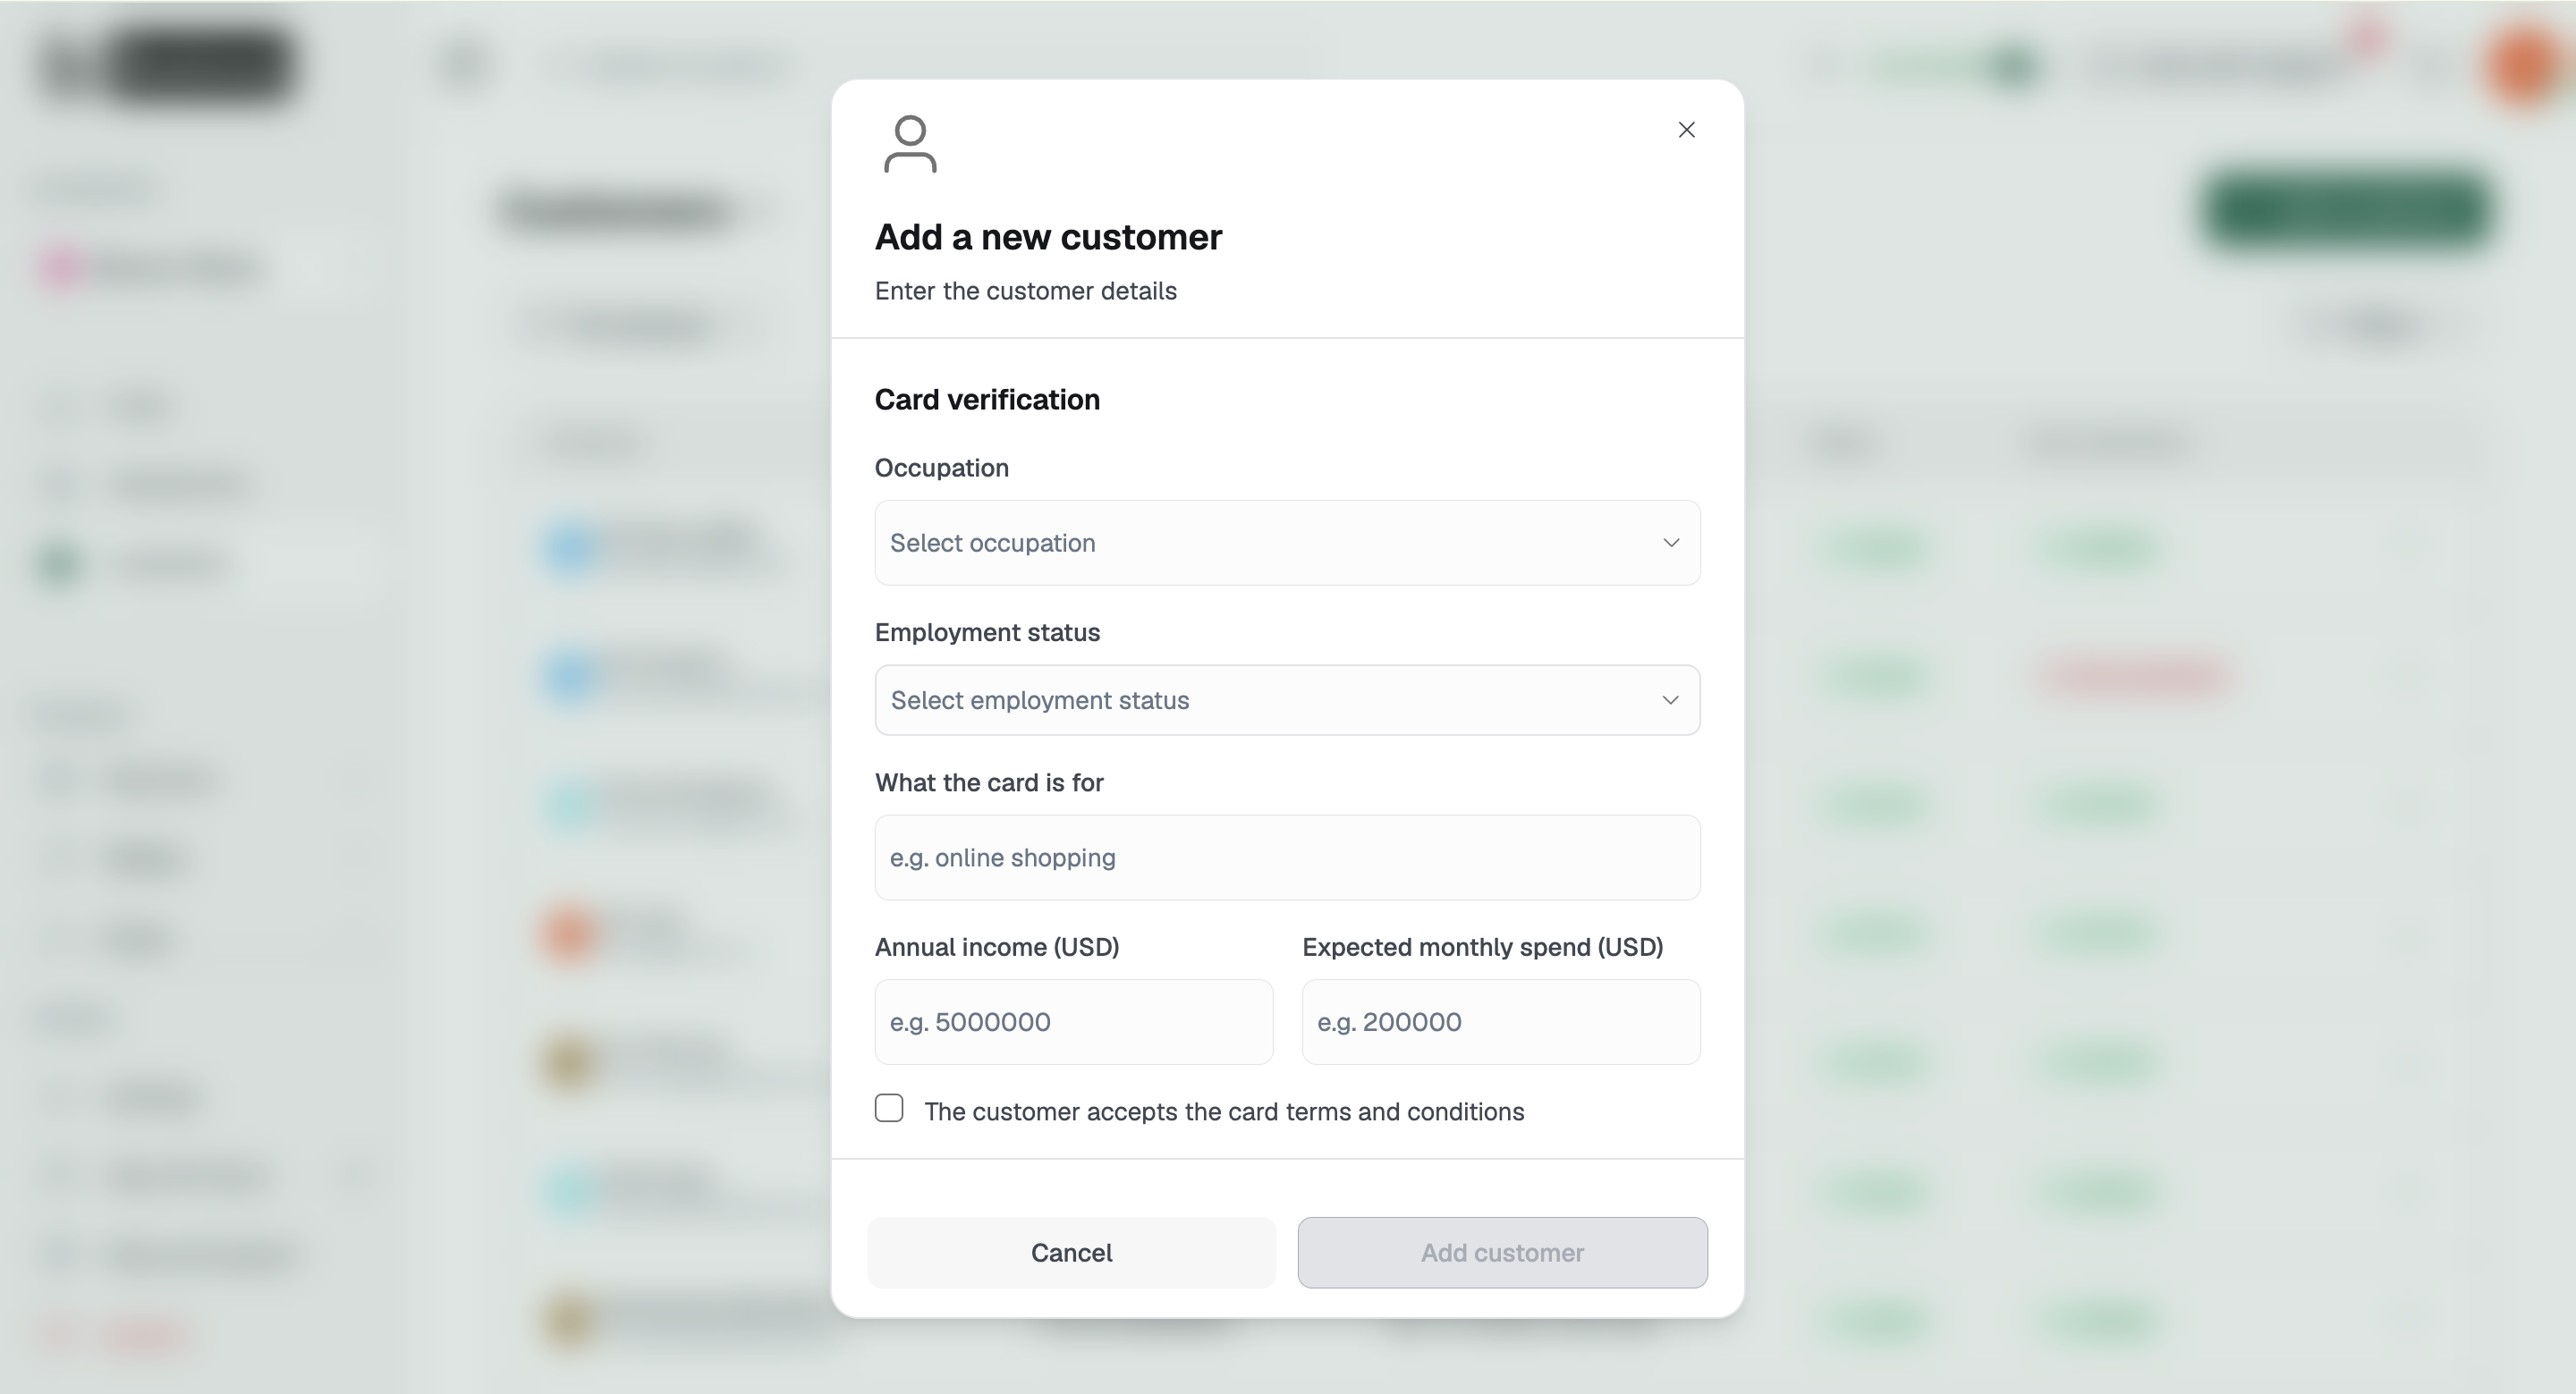
Card verification
Occupation
Employment status
What the card is for (for example, online shopping)
Annual income in USD
Expected monthly spend in USD
Tick The customer accepts the card terms and conditions
4. Watch the "Still needed" list
A running list at the bottom of the modal shows all outstanding fields. The Add customer button stays greyed out until that list is empty. If the button does not activate, scroll down to review the list
5. Submit and check the verification status
Click Add customer. The customer now appears on the Customers list with two separate columns:
Column | What it means |
|---|---|
Status | Whether the customer record is active on your account |
Card verification | Whether the issuer has cleared them to hold a card |
Card verification shows one of three values:
In progress: the issuer is still reviewing the submission. This usually clears within a few minutes.
Verified: the customer can be issued a card.
Not successful: verification failed. Contact support through Chat with Support before retrying, so you do not resubmit the same rejected details.
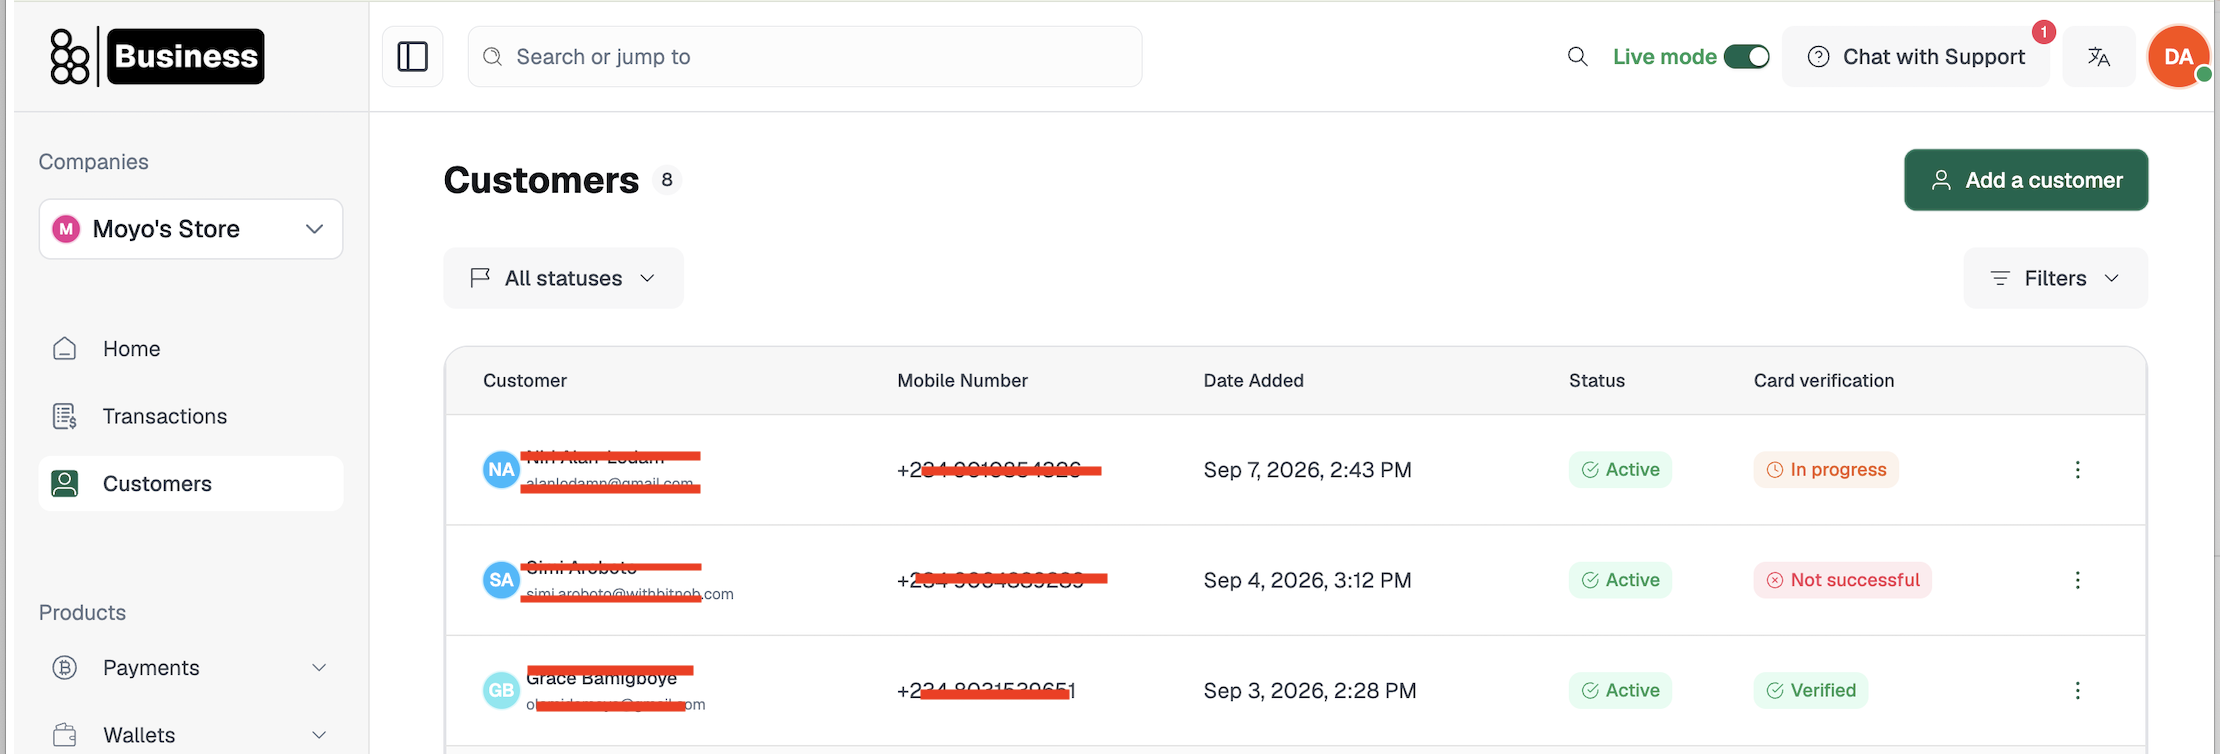
Refresh the Customers page to check for an update. Wait until the customer shows Verified before you create their card.
Part 2: Create the card
1. Open the card creation flow
Click Cards in the sidebar to expand it. You will see three options:
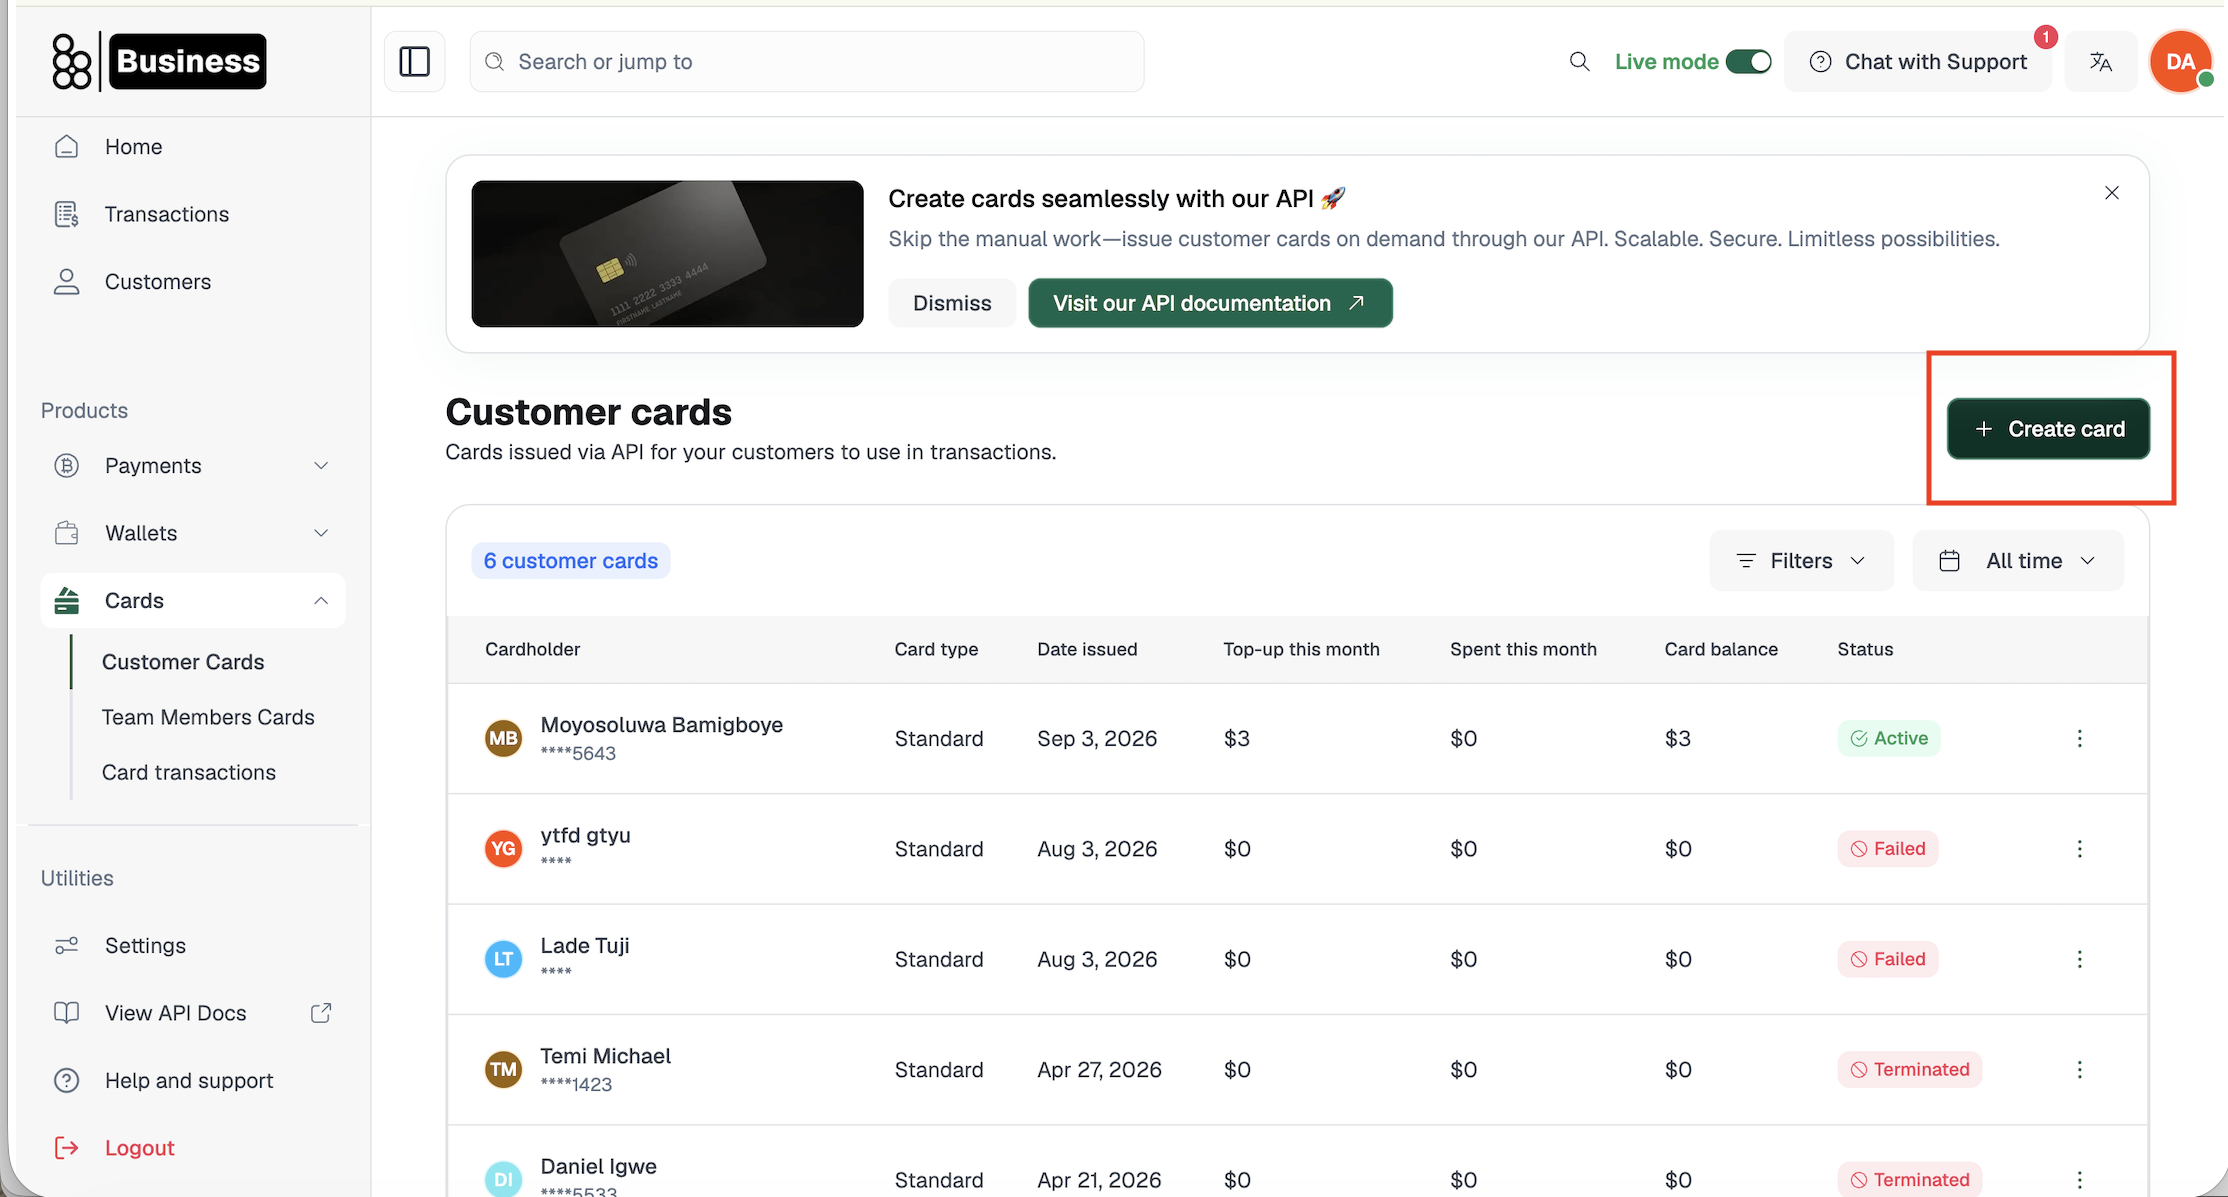
Customer Cards: cards issued to your business's customers. This is where you create customer cards.
Team Members Cards: cards issued to your internal team for business spending. Use this view to see who holds each card, its status and how it is being used.
Card transactions: transaction history across all cards.
Click Customer Cards, then click Create card.
2. Choose the card type
Standard: reloadable. Use it for ongoing subscriptions or repeat purchases.
Single-use: funded once. Use it for trials or one-off payments.
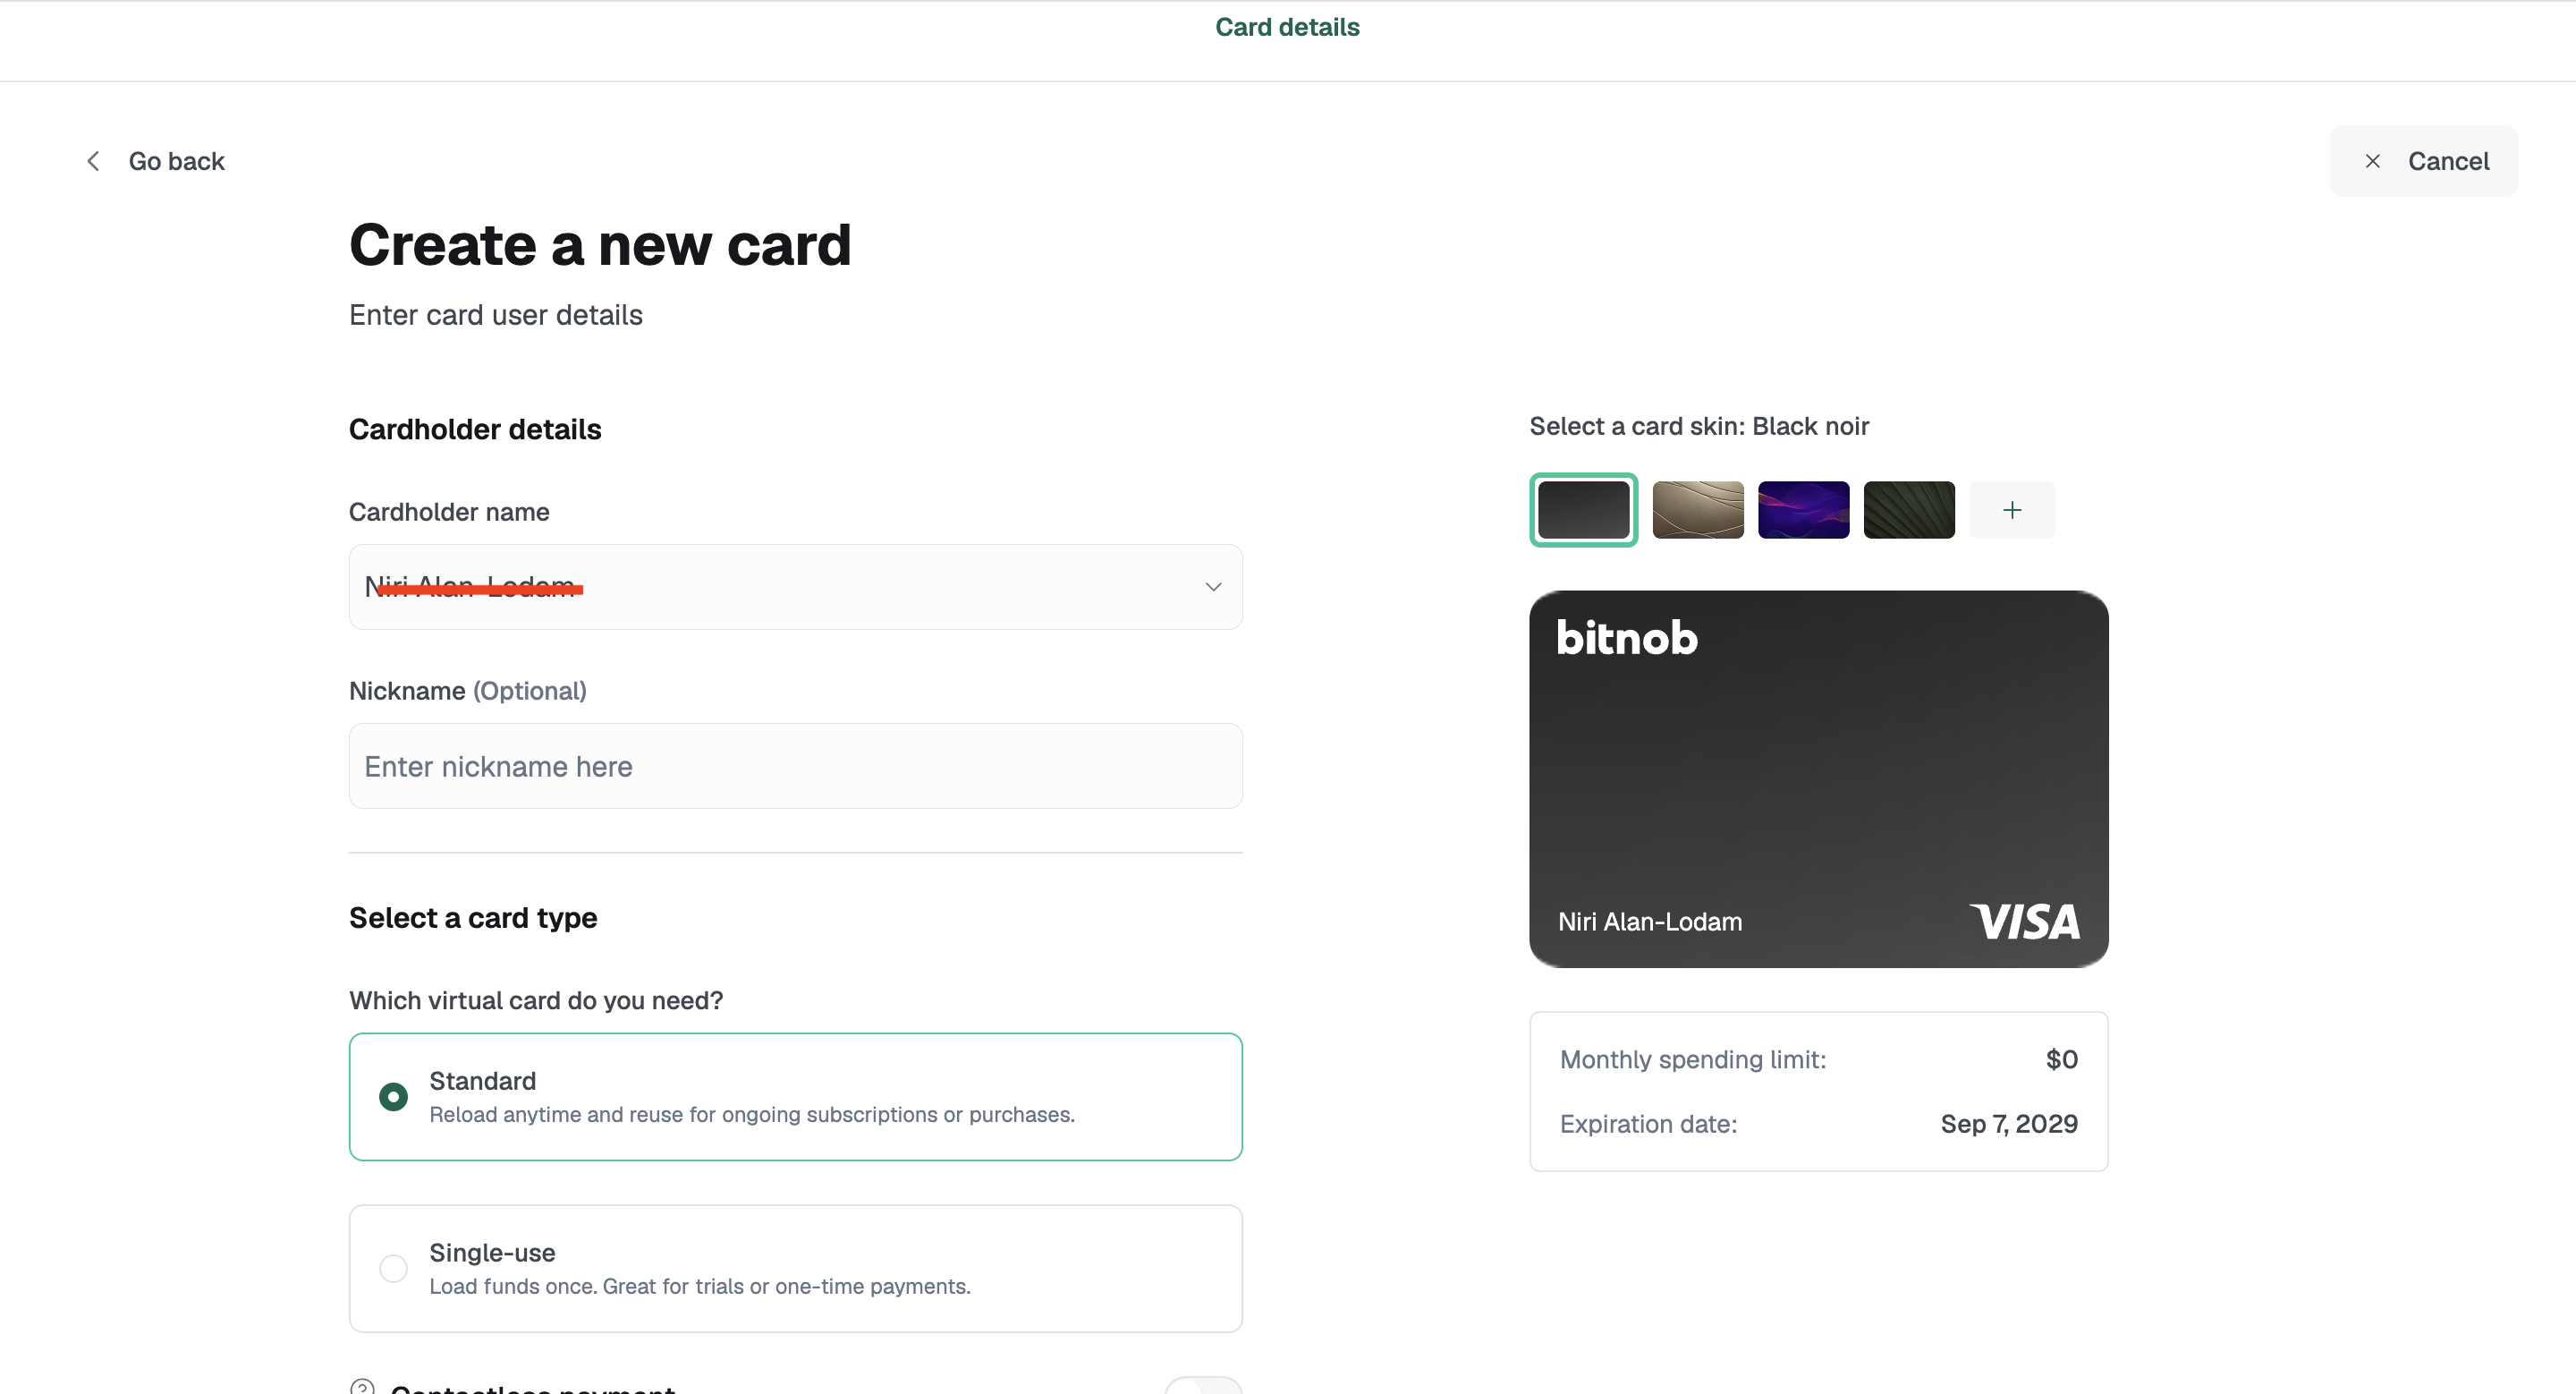
Creating a Standard card
Cardholder name: select the customer from the dropdown. The customer must already be added to your account and their card verification must show Verified. The Customers page lists every customer regardless of verification status, so confirm the status there before you select them.
Nickname (optional): a label to help you identify the card later.
Card skin: pick one of the available designs, or click + to add your own.
Contactless payment (optional): toggle on to enable tap to pay through Apple Pay and Google Pay. Standard cards only.
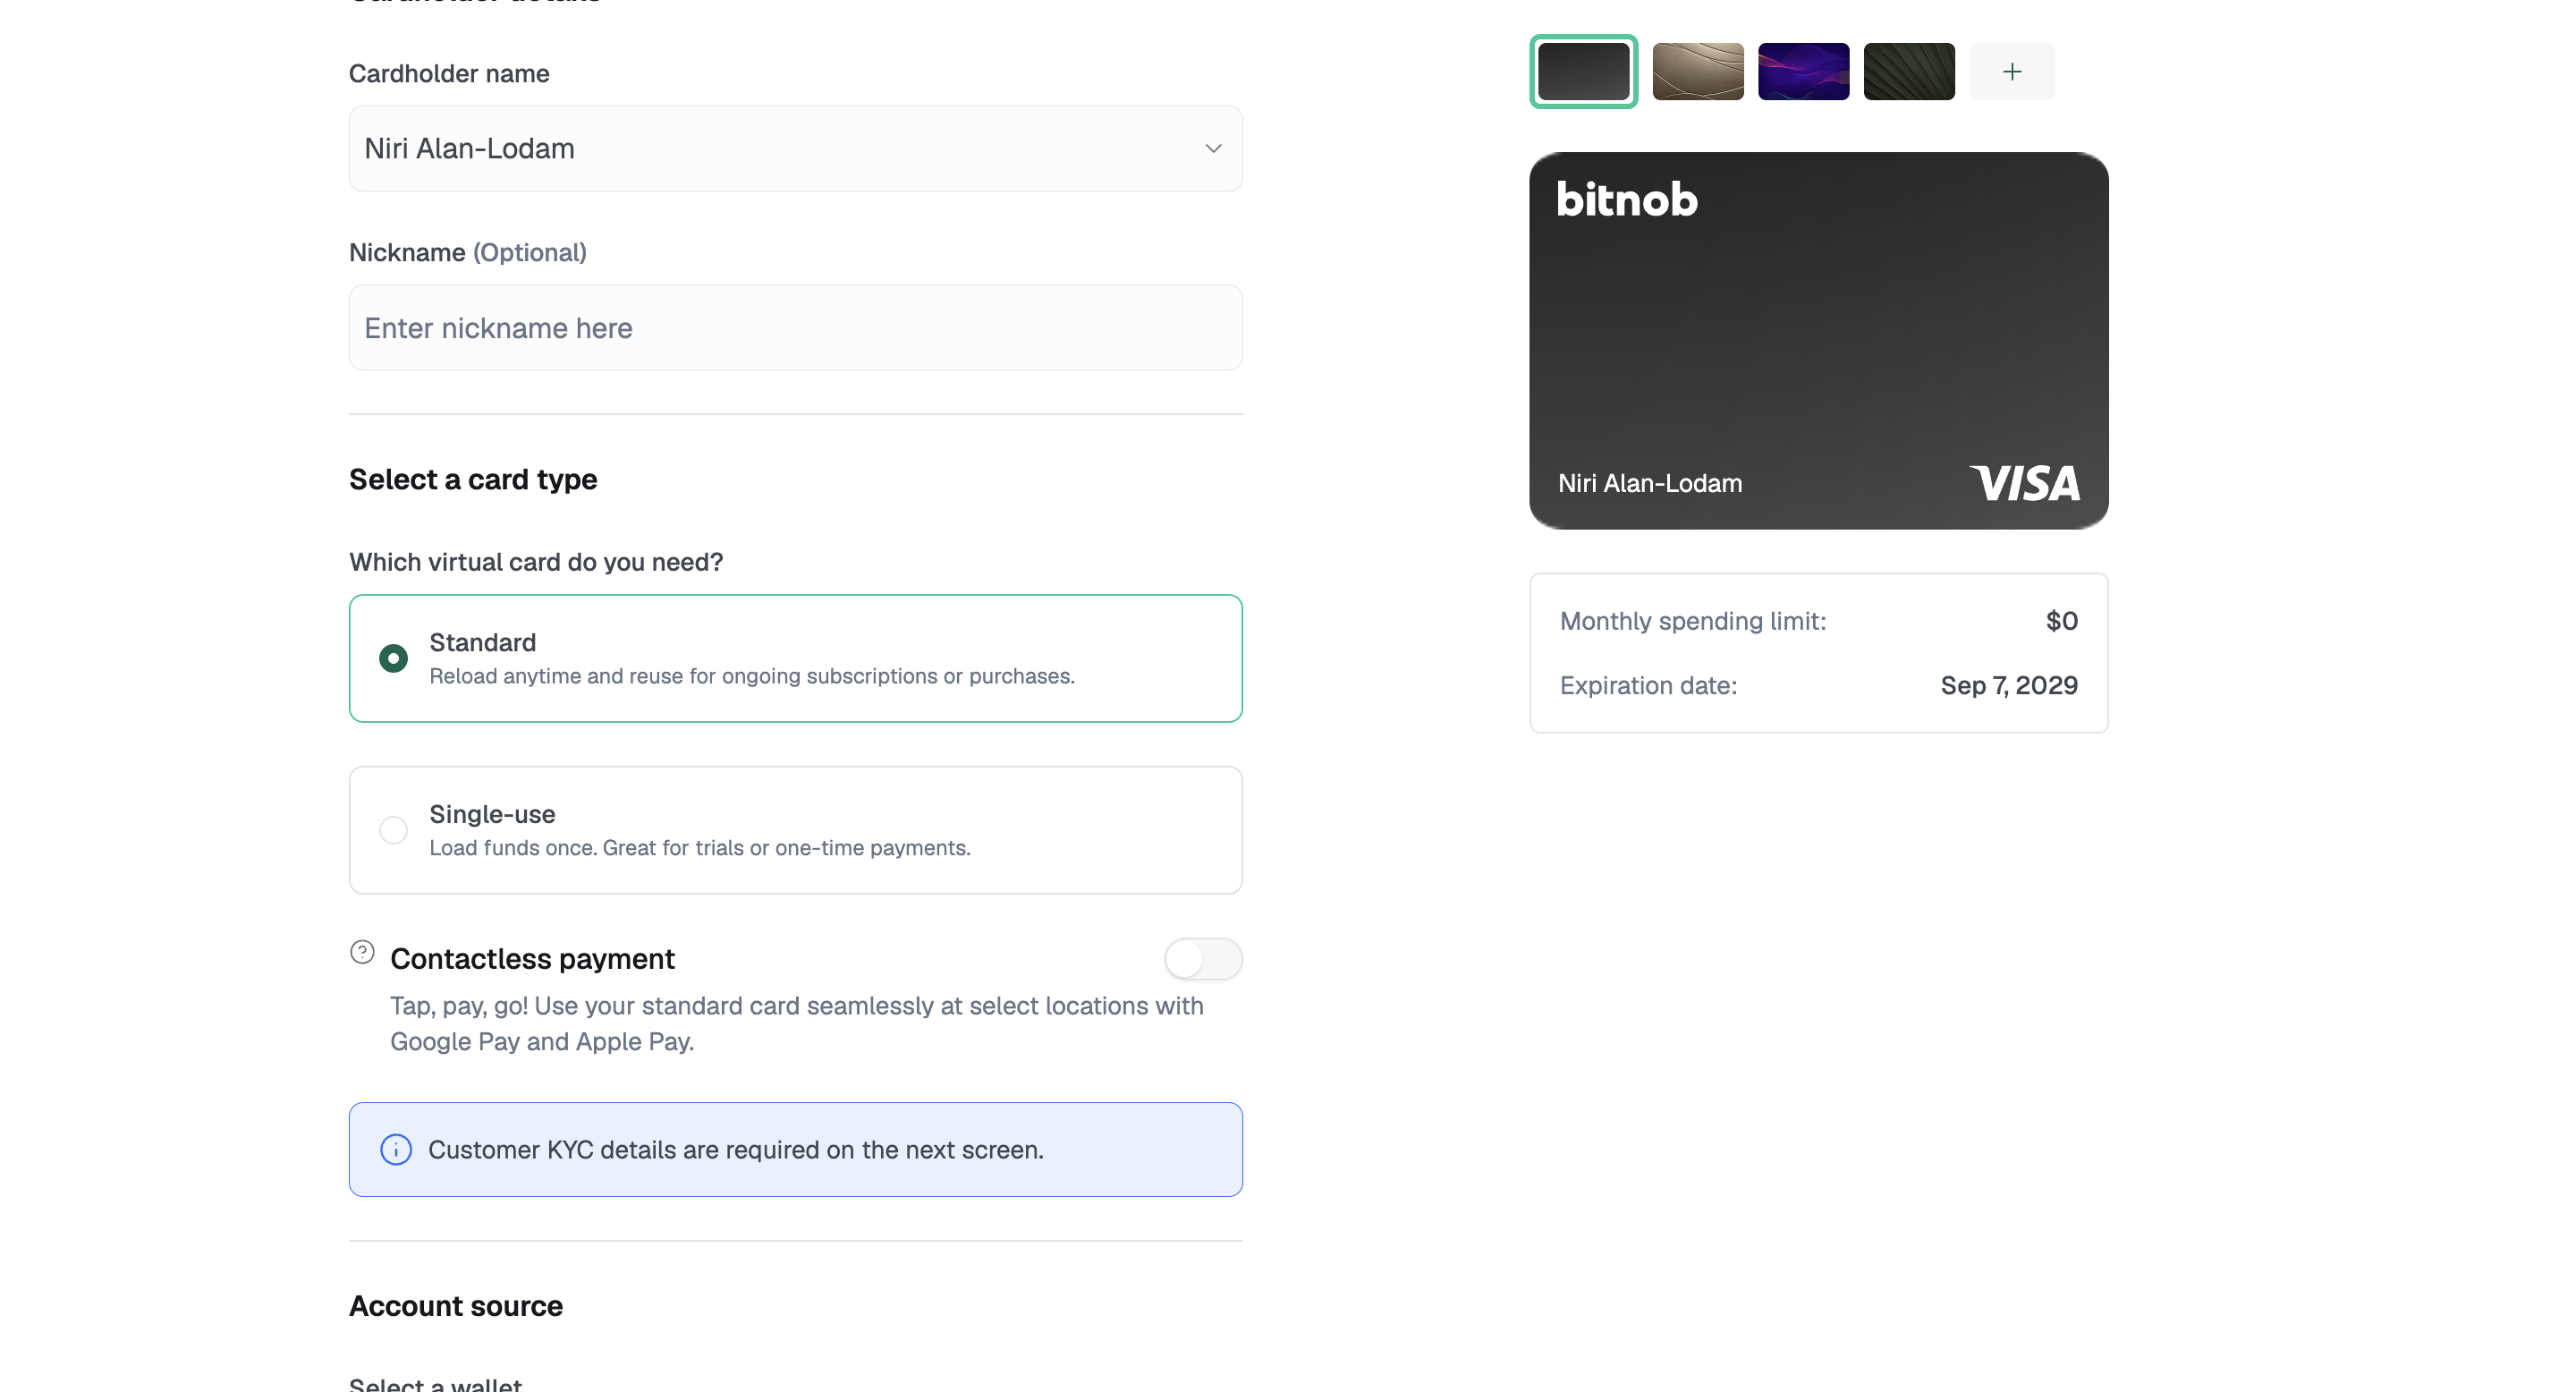
Select a wallet under Account source. The wallet balance is shown so you can confirm it covers the funding amount plus fees.
Funding amount: minimum 3.00 USD, maximum 2,500.00 USD. Quick amount buttons are available, along with Max amount.
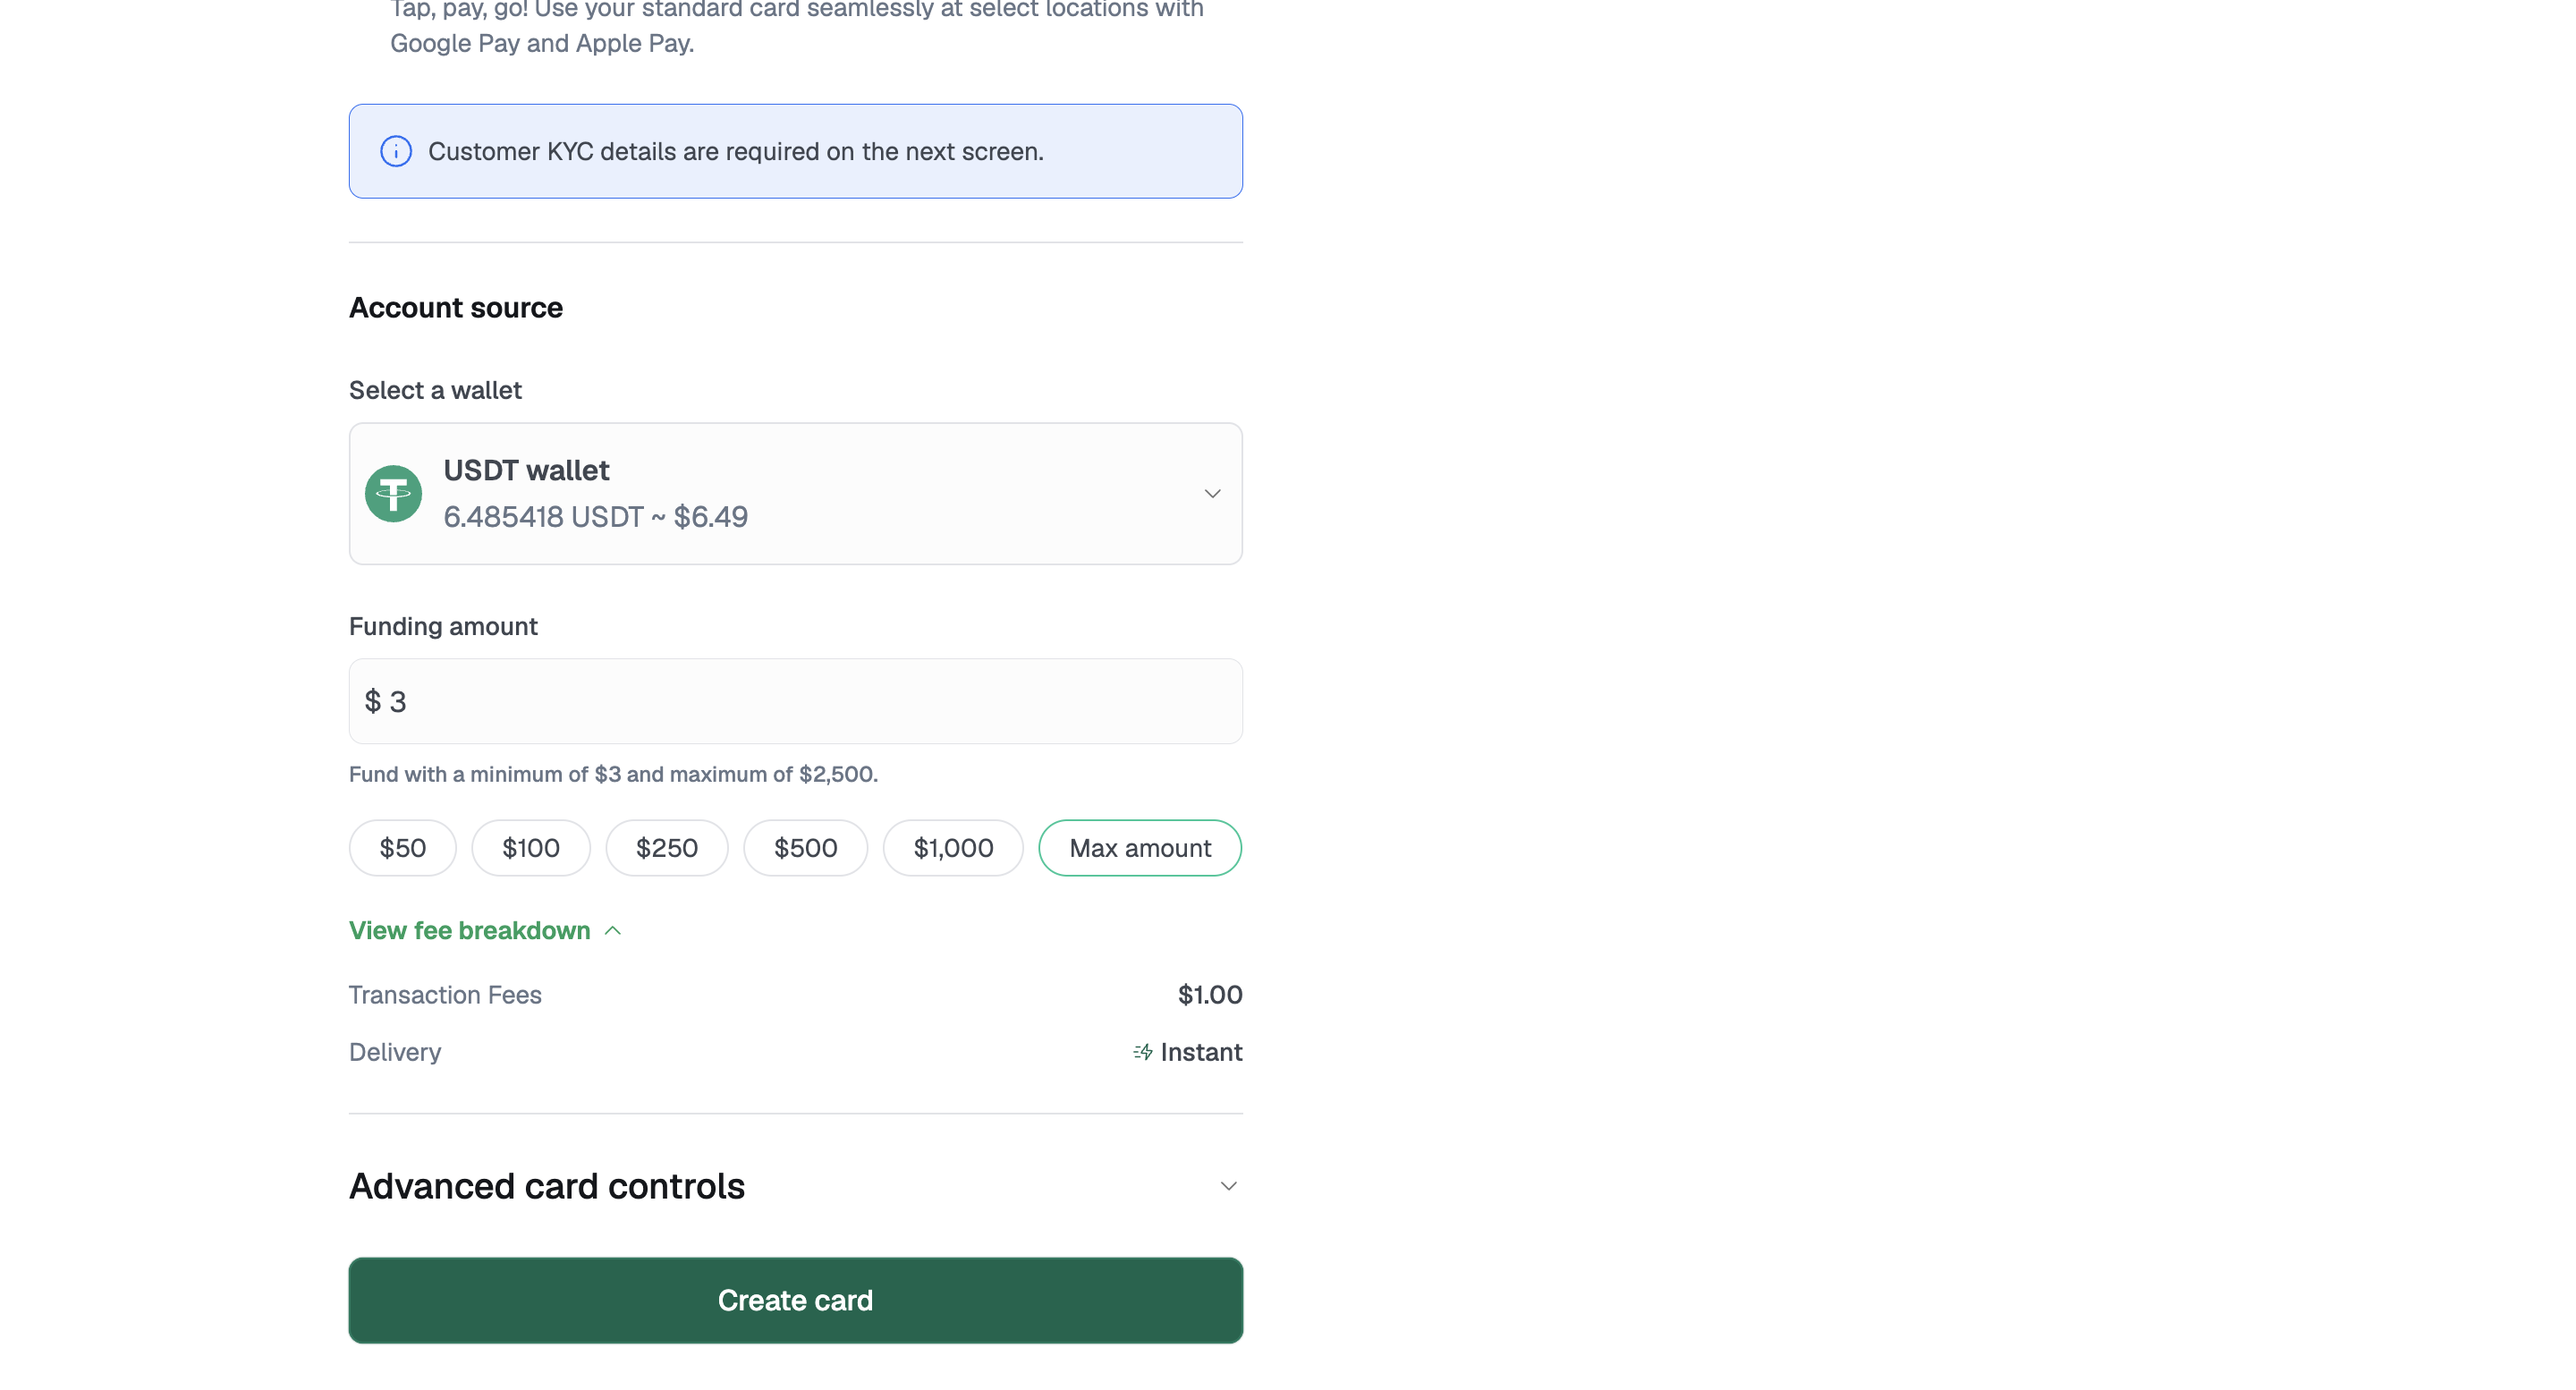
Click View fee breakdown to see the fees and delivery speed before you commit.
Advanced card controls (optional): expand this to set a spending limit or a custom expiration date.
Click Create card.
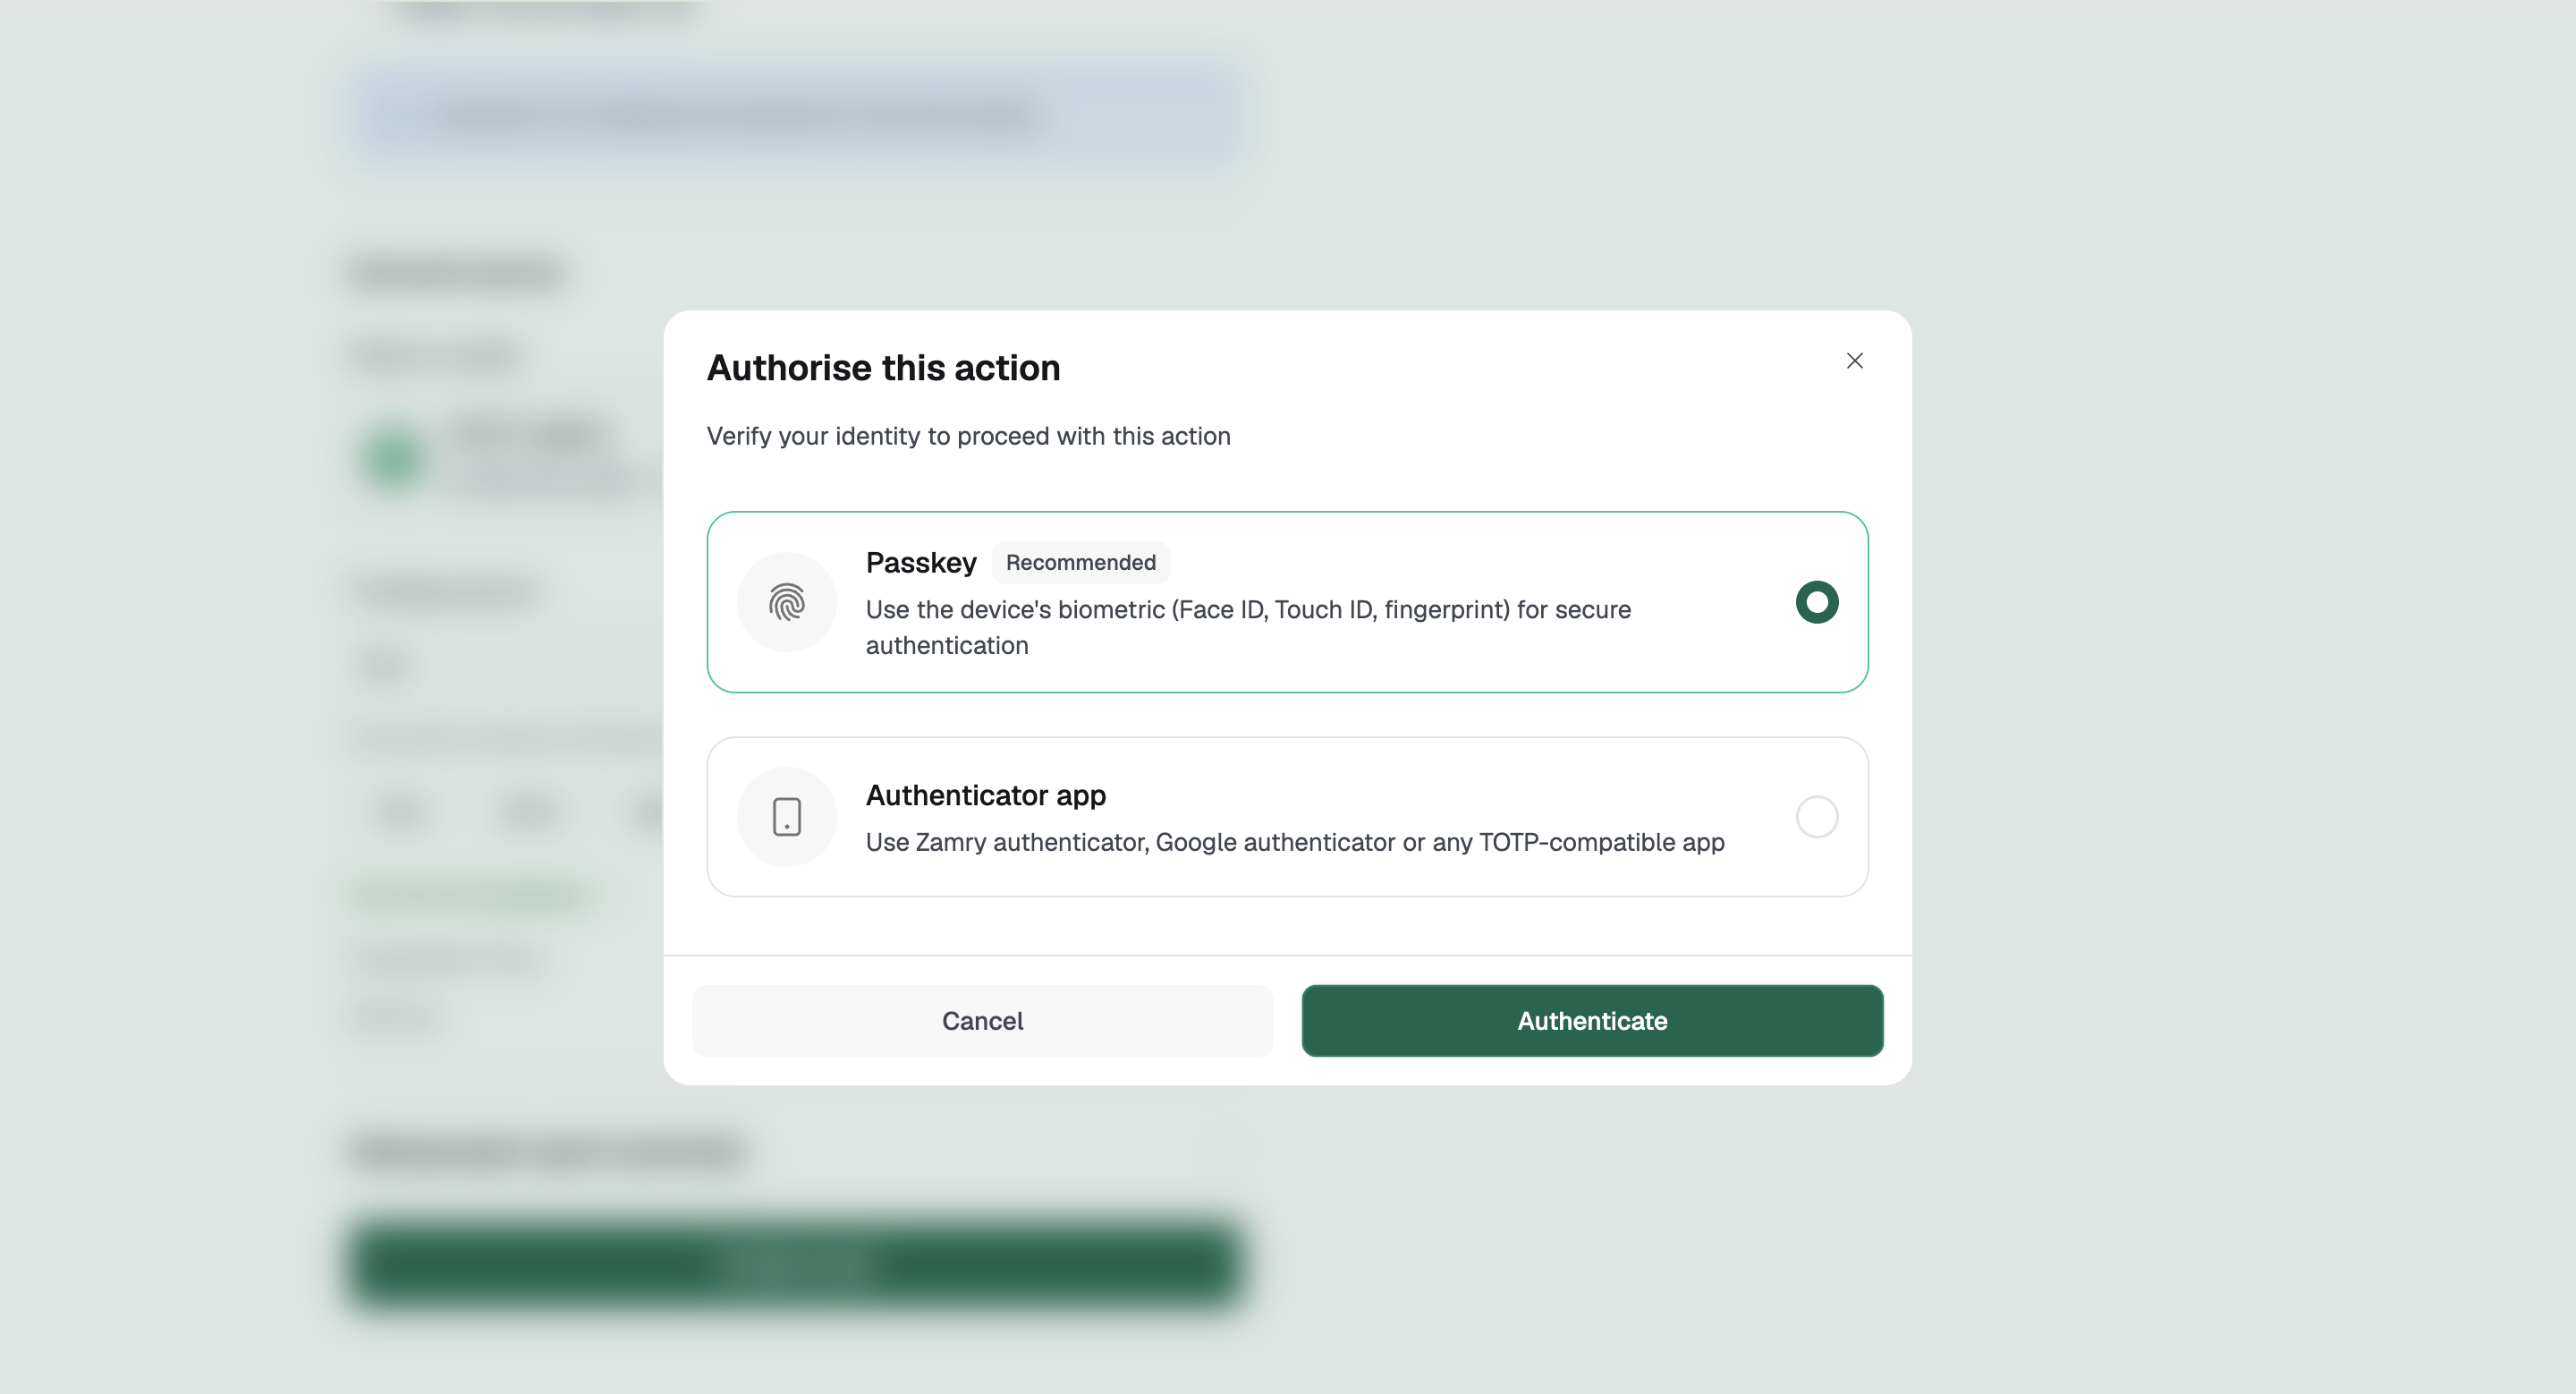
Authorise the action
You will be asked to verify your identity before the card is created. Choose one:
Passkey (recommended): uses your device biometrics, such as Face ID, Touch ID or a fingerprint.
Authenticator app: use Google Authenticator or any TOTP compatible app.
Click Authenticate to confirm.
After creation
You will see a Card creation in progress screen. The card will be ready shortly. From there you can:
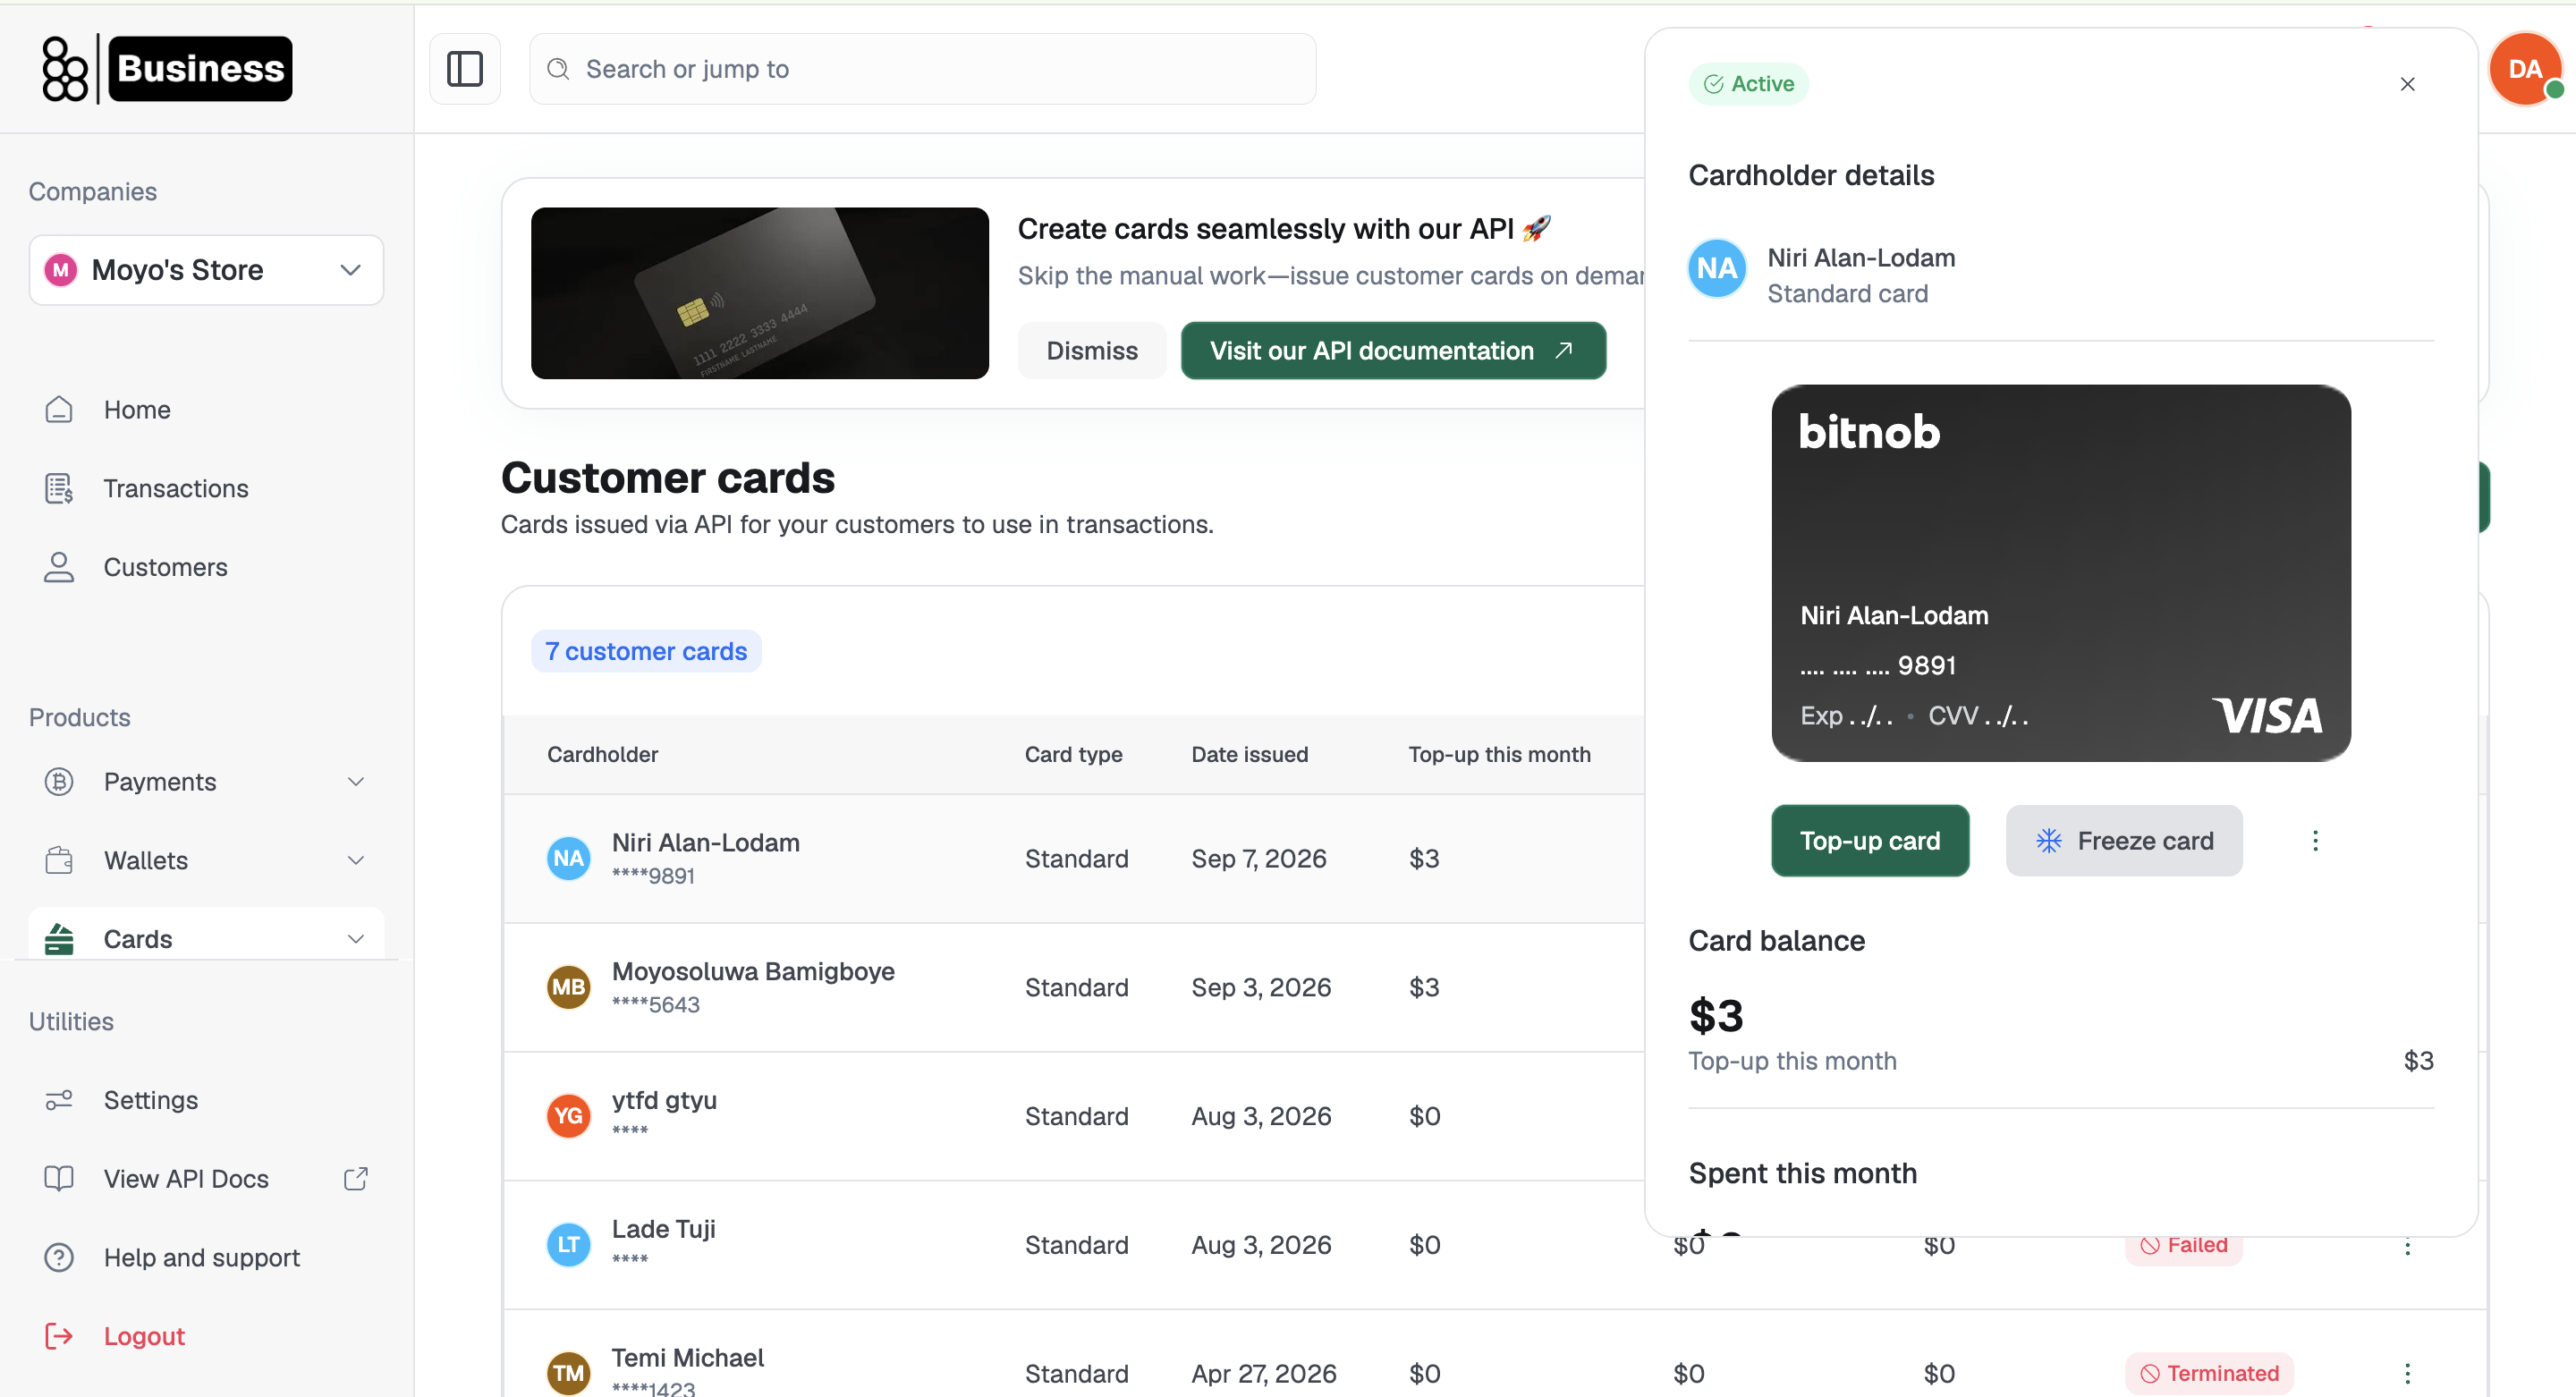
View card details, which opens a panel showing the card status, cardholder, masked card number, balance, top-up this month and spend this month. From that panel you can Top-up card or Freeze card.
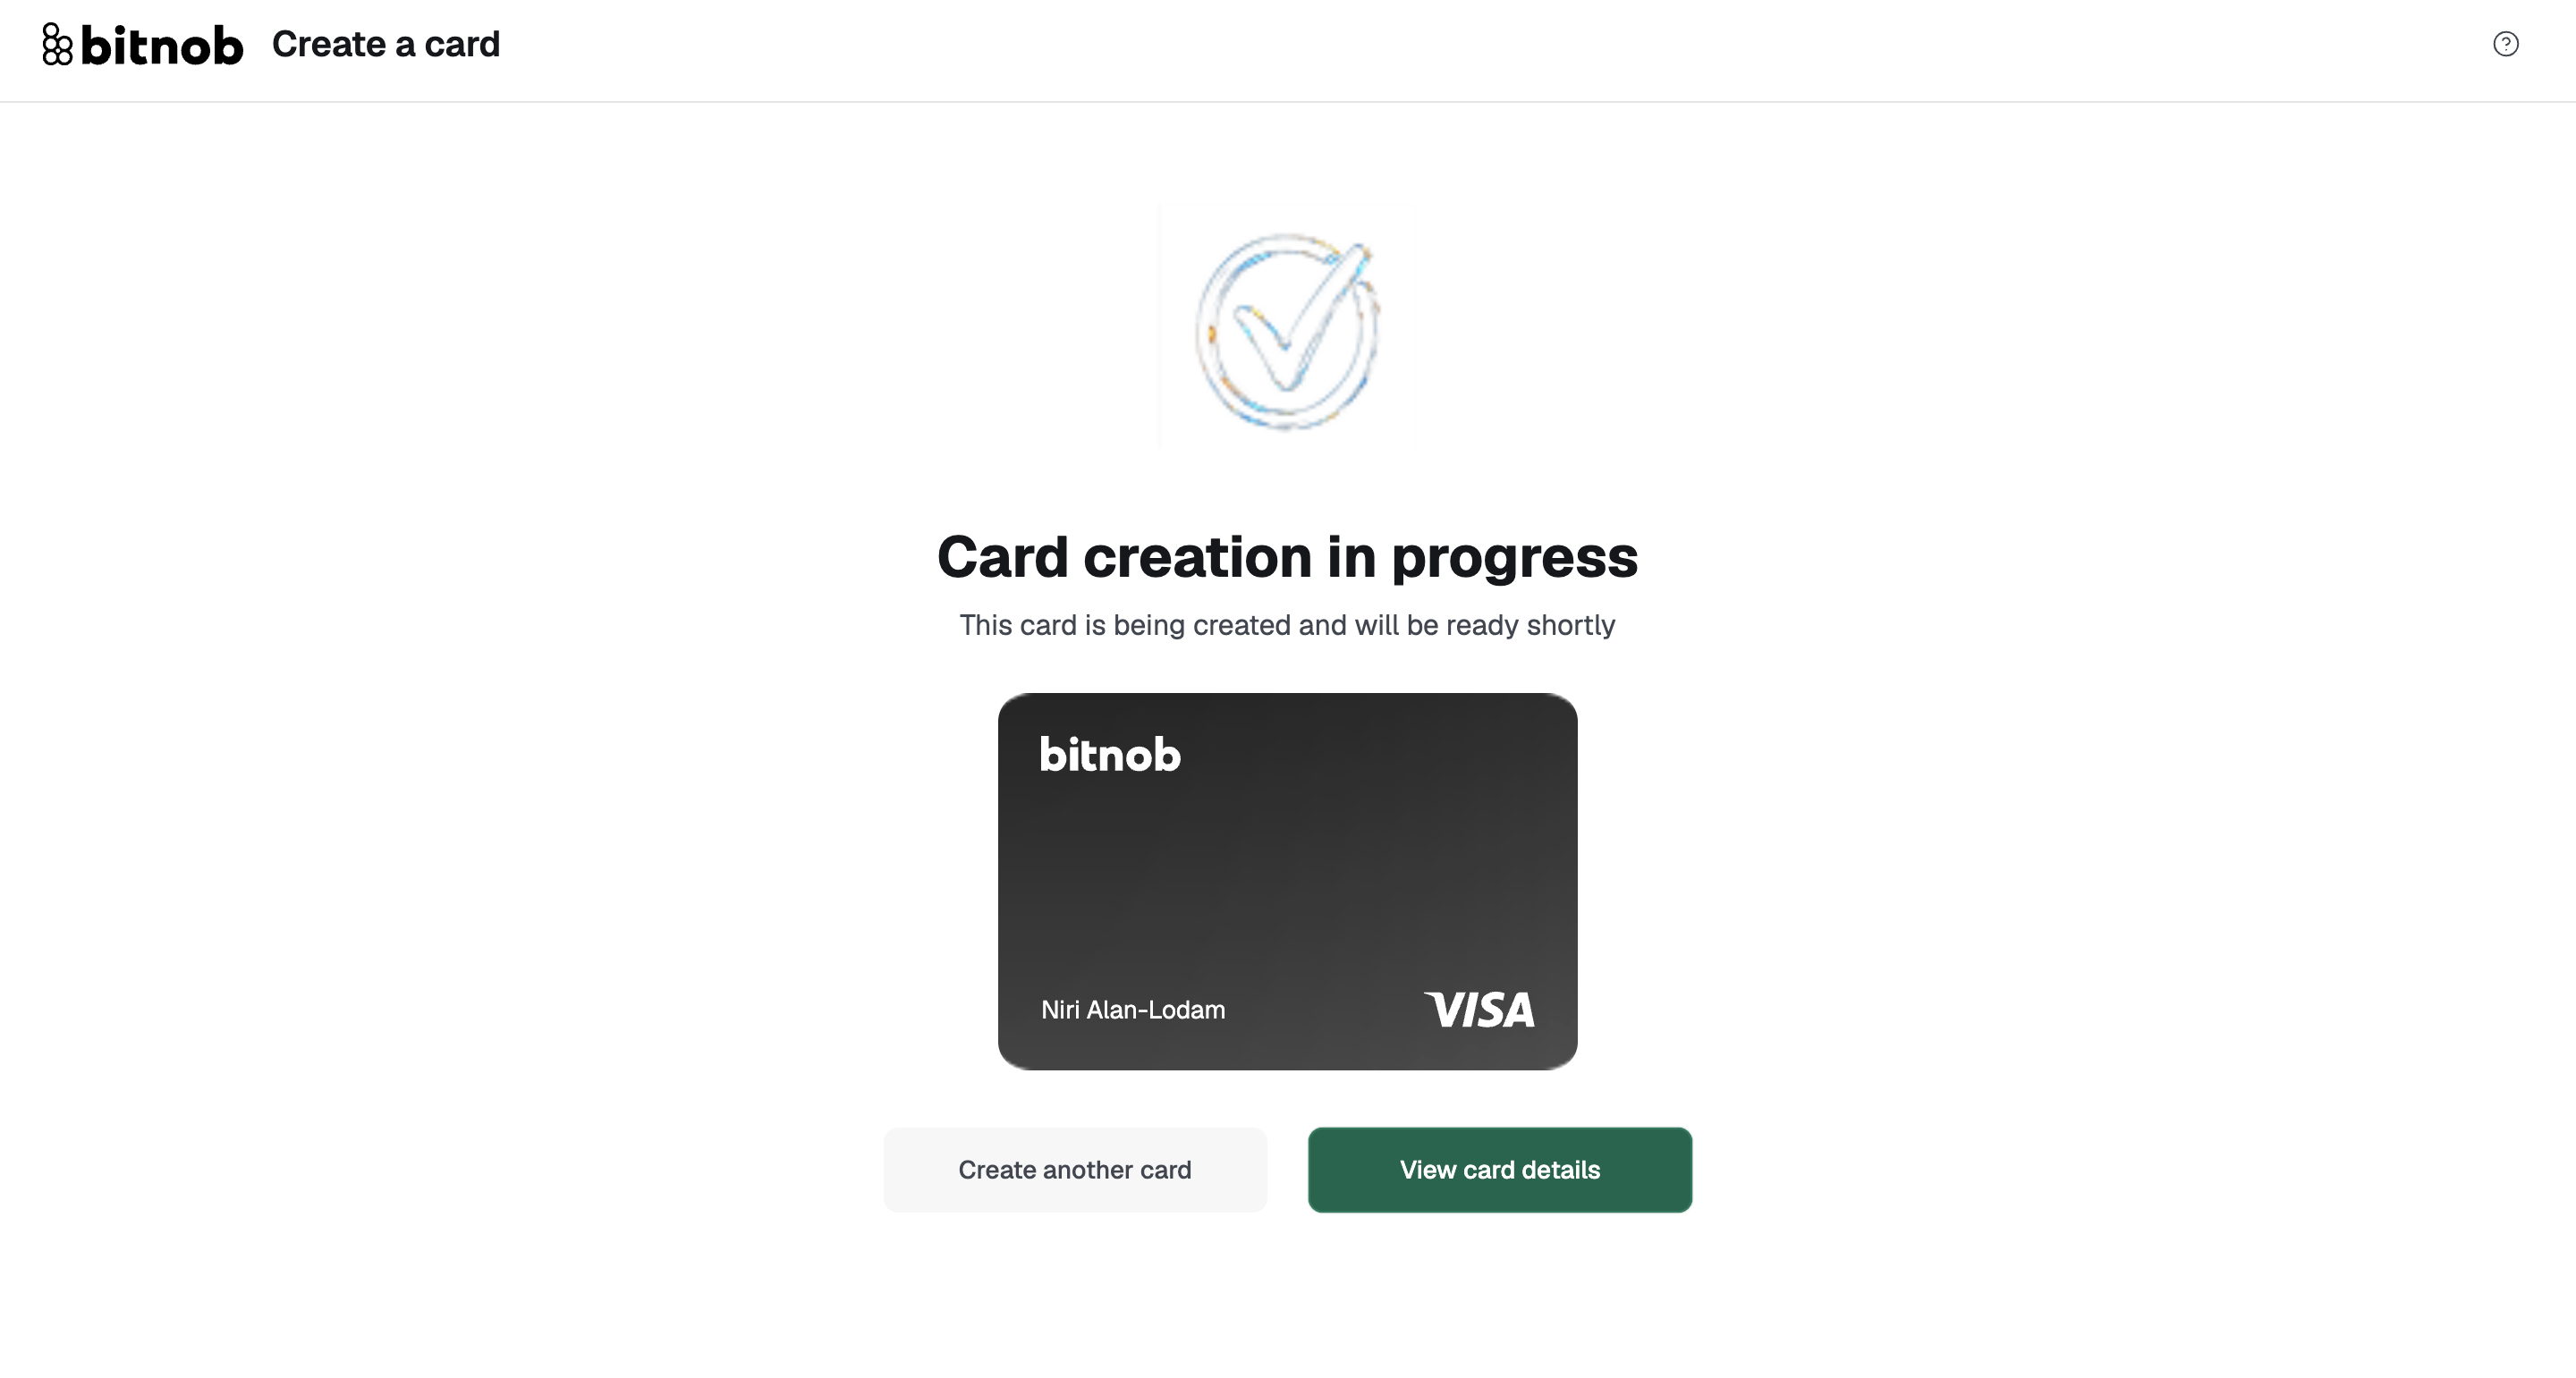
Create another card.
Creating a Single-use card
Select Single-use as the card type.
Select a wallet.
Enter the funding amount: minimum 3.00 USD, maximum 2,500.00 USD.
Click Continue and complete the customer details.
Authorise the action with your passkey or authenticator app.
You will see the Card creation in progress screen. View the card details or create another card once it is ready.
Card fees and limits
Item | Amount |
|---|---|
Card creation fee | 1.00 USD per card |
Minimum top-up | 3.00 USD |
Top-up fee up to 100 USD | 1.00 USD flat |
Top-up fee above 100 USD | 1% of the top-up amount |
Maximum top-up per transaction | 2,500 USD |
Maximum card balance | 50,000 USD |
Per-transaction spending limit | 10,000 USD |
Troubleshooting
The Add customer button is greyed out. Scroll to the bottom of the modal and read the "Still needed" list. Every field named there must be completed, including the ones under the "Optional" heading.
Card verification shows Not successful. Contact support through Chat with Support before resubmitting. Retrying with the same details will usually fail again.
The customer does not appear in the cardholder dropdown. Confirm the customer was added under the correct company. The company selector sits at the top of the sidebar.